Are you facing issues installing and Configuring fail2ban on Ubuntu? This article will guide you through on how to do it.
Fail2ban is very important in keeping any website safe from attackers trying to login without permission of the Website owner. With Fail2bank feature in place, brute force attacks or failed authentication attempts from the attacker's IP address is blocked after a number of Login attempts.
Here at Ibmi Media, we help our customers to Install Server Software and fail2ban as part of our Server Support Services.
In this context, we shall look into how to install and configure fail2ban on Ubuntu.
The importance of Fail2ban on a server?
When a brute force attack occurs, you will see a warning message as shown below as soon as you access your server via an SSH tool;
Last failed login: Mon Sep 10 12:37:02 MST 2020 from X.X.X.X on ssh:nottyThere were 1020 failed login attempts since the last successful login.Last login: Mon sep 10 11:35:57 2020 from X.X.X.X
What this implies is that an attacker launched a brute force attack of the server. You can see from the warning message that there was 1020 attempts using guessed passwords randomly and repeatedly possibly till the correct password get them into your server. This could be really scary to know!
This is the reason why a very strong password which is difficult to guess is always recommended.
For this security concern, Fail2ban is a great solution which helps to block server attacks by restricting the attacker's IP address. By this means, a new rule is implemented in the iptables to block the attacker's IP address.
How to get Fail2ban installed and configured on Ubuntu?
To install Fail2ban, you need to log into the Server as the root user as it requires the necessary privileges to be installed successfully. Follow the steps below;
i. To begin, Update the software packages of the Server before installing fail2ban with the following commands;
apt-get updateapt-get install fail2ban -y
ii. After the installation is completed, start fail2ban service with the command below;
service fail2ban restart
iii. Ensure that the service is running with the command;
service fail2ban statusHow to configure Fail2ban on Ubuntu?
Configuring Fail2ban is important as it helps to define custom rules which does not exist by default. To do this follow the steps below;
1. Start by creating a configuration file for fail2ban with the following command;
touch /etc/fail2ban/jail.local
and edit the file with the command;
vi /etc/fail2ban/jail.local
ii. In the jail.local file, add the following parameters as shown below;
[DEFAULT]ignoreip = 127.0.0.1/8 ::1bantime = 3600findtime = 600maxretry = 5[sshd]enabled = true
Here, the IPv4 and IPv6 addresses are 127.0.0.1 and ::1 respectively as seen above. To implement the banning of attacker's IP address, a bantime is set to activate automatically per IP address which fails to login after 5 times (maxretry = 5). The IP address will be banned for about one hour (bantime = 3600) if tried within 10 minutes (findtime = 600). Also note that the jail for sshd is enabled. To permanently ban the IP address, set the ban time to -1.
iii. Finally, the fail2ban service must be restarted to effect change. Use the command below to do this;
service fail2ban restartFixing common errors encountered while installing Fail2ban on Ubuntu
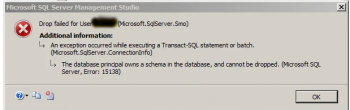
In the process of installing Fail2Ban, you might experience some curl errors which will prevent you from installing successfully. There might be errors or typo in the configuration file.
To fix this sort of errors, have a look at the configuration file again for any typo or errors and then continue with the installation.
Need support in Installing PHP on any Linux Server? We are available.
Conclusion
Improving Server security by installing Fail2ban on your server to help protect all kinds of services such as sshd, httpd from brute force attacks.
Improving Server security by installing Fail2ban on your server to help protect all kinds of services such as sshd, httpd from brute force attacks.