Due to security threats, Linux developers have adopted a more secure means of files transfer to a server and between different servers known as the file transfer protocol/ssh file transfer protocol (SFTP).
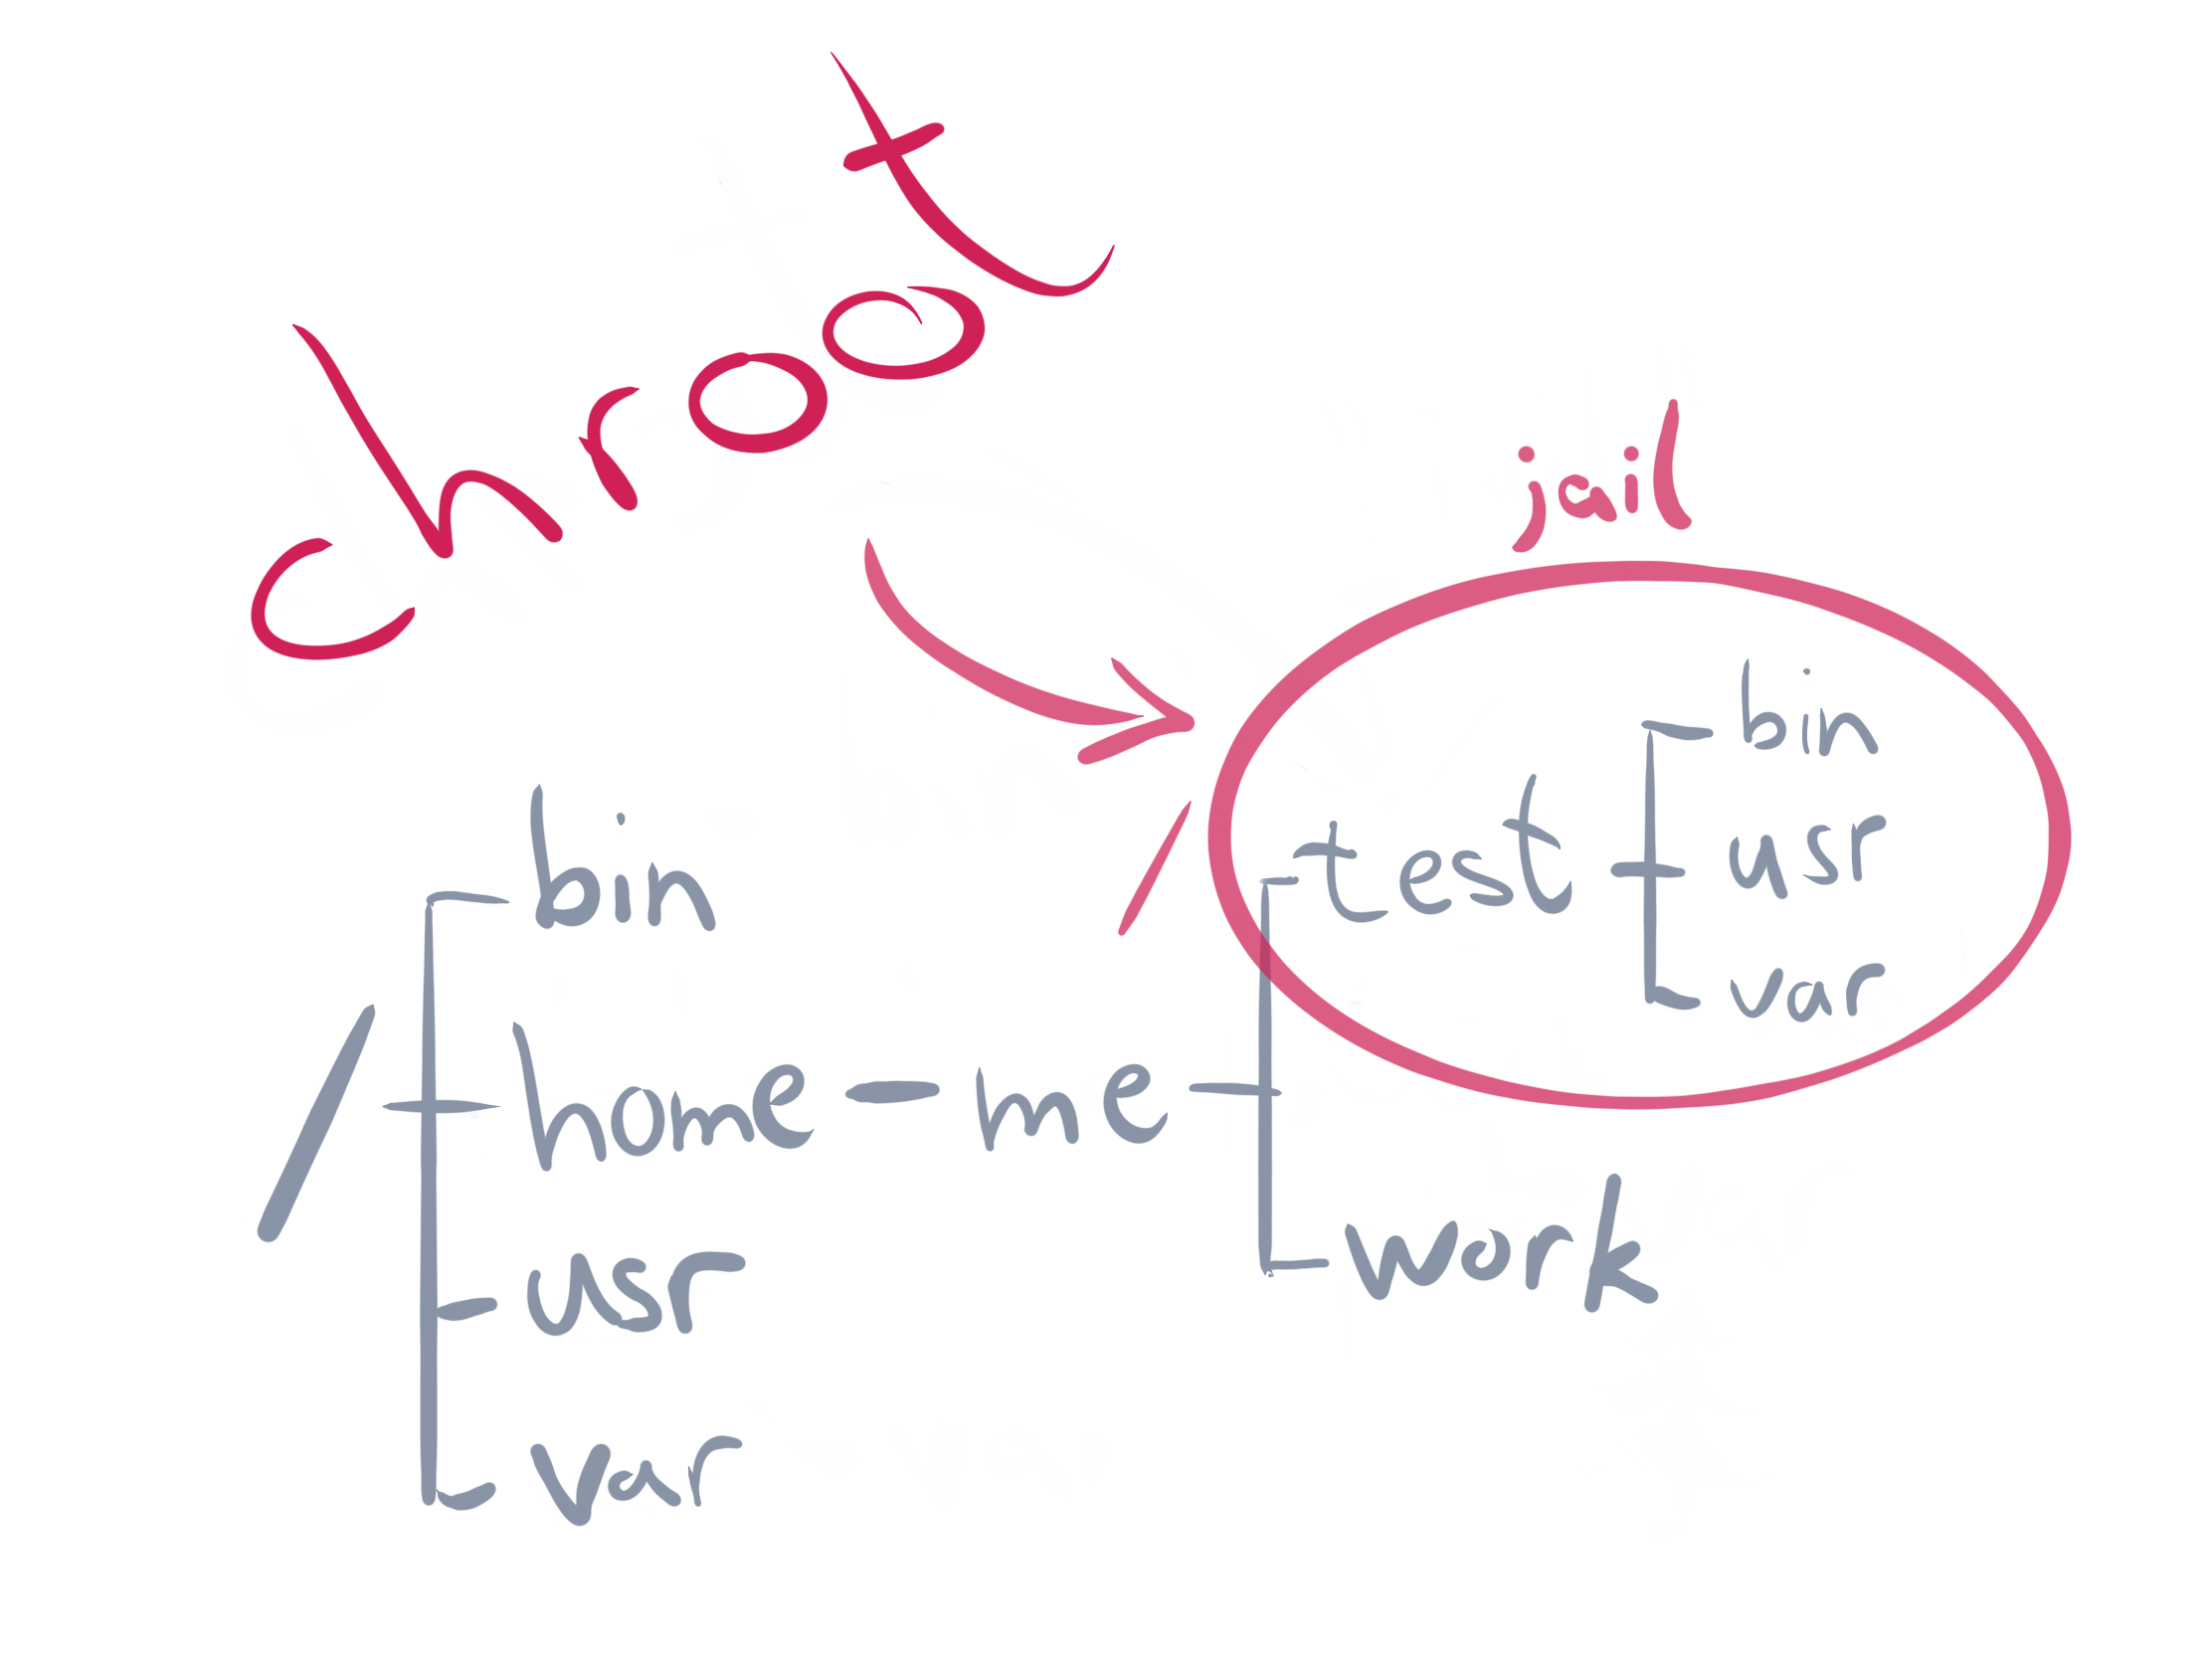
Setting up an SFTP server by implementing chroot feature makes some directories and files inaccessible beyond the home directory just like a Jail environment.
Here at Ibmi Media, as part of our Server Management Services, we regularly help our customers to solve SFTP related tasks.
In this context, we shall look into how to set up SFTP server using chroot feature.
Group creation for SFTP using groupadd command
To begin, you have to create a group for SFTP. Start by assigning a name such as "sftp_users_1" with the command below;
groupadd sftp_users_1Users addition to Group "sftp_users_1" as well as assigning permissions
Create a new user and add it to the group already created "sftp_users_1". Use the command below;
useradd -m -G sftp_users_1 <your_user_name>
Here you will replace "your_user_name" with your actual username you want to use. To set the password for this user, run the chpasswd command below;
echo "your_user_name:<enter_password>" | chpasswd
You can add existing users to the "sftp_users_1" group, run the usermod command below considering the existing username is "user_2";
usermod -G sftp_users_1 user_2
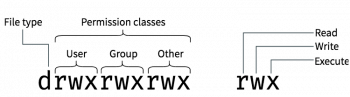
To set the permissions for the users, run the command beneath;
chown root /home/your_user_name /home/user_2/
To create an upload folder in both user's home directory in addition to setting the correct permission or ownership, run the following commands as per your case;
mkdir /home/your_user_name/uploadmkdir /home/user_2/uploadchown your_user_name /home/your_user_name/uploadchown user_2 /home/user_2/uploadModifying SFTP configuration file
The location of SFTP configuration is at "/etc/ssh/sshd_config". As a general rule, make a backup of this file before making changes. To backup the file , use the cp command. Next, apply the following attributes as stated below;
#Subsystem sftp /usr/lib/openssh/sftp-serverSubsystem sftp internal-sftp
Match Group sftp_users_1X11Forwarding noAllowTcpForwarding noChrootDirectory %hForceCommand internal-sftp
Then save this file and exit.
Note that in the file, the first line "Subsystem" was commented out while implementing a new entry "Subsystem sftp internal-sftp".
Additionally, the other lines and their implication are outlined below;
"Match Group sftp_users_1" signifies that the rules below applies to users belonging to the "sftp_users_1" group.
"ChrootDirectory %h" signifies that users can only change directories within their home directories as they cannot access other users or system's directories.
"ForceCommand internal-sftp" signifies that users can utilize sftp commands only.
Ensure that you restart ssh service with the systemctl command given below to effect changes;
systemctl restart sshdTesting and verification of the sftp configuration after a chroot jail process
You can make a connection to the Linux server via sftp or putty to test the chroot implementation on the same network of the sftp server. To achieve this, use the users which has been mapped to the group "sftp_users_1" created previously.
You will get a message such as "Write failed: Broken pipe" meaning that users are not permitted to use SSH.
To connect with the server successfully, you can use the following sftp command;
sftp your_user_name@IP_address
Command such as "put" can be used to upload files to the server. You can also use "get" command to download a file.
You will get a message such as ; "Couldn’t stat remote file: No such file or directory" when you try accessing directories outside the user's home directory or in a different group.
Need support in setting up SFTP Server with Chroot? We can help you today.
Conclusion
This article will show you how to implement chroot Jail on a Linux system so as to restrict access to the the files outside the designated directory directory or tree.
This article will show you how to implement chroot Jail on a Linux system so as to restrict access to the the files outside the designated directory directory or tree.
Related Post