Squid is a caching proxy for the Web supporting HTTP, HTTPS, FTP, and more. It reduces bandwidth and improves response times by caching and reusing frequently-requested web pages. Squid has extensive access controls and makes a great server accelerator.
Here at LinuxAPT, as part of our Server Management Services, we regularly help our Customers to configure Squid Proxy Server on Ubuntu.
In this context, we shall look into how to configure Squid proxy server.
Areas to cover when configuring Squid proxy server?
In this guide, we will look into areas such as this:
i. Configuring Squid to listen on a different port.
ii. Configuring hostname for the Squid proxy server.
iii. Setting Squid cache memory size.
iv. Specifying DNS name-servers to use.
v. Denying access to certain websites in Squid proxy server.
vi. Configuring Squid Proxy client authentication.
vii. Configuring clients to connect through Squid proxy server.
How to configure Squid Proxy Server on Ubuntu 20.04 LTS ?
Squid proxy server configuration file is located at /etc/squid/squid.conf.list. This file contains directives through which the Squid proxy server is configured.
1. How to Configure Squid to listen on a different port ?
By default, the Squid proxy server listens on port 3128 for the traffic coming from client machines.
However, you can configure it to listen on some different port other than the default port using http_port directive.
i. Edit the squid configuration using the below command:
$ sudo nano /etc/squid/squid.confNow find the below entry in the configuration file.
Note: You can use Ctrl+W to search for any line. Press Ctrl+W, type keywords, and hit Enter.
http_port 3128
Now replace 3128 with the port number you want the Squid proxy server to listen to, let's say 3155:
http_port 3155
ii. Now, restart the squid proxy server service for the changes to take effect:
$ sudo service squid restart2. How to configure hostname for the Squid proxy server ?
You can configure the hostname for the Squid proxy server if it can't determine the hostname of the machine on its own.
To configure the hostname, you can use the visible_hostname directive. This name is used by Squid in error messages, internal URLs, FTP directory listings, and so on.
i. Edit the squid configuration using the below command:
$ sudo nano /etc/squid/squid.confii. Now add the following entry in the configuration file replacing <host_name> with any name you want to set as a hostname for the Squid proxy server. It is not necessary to use the actual hostname of your system.
visible_hostname <host_name>iii. For instance, to set "linuxapt" as the hostname of the Squid proxy server, the entry would be:
visible_hostname linuxapt iv. Once you are done with the configurations, save and exit the configuration file.
Now, restart the Squid proxy service for the configuration changes to take effect.
$ sudo service squid restartHow to set Squid cache memory size ?
Squid caches the frequently visited content in memory. The default size of Squid cache memory is 256 MB.
To change the size of the Squid cache memory, cache_mem directive is used.
i. Edit the configuration file using the below command:
$ sudo nano /etc/squid/squid.confii. Then search for the following entry in the configuration file and replace 256 by the amount to set for the cache memory size.
cache_mem 256 MB
For instance, to set the cache size to 512 MB, the entry would be changed to:
cache_mem 512 MB
Once you are done with the configurations, save and exit the configuration file.
iii. Now, restart the squid service to apply the changes:
$ sudo service squid restartHow to Specify DNS name-servers to use ?
By default, Squid uses /etc/resolv.conf to resolve domain names. If you want the Squid to use a different name server, you can do so using the dns_nameservers directive. Edit the squid configuration using the below command:
$ sudo nano /etc/squid/squid.confNow add the below entry in the configuration file replacing:
dns_nameservers <IP address of DNS server>For instance, to set 8.8.4.4 as name servers, the entry would be:
dns_nameservers 8.8.8.8 8.8.4.4
Once you are done with the configurations, save and exit the file.
Now, restart the squid service to apply the changes:
$ sudo service squid restartControlling access to the proxy server
How Squid ACL works ?
For access control, ACLs are used in combination with access control directive. ACL alone is of no use, they only help to identify user requests based on various rules. In order to allow or deny access, they are combined with the http_access directive.
To define ACL, the syntax is:
acl NAME TYPE value
Example: Allow LAN traffic through Squid proxy server
To match traffic coming from LAN 192.168.5.0/24, we will need to create an ACL rule in the Squid configuration file:
acl myacl src 192.168.5.0/24Once the ACL is defined, you can use the http_access directive to allow/deny access. Here is the syntax for the http_access directive:
http_access allow|deny NAME
Where NAME identifies the traffic which you want to allow/deny access.
To allow the traffic identified in the ACL, you will need to add the following http_access directive in the Squid configuration file:
http_access allow myaclHow to configure proxy Sources to Access the internet ?
First, we will configure the sources which we want to allow access to the internet through the proxy server. For instance, you might want to allow access to the proxy server only from the internal network.
i. To configure the allowed sources, edit the squid configuration file:
$ sudo nano /etc/squid/squid.confii. Now, search for the entry acl localnet src.
Note: To search for an entry in the Nano editor, Press Ctrl+w, and type the expression you want to search. In the case of the above example, press Ctr+w and type acl localnet src
iii. Here, you will see the number of entries for different IP address ranges. Here, add an entry for your network as follows:
acl localnet src subnet_ID/subnet_maskFor instance, your local network runs on the 192.168.72.0/24 subnet. In this case, the entry would be:
acl localnet src 192.168.72.0/255.255.255.0
iv. Now using the http_access directive, allow the sources identified by the acl named localnet defined above. The http_access directive is already defined in the configured, you only need to find and uncomment it.
Search for the entry #http_access allow localnet and then uncomment it by removing the # character.
http_access allow localnetNow save and exit the squid configuration file.
v. Now, restart the squid service using the below command:
$ sudo service squid restartHow to Deny access to certain websites in Squid proxy server ?
i. To deny access to some websites in the Squid proxy server, create a file and list all the websites that you want to deny access to.
$ sudo nano /etc/squid/deniedsites.aclNow list the sites you want to deny access to and then save and exit the file.
…
.msn.com
.yahoo.com
.bbc.com
…
ii. Then edit the squid configuration file using the below command:
$ sudo nano /etc/squid/squid.confiii. Now create an ACL rule for the denied websites and mention the file containing the list of denied websites.
acl denied_sites dstdomain “/etc/squid/deniedsites.acl”The ACL rule denied_sites will match all requests destined for the websites listed in the "/etc/squid/deniedsites.acl" file.
iv. Now you will need to add the http_access directive to deny the websites identified by the above ACL rule named denied_sites.
Add the below line in the Squid configuration file:
http_access deny denied_sitesOnce you are done with the configurations, save and exit the file.
v. Now, restart the squid service using the below command:
$ sudo service squid restartHow to configure Squid Proxy client Authentication ?
With the Squid proxy server, we can add basic user-based authentication for some security. To do so, we will use the htpasswd program that comes with the Apache HTTP server. Then we will create a file that will contain usernames and passwords for authentication.
1. First, we will have to install Apache2-utils. Use the following command to do so:
$ apt install -y apache2-utils2. Now create passwd file in /etc/squid directory to store passwords:
$ touch /etc/squid/passwd3. Use the below command to set the ownership to user “proxy”:
$ chown proxy: /etc/squid/passwd4. Now add a user in the /etc/squid/passwd file:
htpasswd /etc/squid/passwd tinType a password and then confirm by re-entering it. Now the user and its encrypted password will be saved to the /etc/squid/passwd file.
5. Edit the /etc/squid/squid.conf file using the below command:
$ sudo nano /etc/squid/squid.confNow add below lines in the file:
auth_param basic program /usr/lib64/squid/basic_ncsa_auth /etc/squid/passwdauth_param basic children 5
auth_param basic realm Squid Basic Authentication
auth_param basic credentialsttl 2 hours
acl auth_users proxy_auth REQUIRED
http_access allow auth_users
Once you are done with the configurations, save and exit the configuration file.
How to configure clients to connect through Squid proxy server ?
In this section, we will configure clients to connect through the Squid proxy server.
1. Open a web browser in your system. Here we will use the Firefox browser.
2. Go to upper right corner of your browser and click three horizontal bar icon. Then click Options.
3. Then in the search bar, type network. When the search result appears, click Settings.
4. Select the Manual proxy configuration option button.
Then type the IP address of the Squid proxy server in the HTTP Proxy field and port number in the Port field. Also, check the Also use this proxy for FTP and HTTPS checkbox. 5. Then click OK.
6. Now in order to check if the Squid server is working, try accessing any website in your browser. You will see an authentication dialog. Enter the squid username and password that you have created before and click OK.
7. Now you should be able to access the requested website.
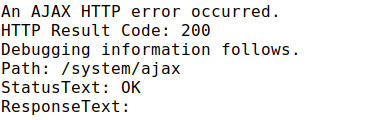
8. Now try accessing another website that you have blocked using the access list. The browser will show the following page saying "The proxy server is refusing connections".
[Need urgent assistance to configure Squid proxy server on your Debian Server? We are available to help you. ]
Conclusion
This article will guide you on how to configure Squid #proxy server on a Linux system. There is a lot more you can do with Squid proxy server.
Although primarily used for HTTP and FTP, #Squid includes limited support for several other protocols including Internet Gopher, SSL, TLS and HTTPS. Squid does not support the #SOCKS protocol, unlike Privoxy, with which Squid can be used in order to provide SOCKS support.
The squid. conf file defines the configuration for squid. The configuration includes (but not limited to) HTTP port number, the ICP request port number, incoming and outgoing requests, information about #firewall access, and various timeout information.
To connect Squid proxy:
i. Tools>Options>Advanced>Network>Settings.
ii. Select Manual proxy configuration and tick the 'use this proxy server for all protocols' box.
iii. Under HTTP Proxy: add the squid listening IP address, 10.0. 0.1. In the Port: section add the squid listening port 3128.
iv. Click OK to save the changes.


