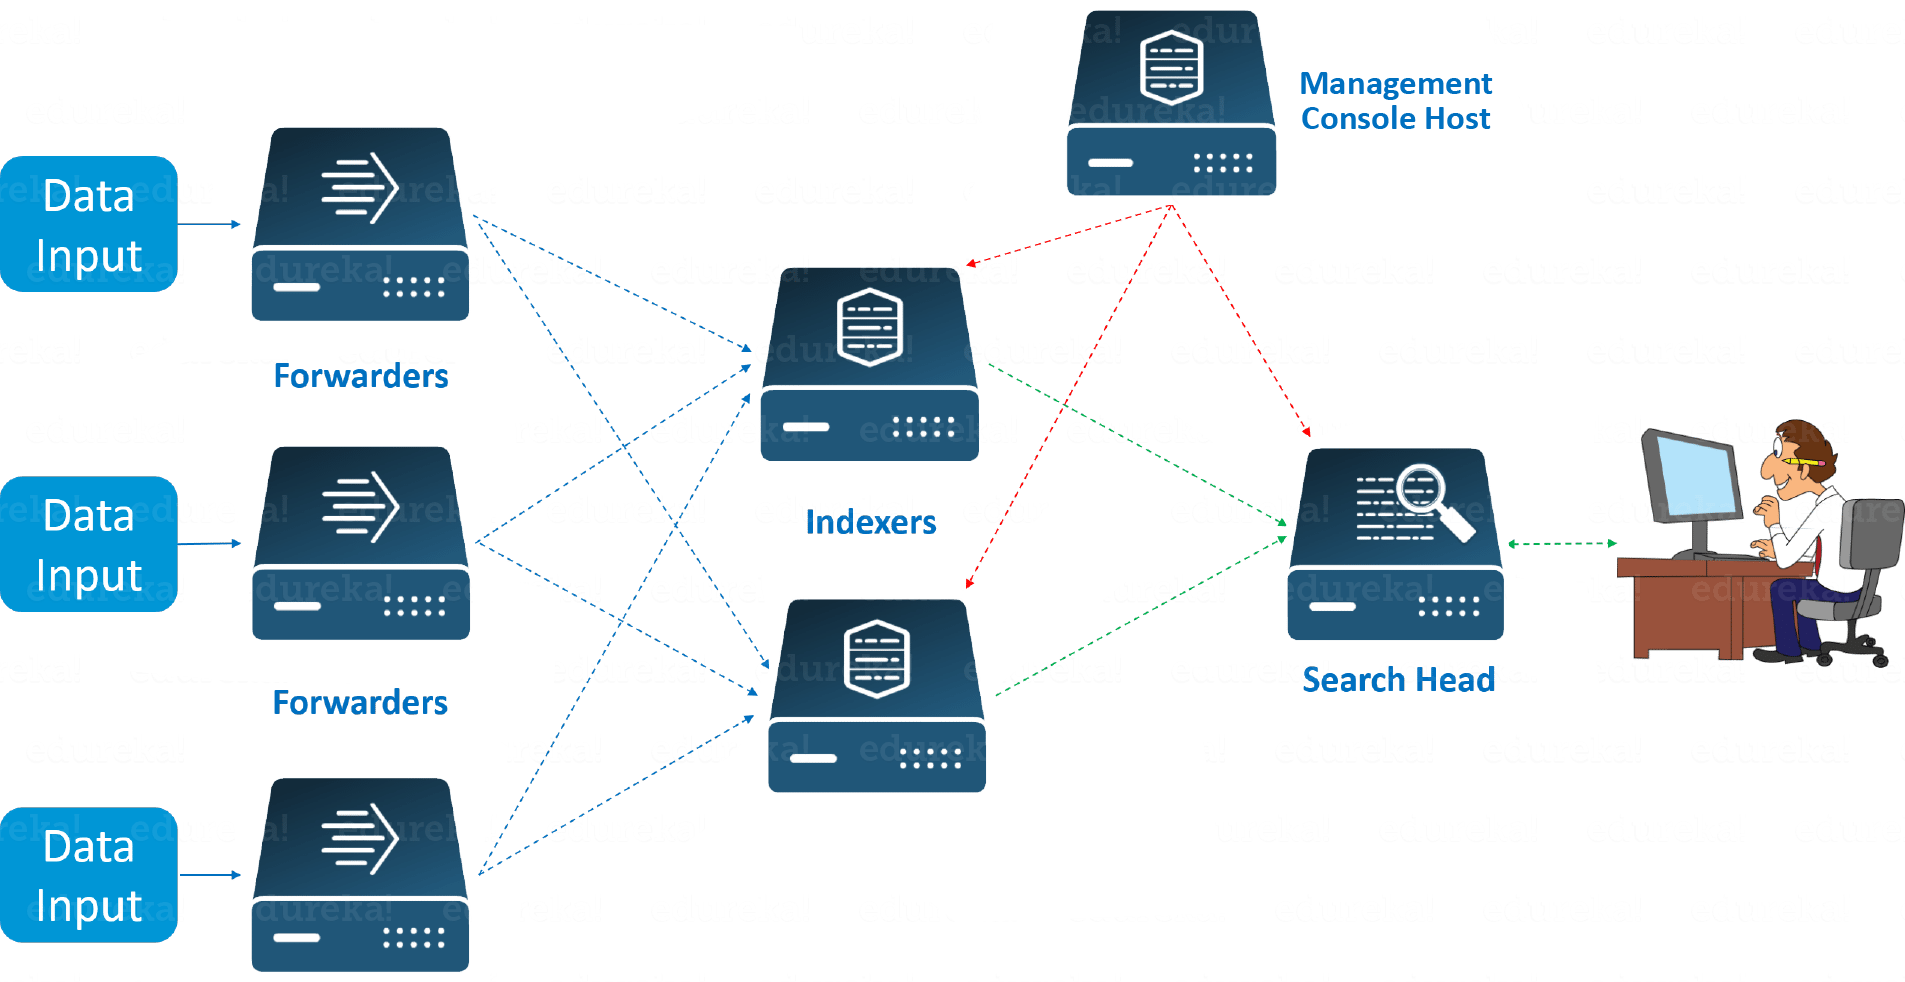
A Splunk Forwarder is required in order to send alerts to the indexer.
The Splunk infrastructure does not use any database to store its data, as it extensively makes use of its indexes to store the data. It uses MongoDB to facilitate certain internal functionality like the kvstore which makes it possible to ingests the data from external sources like Universal forwarder.
Splunk is basically a software mainly used for searching, monitoring, and examining machine-generated Big Data through a web-style interface. Splunk performs capturing, indexing, and correlating the real-time data in a searchable container from which it can produce graphs, reports, alerts, dashboards, and visualizations.
Here at Ibmi Media, as part of our Server Management Services, we regularly help our customers to fix Ubuntu related issues and Installation.
Now, we will look into how to perform Splunk Forwarder Installation on Ubuntu.
More information about Splunk Forwarder?
Splunk forwarder is a system which acts as agent for log collection from remote machines.
It helps to collects logs from remote machines and forward them to indexer (Splunk database) for further processing and storage.
There is a common forwarders known as "universal forwarder" which is managed centrally and functions without any configuration.
However, large Splunk customers deploy thousands of universal forwarders to gather data from servers, applications, and any Windows or Unix-based system.
Now let us see how the installation of Splunk Forwarder is done on an Ubuntu machine.
How to install Splunk Forwarder on an Ubuntu Server?
Start by downloading Splunk Forwarder v7.2.1 package from Splunk official Download repository .
After downloading it to your server, install it using the commands below according to your Operating System.
For .rpm based distribution, run the command below;
yum install splunkforwarder-package.rpmFor .deb based distribution, run the command below;
dpkg –install splunkforwarder-package.debNow the Splunk Forwarder will be installed to the directory "/opt/splunkforwarder".
How to configure Splunk Forwarder on Ubuntu?
To configure Splunk Forwarder in order for it to be able to send alerts to the indexer component, the following configuration needs to be well configured;
i. "props.conf" helps Splunk to specify the format in which data inputs will be presented and interpreted.
ii. "inputs.conf" helps Splunk Forwarder to read data from an input.
How to set up data collection?
1. Props configuration
Start by downloading props configuration and its template "props.conf" by running the command below;
curl -so /opt/splunkforwarder/etc/system/local/props.conf https://raw.githubusercontent.com/wazuh/wazuh/3.7/extensions/splunk/props.conf2. Inputs configuration
Now download and insert "inputs.conf" template by running the command below;
curl -so /opt/splunkforwarder/etc/system/local/inputs.conf https://raw.githubusercontent.com/wazuh/wazuh/3.7/extensions/splunk/inputs.confNext, set the Wazuh manager hostname with the command below;
sed -i "s:MANAGER_HOSTNAME:$(hostname):g" /opt/splunkforwarder/etc/system/local/inputs.conf3. Setting up data forwarding
Here, to point the Forwarder output to Wazuh's Splunk Indexer, run the command below;
/opt/splunkforwarder/bin/splunk add forward-server <INDEXER_IP>:<INDEXER_PORT>Then, restart the Splunk Forwarder Service with the command below;
/opt/splunkforwarder/bin/splunk restartIn some cases, the port 8089 will be already in use. If so then change to another port and allow firewall for that port.
Now the incoming data will be linked to the designated Indexer.
To make the Splunk Forwarder service to start on boot, run the command below;
/opt/splunkforwarder/bin/splunk enable boot-startNeed support in Installing Software on Ubuntu and Debian Machines? We are available to help you today.
Conclusion
This article will show you the steps to take to install and configure Splunk forwarder on a Linux Machine (Ubuntu , Debian).
This article will show you the steps to take to install and configure Splunk forwarder on a Linux Machine (Ubuntu , Debian).


