phpMyAdmin is a database management system which gives users the ability to interact with their MySQL databases in an efficient way.
The installation of phpMyAdmin on Debian 10 involves the process of downloading it from its official source as the local phpMyAdmin packages might not be available in the default Debian repositories.
Here at Ibmi Media, as part of our Server Management Services, we regularly help our customers to perform Software installations on their Servers.
Now, let us look into how to install phpMyAdmin on Debian 10 Machine.
Steps to install PHPMyAdmin on Debian 10?
To install and configure PHPMyAdmin, the following steps needs to be followed as shown below;
1. Updating System, Software and Packages
To update the system, Log into your server as the root user and run the command below;
sudo apt update2. Apache Web Server Installation
To install Apache, run the command below;
sudo apt install apache2 -yAfter Apache installation is completed, check its status with the command below;
systemctl status apache23. Installing PHP on Debian 10
To install PHP, you need to install the core packages, modules as well as its dependencies by running the command below;
sudo apt install php php-cgi php-mysqli php-pear php-mbstring php-gettext libapache2-mod-php php-common php-phpseclib php-mysql -yAfter installation , check PHP version by running the command below;
php --version4. Installation and Configuration on Debian 10
To install MariaDB, run the command below;
sudo apt install mariadb-server mariadb-client -yThen, verify the installation with the command below;
systemctl status mariadb5. Securing MariaDB
Now, we need to configure the MariaDB database. Start by running the command below;
sudo mysql_secure_installationHere you can set a very serious password for the database. Also remove anonymous users and test database.
6. Creating a new MariaDB user
For phpMyAdmin utility to function properly, a designated user must be created to enable connection to the database. This further enhances the security and manages the administration of permission levels for users. After creating a user, you can then proceed with the installation of phpMyAdmin.
7. phpMyAdmin Installation processes on Debian 10
To install phpMyAdmin, first you need to install some important PHP modules such as php-mbstring, php-zip, and php-gd by running the command below;
sudo apt install php-mbstring php-zip php-gdNow, download phpMyAdmin from the source code from the official phpMyAdmin Downloads center where you should select the .tar.gz file as per your choice.
Next, run the command below to download the tarball file to your server;
wget https://files.phpmyadmin.net/phpMyAdmin/4.9.7/phpMyAdmin-4.9.7-all-languages.tar.gzAfter downloading it, extract it with the command below;
tar xvf phpMyAdmin-4.9.7-all-languages.tar.gzThis will extract the file and also create new files and directories on the server under the main directory called "phpMyAdmin-4.9.7-all-languages".
Next, move this main directory as well as its subdirectories to the directory "/usr/share/". The "/usr/share/" directory is where phpMyAdmin keeps its configuration files.
To do this, run the command below;
sudo mv phpMyAdmin-4.9.7-all-languages/ /usr/share/phpmyadmin8. How to configure phpMyAdmin Manually
Now make a new directory where phpMyAdmin will store its temporary files assigning the correct permissions and ownership. To do this run the commands below;
sudo mkdir -p /var/lib/phpmyadmin/tmp
sudo chown -R www-data:www-data /var/lib/phpmyadmin
Next, copy the previous sample configuration file which is "/usr/share/phpmyadmin/config.sample.inc.php" and then rename it to "config.inc.php" in the same directory. To do this, run the command below;
sudo cp /usr/share/phpmyadmin/config.sample.inc.php /usr/share/phpmyadmin/config.inc.phpNow modify this file with the command below;
sudo nano /usr/share/phpmyadmin/config.inc.phpHere, in the "$cfg[‘blowfish_secret’]" section which looks like this;
$cfg['blowfish_secret'] = ''; /* YOU MUST FILL IN THIS FOR COOKIE AUTH! */Enter a string of 32 random characters in between the single quotes. Ensure that you keep this safe and remember it if possible because it will be required internally by the AES algorithm. In our instance, it will now look like this;
$cfg['blowfish_secret'] = 'STRINGOFSECURESTRONGRANDOMCHARACTERS'; /* YOU MUST FILL IN THIS FOR COOKIE AUTH! */For security purposes, you can generate a random string of characters.
For this, install the pwgen program to the system by running the command below;
sudo apt install pwgenNow to generate a 32 digit string in a single group, run the command below;
pwgen -s 32 19. How to update the password.
In the "/usr/share/phpmyadmin/config.inc.php" file, scroll down to the comment reading /* User used to manipulate with storage */. This section includes some directives that define a MariaDB database user named pma which performs certain administrative tasks within phpMyAdmin. As per the official documentation, this special user account is not necessary in cases where only one user will access phpMyAdmin, but it is recommended in multi-user scenarios.
Now, uncomment the controluser and controlpass directives by removing the preceding slashes. Then update the controlpass directive to point to a secure password. If we do not do this, the default password will remain in place and unknown users could easily gain access to the database through the phpMyAdmin interface.
The section of the file will now look like this;
/* User used to manipulate with storage */
// $cfg['Servers'][$i]['controlhost'] = '';
// $cfg['Servers'][$i]['controlport'] = '';
$cfg['Servers'][$i]['controluser'] = 'pma';
$cfg['Servers'][$i]['controlpass'] = 'password';
Below this section, you will find another section preceded by a comment reading /* Storage database and tables */. This section contains a number of directives which defines the phpMyAdmin configuration storage, a database, and several tables used by the administrative pma database user. These tables enable a number of features in phpMyAdmin, including Bookmarks, comments, PDF generation, and others.
Now, uncomment each line in this section by removing the slashes at the beginning of each line to make it look like this;
/* Storage database and tables */
$cfg['Servers'][$i]['pmadb'] = 'phpmyadmin';
$cfg['Servers'][$i]['bookmarktable'] = 'pma__bookmark';
$cfg['Servers'][$i]['relation'] = 'pma__relation';
$cfg['Servers'][$i]['table_info'] = 'pma__table_info';
$cfg['Servers'][$i]['table_coords'] = 'pma__table_coords';
$cfg['Servers'][$i]['pdf_pages'] = 'pma__pdf_pages';
$cfg['Servers'][$i]['column_info'] = 'pma__column_info';
$cfg['Servers'][$i]['history'] = 'pma__history';
$cfg['Servers'][$i]['table_uiprefs'] = 'pma__table_uiprefs';
$cfg['Servers'][$i]['tracking'] = 'pma__tracking';
$cfg['Servers'][$i]['userconfig'] = 'pma__userconfig';
$cfg['Servers'][$i]['recent'] = 'pma__recent';
$cfg['Servers'][$i]['favorite'] = 'pma__favorite';
$cfg['Servers'][$i]['users'] = 'pma__users';
$cfg['Servers'][$i]['usergroups'] = 'pma__usergroups';
$cfg['Servers'][$i]['navigationhiding'] = 'pma__navigationhiding';
$cfg['Servers'][$i]['savedsearches'] = 'pma__savedsearches';
$cfg['Servers'][$i]['central_columns'] = 'pma__central_columns';
$cfg['Servers'][$i]['designer_settings'] = 'pma__designer_settings';
$cfg['Servers'][$i]['export_templates'] = 'pma__export_templates';
Note that these tables do not exist and will be created in the next stage of this tutorial.
Next, scroll down to the bottom of the file and add the following line to configure phpMyAdmin to use the "/var/lib/phpmyadmin/tmp" directory which was created earlier as its temporary directory.
phpMyAdmin will use this temporary directory as a templates cache which allows for faster page loading as shown below;
$cfg['TempDir'] = '/var/lib/phpmyadmin/tmp';10. How to create the phpMyAdmin storage database and tables?
To create a database to server as the configuration storage database and tables, run the command below;
sudo mariadb < /usr/share/phpmyadmin/sql/create_tables.sqlNext, create the administrative pma user with the command;
sudo mariadbNow, from the prompt, run the following statements to create the pma user and grant the necessary permissions. Ensure that the password is same with the one defined in the "config.inc.php" file as shown below;
MariaDB [(none)]> GRANT SELECT, INSERT, UPDATE, DELETE ON phpmyadmin.* TO 'pma'@'localhost' IDENTIFIED BY 'password';Now, you can exit the MariaDB shell by running the command below;
MariaDB [(none)]> exitNow, phpMyAdmin has been fully installed but Apache web server has not been configured to serve application with it. This is why you should create an Apache configuration file.
11. How to configure Apache to Server phpMyAdmin?
To configure Apache, you need to create a file with name "phpmyadmin.conf" in the "/etc/apache2/conf-available/" directory by running the command below;
sudo nano /etc/apache2/conf-available/phpmyadmin.confThen add the following contents into it;
# phpMyAdmin default Apache configuration
Alias /phpmyadmin /usr/share/phpmyadmin
<Directory /usr/share/phpmyadmin>
Options SymLinksIfOwnerMatch
DirectoryIndex index.php
<IfModule mod_php5.c>
<IfModule mod_mime.c>
AddType application/x-httpd-php .php
</IfModule>
<FilesMatch ".+\.php$">
SetHandler application/x-httpd-php
</FilesMatch>
php_value include_path .
php_admin_value upload_tmp_dir /var/lib/phpmyadmin/tmp
php_admin_value open_basedir /usr/share/phpmyadmin/:/etc/phpmyadmin/:/var/lib/phpmyadmin/:/usr/share/php/php-gettext/:/usr/share/php/php-php-gettext/:/usr/share/javascript/:/usr/share/php/tcpdf/:/usr/share/doc/phpmyadmin/:/usr/share/php/phpseclib/
php_admin_value mbstring.func_overload 0
</IfModule>
<IfModule mod_php.c>
<IfModule mod_mime.c>
AddType application/x-httpd-php .php
</IfModule>
<FilesMatch ".+\.php$">
SetHandler application/x-httpd-php
</FilesMatch>
php_value include_path .
php_admin_value upload_tmp_dir /var/lib/phpmyadmin/tmp
php_admin_value open_basedir /usr/share/phpmyadmin/:/etc/phpmyadmin/:/var/lib/phpmyadmin/:/usr/share/php/php-gettext/:/usr/share/php/php-php-gettext/:/usr/share/javascript/:/usr/share/php/tcpdf/:/usr/share/doc/phpmyadmin/:/usr/share/php/phpseclib/
php_admin_value mbstring.func_overload 0
</IfModule>
</Directory>
# Authorize for setup
<Directory /usr/share/phpmyadmin/setup>
<IfModule mod_authz_core.c>
<IfModule mod_authn_file.c>
AuthType Basic
AuthName "phpMyAdmin Setup"
AuthUserFile /etc/phpmyadmin/htpasswd.setup
</IfModule>
Require valid-user
</IfModule>
</Directory>
# Disallow web access to directories that don't need it
<Directory /usr/share/phpmyadmin/templates>
Require all denied
</Directory>
<Directory /usr/share/phpmyadmin/libraries>
Require all denied
</Directory>
<Directory /usr/share/phpmyadmin/setup/lib>
Require all denied
</Directory>
Note that the above configuration is the default phpMyAdmin Apache configuration file tailored for Ubuntu Systems but it also works in Debian.
Now save this file and exit.
Enable the file by running the command below;
sudo a2enconf phpmyadmin.confThen, restart Apache Service to effect changes made in the configuration file by running the command below;
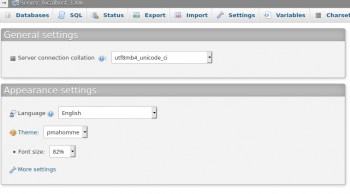
sudo systemctl reload apache212. How to access phpMyAdmin?
To access phpMyAdmin via a web browser, enter the URL below as per your case;
https://your_domain/phpmyadminYou will see a login page where you can enter the MariaDB username and password which was previously configured in the earlier stages.
13. How to Secure your phpMyAdmin Instance from Attackers?
To secure phpMyAdmin, you can implement some configuration directives in the ".htaccess" file.
Start by enabling .htaccess file override s by modifying Apache configuration file. To do this, run the command below;
sudo nano /etc/apache2/conf-available/phpmyadmin.confNow add an AllowOverride All directive within the "<Directory /usr/share/phpmyadmin>" section of the configuration file to make it look like this;
<Directory /usr/share/phpmyadmin>
Options FollowSymLinks
DirectoryIndex index.php
AllowOverride All
<IfModule mod_php5.c>
After this, save the configuration file and restart Apache to effect changes;
sudo systemctl restart apache2Now we can now implement security via the .htaccess file.
14. How to implement security via .htaccess file?
Create a ".htaccess" file in the application root directory by running the command below;
sudo nano /usr/share/phpmyadmin/.htaccessThen, in this file, add the following information;
AuthType Basic
AuthName "Restricted Files"
AuthUserFile /usr/share/phpmyadmin/.htpasswd
Require valid-user
From the above directives;
"AuthType Basic" specifies the authentication type that we are implementing. This type will implement password authentication using a password file.
"AuthName" sets the message for the authentication dialog box. We should keep this generic so that unauthorized users will not gain any information about what is being protected.
"AuthUserFile" sets the location of the password file that will be used for authentication. This should be outside of the directories that are being served. We will create this file shortly.
"Require valid-user" specifies that only authenticated users should be given access to this resource. This is what actually stops unauthorized users from entering.
Now you can save this file and close.
Need support in installing PHPMyAdmin on Debian 10 and Ubuntu System? We are available to help you today.
Conclusion
This article will take you through the steps you need to take to install, Configure and Secure phpMyAdmin on your Debian 10 Server.
This article will take you through the steps you need to take to install, Configure and Secure phpMyAdmin on your Debian 10 Server.