Are you facing 403 Forbidden error on your WordPress site?
This guide will help you.
The 403 Forbidden error is an HTTP status code which means that accessing the page or resource you were trying to reach is absolutely forbidden for some reason.
Here at Ibmi Media, as part of our Server Management Services, we regularly help our Customers to fix WordPress related errors.
In this context, we shall look into how to easily fix the 403 forbidden error in WordPress.
Nature of WordPress 403 Forbidden Error ?
WordPress 403 Forbidden error code occurs when your server permissions don't allow access to a specific page.
When this error happens, you will see an error message such as this:
403 Forbidden – You don’t have permission to access ‘/’ on this server.
Additionally, a 403 Forbidden error was encountered while trying to use an ErrorDocument to handle the request.
This error have show up in different scenarios as outlined below:
i. 403 Forbidden – Access denied on wp-admin or WordPress login page.
ii. 403 Forbidden – during WordPress install.
iii. 403 Forbidden error when visiting any page on your WordPress site.
iv. It is also possible that you only get to see ‘Access Denied’ instead of full 403 Forbidden status.
v. You may also see 'Access to yourdomain.com was denied. You don't have authorization to view this page'.
Next, we will take a look at what causes 403 error.
What triggers WordPress 403 Forbidden Error ?
i. The most common cause for the 403 Forbidden error in WordPress is due to poorly configured security plugins.
Many WordPress security plugins can block an IP address (or a whole range of IP addresses) if they believe them to be malicious.
ii. Another possible cause could be a corrupt .htaccess file or incorrect file permissions on your server.
iii. Your WordPress hosting company can sometimes make accidental changes to their server settings. This may result in 403 Forbidden error on your site.
Having seen all the possible reasons for this error, let's take a look at how to solve WordPress 403 Forbidden Error.
How to fix WordPress 403 Forbidden Error ?
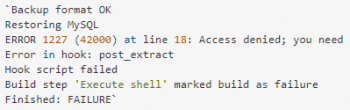
Before proceeding with the tips given below, we recommend that you create a complete WordPress backup of your website.
1. Fixing 403 Forbidden Error Caused by a WordPress Plugin
First thing you need to do is to temporarily deactivate all WordPress plugins.
This includes any security plugins that you may have installed on your site.
If this resolves your problem, then this means one of the plugins on your website was causing this error.
You can figure out which plugin was causing the error by activating all your plugins one at a time until you are able to reproduce the 403 forbidden error.
2. Fix 403 Forbidden Error Caused by Corrupt .htaccess File
Often the 403 error is caused by a corrupt .htaccess file in your WordPress site. Repairing this file is quite easy.
i. First you need to connect to your website using a FTP client or file manager in cPanel.
ii. Next, locate the .htaccess file in the root folder of your WordPress site.
You need to download the .htaccess file to your computer so that you have a fresh backup of it.
iii. After that, you need to delete the file from your server.
Then, Try accessing your website.
If 403 forbidden error is resolved, then this means that your .htaccess file was corrupt.
You can generate a fresh .htaccess file by logging into your WordPress admin area and going to 'Settings » Permalinks' page.
Simply click on the Save Changes button at the bottom of the page and WordPress will generate a fresh .htaccess file.
3. Fix 403 Forbidden Error Caused by File Permissions in WordPress
All files stored on your website have file permissions.
These file permissions control who can access files and folders on your website.
Incorrect file permissions can cause 403 forbidden error. It makes your web server thinks that you do not have permission to access those files.
If the above two solutions do not solve the 403 forbidden error on your site, then incorrect file permissions can be the most likely cause.
Changing file permissions yourself can have serious consequences.
If you do not feel confident doing it yourself, then hire a WordPress professional .
However, if you want to do it yourself, then here is how you would check your file permissions.
i. Simply connect to your WordPress site using an FTP client.
ii. Navigate to the root folder containing all your WordPress files.
iii. Click to select a folder, right click and then select File Permissions from the menu.
All folders on your WordPress site should have a file permission of 744 or 755.
All files on your WordPress site should have a file permission of 644 or 640.
You can set the file permission to the root folder to 744 or 755.
iv. Check the box next to 'Recourse into subdirectories' and then check the option that says 'apply to directories only'.
v. Click on the OK button. Your FTP client will now start setting permissions to all subdirectories in that folder.
Once it is done, you need to repeat the process for all the files.
vi. This time you will use file permission of 644 or 640 and don't forget to select 'Recourse into subdirectories' and 'apply to files only' options.
vii. Click on the OK button and your FTP client will start setting file permissions for all the selected files.
Try accessing your website now, and 403 forbidden error should be gone now.
[Need urgent assistance to fix your WordPress Website? We are available to help you. ]
Conclusion
This article will guide you on different methods to fix the 403 #forbidden error in WordPress.
The 403 Forbidden #error means that your server is working, but you no longer have permission to view all or some of your site for some reason.
The two most likely causes of this error are issues with your WordPress site's file permissions or .htaccess file.
Also, some plugin issues might also cause the #403 Forbidden error.
To Fix 403 Forbidden WordPress Error:
1. Create a Backup. Most of the time, you are not responsible for the errors that occur on your WordPress website hosting server.
2. Check . htaccess File.
3. Deactivate All Plugins. Login to your WordPress admin dashboard and navigate to #Plugins - Installed Plugins.