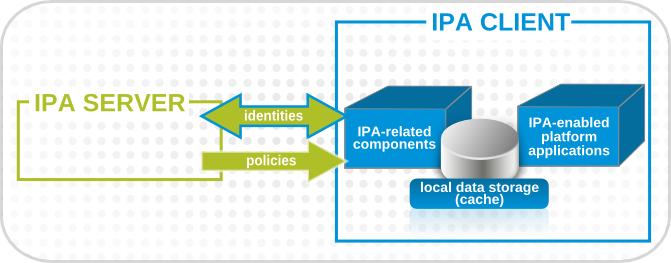
Are you trying to install FreeIPA Client on your Linux Server? Our Software Support team can help you.
As part of our Server Management Services here at Ibmi Media, we regularly help our customers to perform Installations tasks on Ubuntu.
In this context, we will look into how to install FreeIPA on Ubuntu.
Steps to install FreeIPA client on Ubuntu or Debian
Follow the following steps to install FreeIPA client.
i. Initial Preparation of Server for IPA Client
To start with, you need to ensure that your Domain dns is resolving and propagated correctly to your server IP address.
Also set the Server hostname according to the fully qualified domain name (FQDN).
For FreeIPA client to work correctly, the server hostname must align with the FQDN.
For instance, if it is a new server, you can simply edit the hosts locates at /etc/hosts to set the hostname and server ip address.
Also check that the hostname is listed in the /etc/hostname file and it should be the only line available there.
After updating your hostname, update the system packages with the command below;
apt-get updateii. FreeIPA Client installation
By default, the FreeIPA Client is included in Ubuntu 18.04 official repository. So use the command below to install FreeIPA;
apt-get install freeipa-client
Next run the FreeIPA command below;
ipa-client-install --mkhomedir
The "--mkhomedir" flag in the command signifies that FreeIPA will create home directories for users of IPA as soon as they log into the machine for the first time. However, this option is optional as you can do without it if your do not need this feature activated.
While installing, you will be prompted to enter the IPA domain as shown below;
Provide the domain name of your IPA server (ex: example.com): ipa.example.com
Next, enter the domain name of the IPA Server. Ensure that you use the correct domain which you want to use to access the IPA web as seen below;
Provide your IPA server name (ex: ipa.example.com): ipa.example.com
For a single server, failover will not work. So you have to enter yes if your are warned about this during FreeIPA installation just like seen below;
Autodiscovery of servers for fail-over cannot work with this configuration.If you proceed with the installation, services will be configured to always access the discovered server for all operations and will not fail over to other servers in case of failure.Proceed with fixed values and no DNS discovery? [no]: yes
Next, continue with the installation after confirming that the options are correct just like seen below;
Continue to configure the system with these values? [no]: yes
Next, you will be prompted to enter an admin username;
User authorized to enroll computers: admin
The you can enter the password for your IPA admin user.
The next steps is to verify that the web interface for IPA is working correctly.
iii. FreeIPA client verification
To verify IPA installation on the web, simply enter the IPA web UI which will be https://ipa.example.com. Then you can enter your IPA admin username and password in the Web UI.
From the interface, go to the Hosts tab where the IPA server will be listed for the client your just configured. To see the overview of the host, click on the entry for the IPA client.
Alternatively to log in via SSH, simply run the command below;
ssh admin@ipa-client.example.com
This will log you in to the machine as an IPA user.
Need support in installing Software or packages on Debian or Ubuntu Server? We are available to help you today.
Conclusion
This guide will help you with all the information you need to install FreeIPA client on Debian or Ubuntu Server.
This guide will help you with all the information you need to install FreeIPA client on Debian or Ubuntu Server.


