Trying to install phpIPAM on your CentOS Server? This article will help you.
phpIPAM is an open-source web IP address management Software. It helps to provide a light weight IP address management application.
Here at Ibmi Media, as part of our Server Management Services, we regularly help our customers to perform Software Installation tasks on their Servers.
In this context, we will look into how to install phpIPAM on CentOS.
More information about phpIPAM?
phpIPAM helps in IP address management for the server by providing automatic ping scans, status reports that let you see which of your hosts are up and which are down, email notifications about changes to the hosts you’re monitoring, and other features that make managing infrastructure much easier.
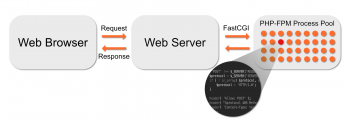
It is a powerful web application based on PHP and MySQL. To use the application you need a web server with active SSL and a working MySQL instance.
Additionally, it has lots of potential features which include IPv4/IPv6 IP address management, Automatic free space display for subnets, NAT support, IPv4 / IPv6 calculator, E-mail notifications, PowerDNS integration, IP request module, and many more.
How to install phpIPAM on CentOS?
Start by installing the dependencies which phpIPAM depends on to function correctly.
In this instance, the following packages and Software should be installed;
i. MySQL / MariaDB database server
ii. PHP / PHP-FPM
iii. PHP extensions
iv. A web server such as Apache or Nginx
We will now go through these installation processes briefly.
i. How to install httpd and PHP
To begin, we will install a web server (Apache), PHP and some PHP extension.
To do this, run the commands below;
sudo dnf -y install @httpd
sudo dnf -y install @phpsudo dnf -y install php-{mysqlnd,curl,gd,intl,pear,recode,xmlrpc,mbstring,gettext,gmp,json,xml,fpm}
Then start and enable the installed services (httpd and PHP-FPM) by running the command below;
sudo systemctl enable --now httpd php-fpmii. How to install MariaDB Database server
In this stage, install MariaDB by running the commands below;\
sudo dnf -y updatesudo dnf module install mariadbrpm -qi mariadb-serversudo systemctl enable –now mariadbsudo mysql_secure_installation
After installation, you need to create a database and user for phpIPAM by logging into the MySQL CLI as a root user with the command below;
mysql -u root -p
Next, enter the statements below to create a database and user as advised above;
CREATE DATABASE phpipam;GRANT ALL ON phpipam.* TO phpipam@localhost IDENTIFIED BY 'IpamStr0ngP@sswOrd';FLUSH PRIVILEGES;QUIT;iii. How to install phpIPAM on CentOS 8 / RHEL 8?
With the latest source code of phpIPAM available from Github repository, run the commands below to download and process to your server;
sudo dnf -y install gitsudo git clone –recursive https://github.com/phpipam/phpipam.git /var/www/html/phpipam
Next, you have to configure phpIPAM by changing directory to where phpIPAM was installed.
To do this, run the command below;
cd /var/www/html/phpipam
Now, copy "config.dist.php" to "config.php" by running the command below;
sudo cp config.dist.php config.php
Next, modify the copied file with the command below;
sudo vi config.php
Now enter the database details which will look like this;
/*** database connection details******************************/$db['host'] = 'localhost';$db['user'] = 'phpipam';$db['pass'] = 'IpamStr0ngP@sswOrd';$db['name'] = 'phpipam';$db['port'] = 3306;iv. How to configure Apache web server?
Start by creating an Apache httpd configuration file for phpIPAM on CentOS 8/RHEL 8 by running the command below;
sudo vi /etc/httpd/conf.d/phpipam.conf
Then add the following details to the configuration file;
<VirtualHost *:80>ServerAdmin admin@example.comDocumentRoot "/var/www/html/phpipam"ServerName phpipam.ibmimedia.comServerAlias www.phpipam.ibmimedia.com<Directory "/var/www/html/phpipam">Options Indexes FollowSymLinksAllowOverride AllRequire all granted</Directory>ErrorLog "/var/log/httpd/phpipam-error_log"CustomLog "/var/log/httpd/phpipam-access_log" combined</VirtualHost>
Additionally, give ownership of the directory "/var/www/phpipam" to the user "www-data" and its group. To do this, run the command below;
sudo chown -R apache:apache /var/www/html/
Now validate the httpd configuration by running the command below;
sudo apachectl -t
You will get an output as seen below if everything is fine;
Syntax OK
Finally, restart the httpd service by running the command below;
sudo systemctl restart httpdv. Testing and Final Configuration of phpIPAM Installation
To test phpIPAM on a browser, open the server domain URL, lets say "http://domain.com". Do replace domain.com with your domain name as per phpIPAM installation on your server.
Then, select the option "New phpIPAM installation" and on the Next page choose the database installation method.
Next, select "MySQL import instructions". Now run the command below to import the SQL file;
sudo mysql -u root -p phpipam < /var/www/html/phpipam/db/SCHEMA.sql
After this process, click on the login button.
The default login details are;
Username: admin
Password: ipamadmin
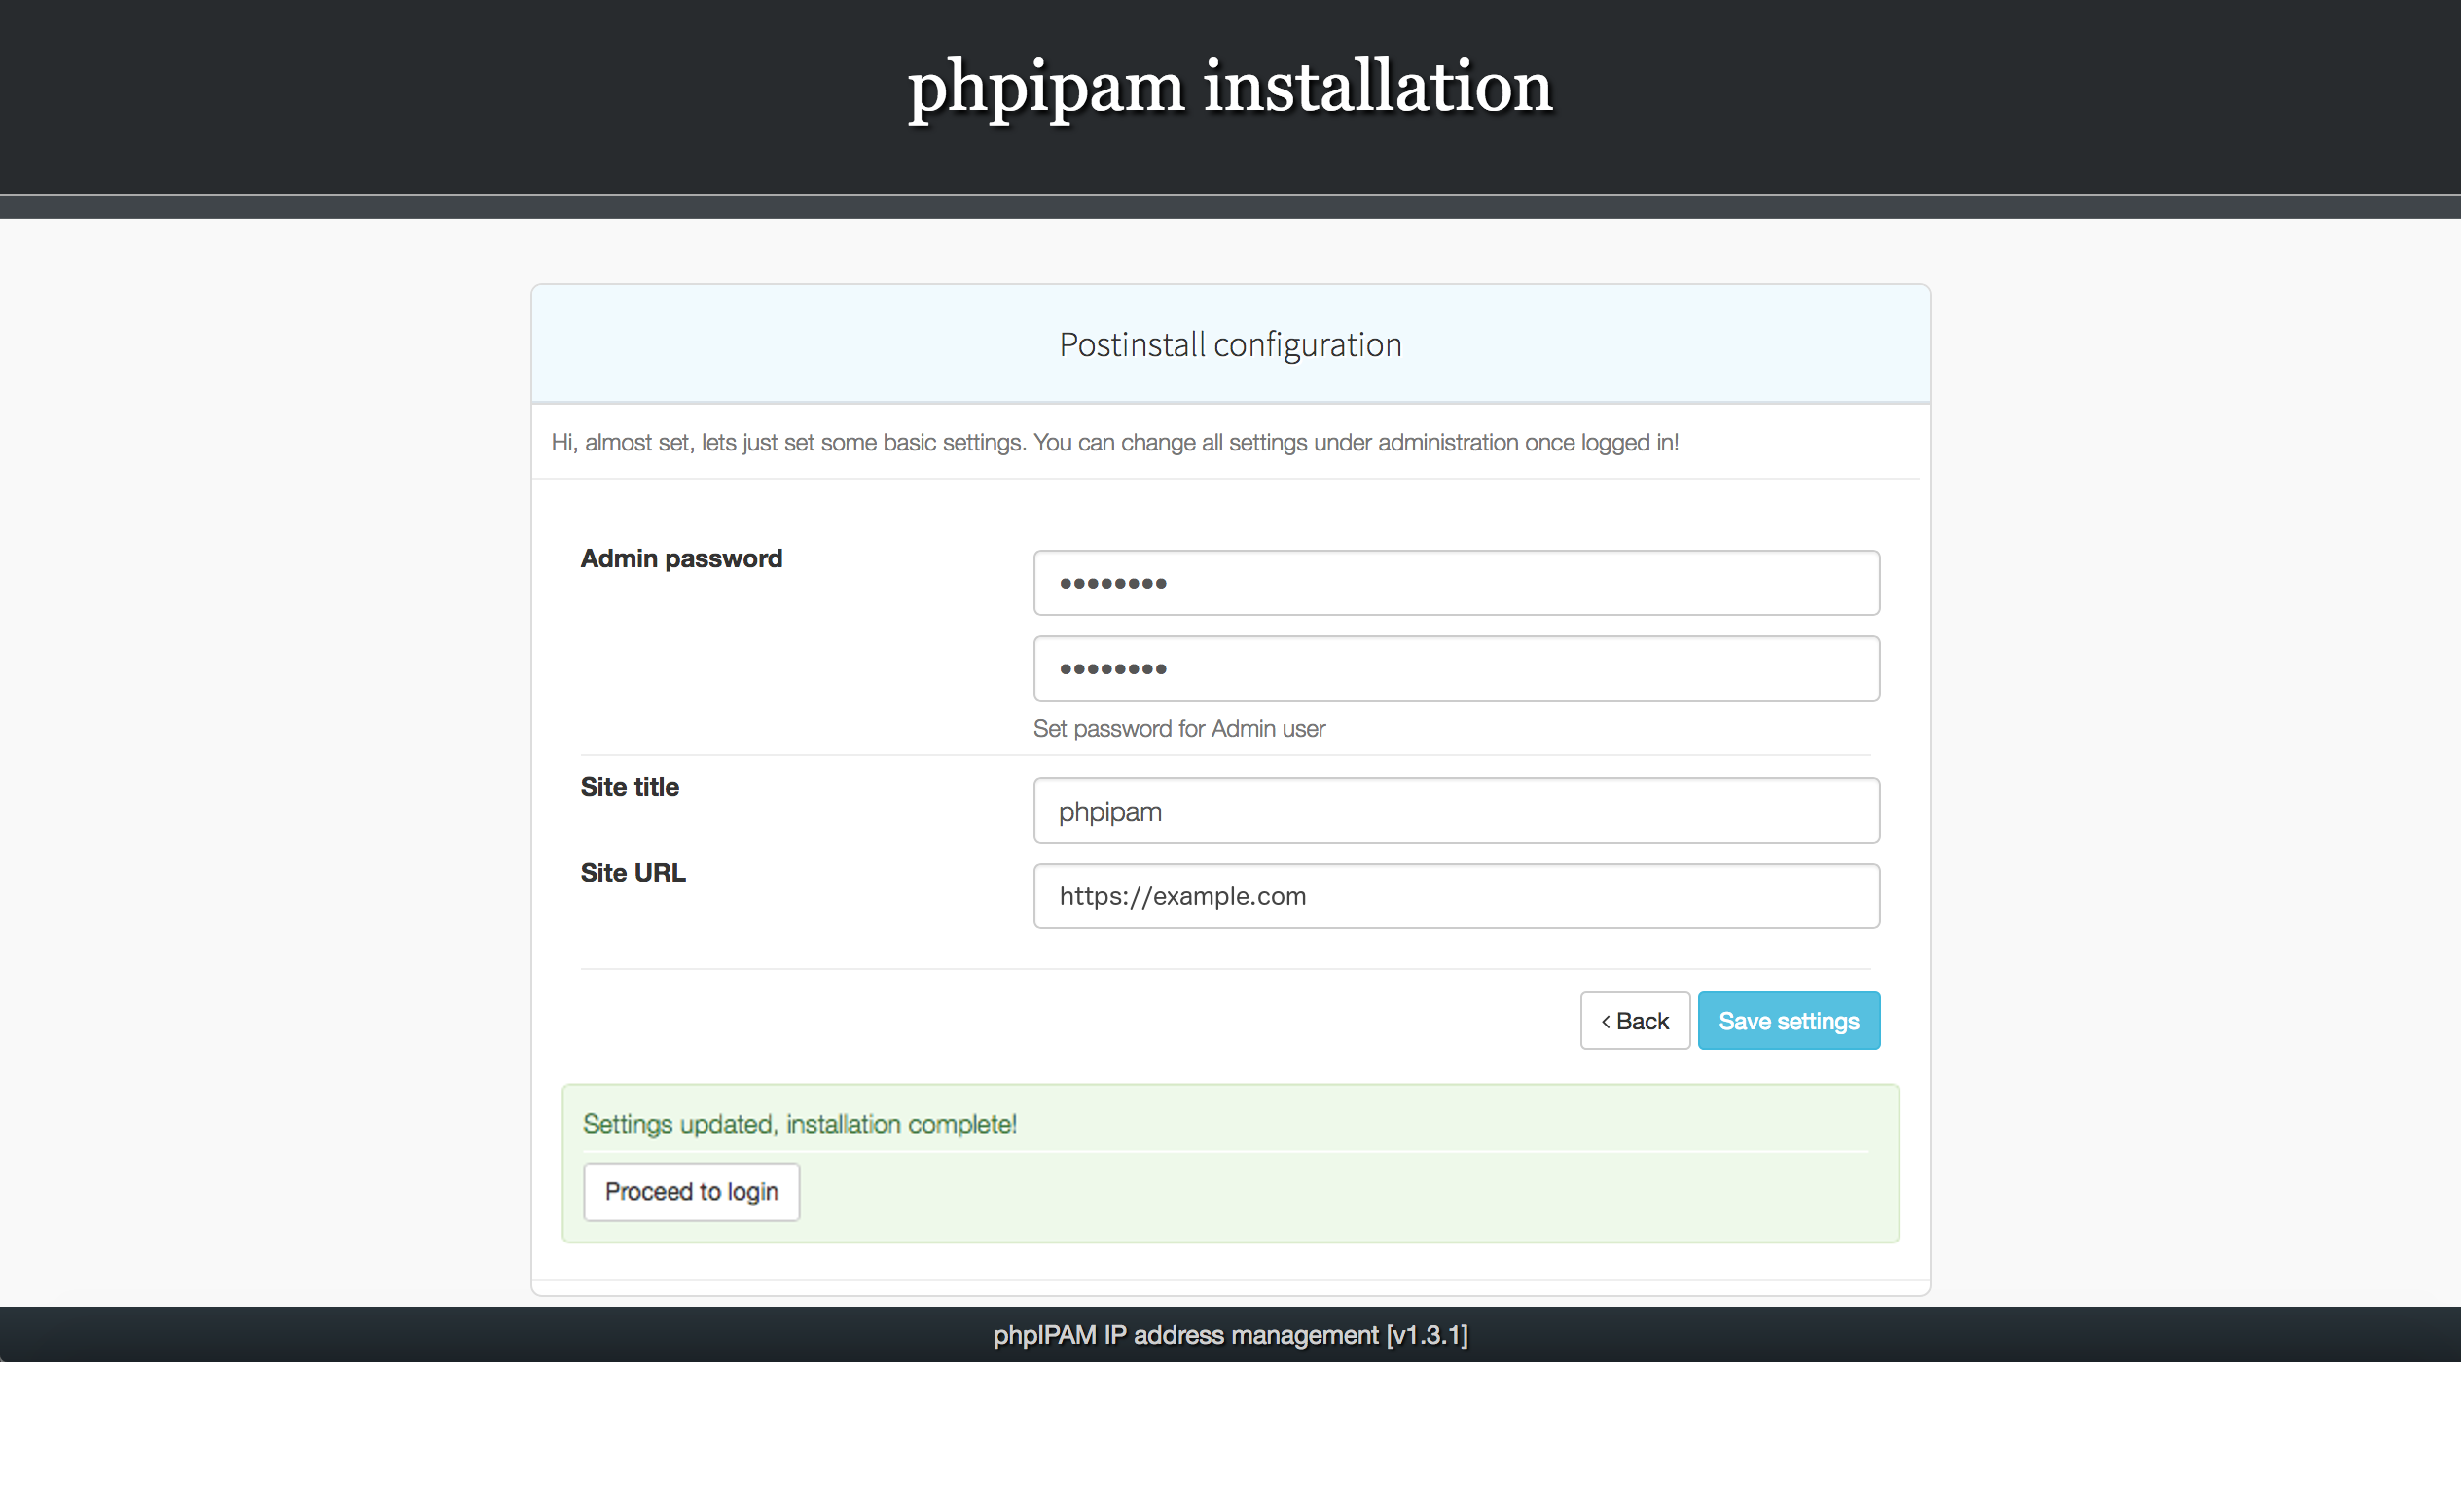
When you first log in, you will be asked to change the admin password.
Now the installation and basic configuration of phpIPAM on CentOS 8/RHEL 8 is not complete.
Need support in Installing any Software on your CentOS Server? We are available to help you today.
Conclusion
This article will guide you on how to install phpIPAM on CentOS 8.
This article will guide you on how to install phpIPAM on CentOS 8.