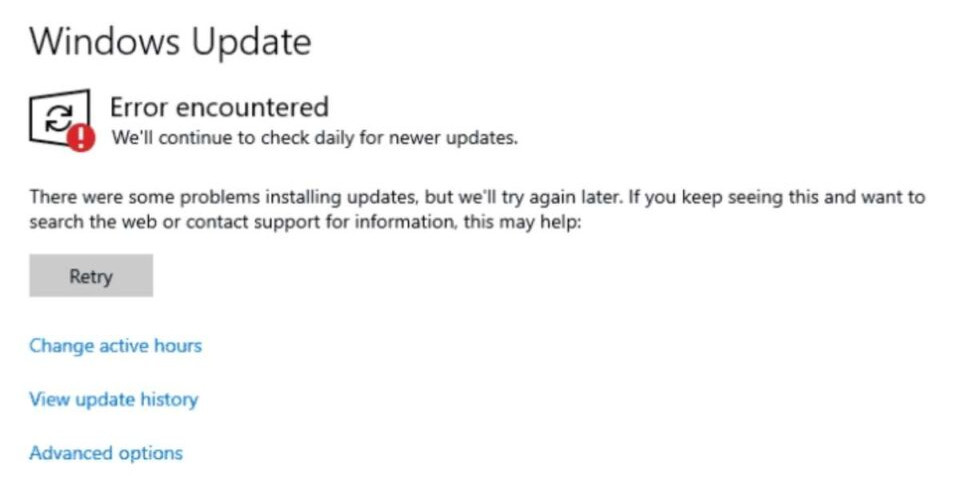
Are you struggling with Windows update error 0x80240023?
This guide is for you.
Your Windows Update may fail to update your Windows because its components are corrupted.
Here at Ibmi Media, as part of our Server Management Services, we regularly help our Customers to fix Windows related errors.
In this context, we shall look into methods to resolve Windows update error 0x80240023.
Nature of Windows error 0x80240023 ?
This error implies that Windows update continuously fails to search for updates or cannot install them. The source of this problem can be:
i. Windows Registry.
ii. Windows Filesystem.
iii. Internet access.
iv. Windows Update service.
v. File corruption.
vi. Misconfiguration.
vii. Adware.
viii. Virus and Malware.
What are the Causes of Windows update error 0x80240023 ?
The windows update error 0x80240023 appears because of WU_E_EULAS_DECLINED.
This means that one or more updates had the license terms declined. This results in the failure of Windows system update installation.
Whenever we install windows update the license term needs to be set to accept.
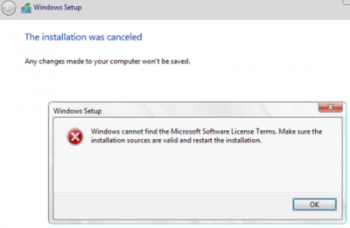
i. Windows could not install the Microsoft Office File Validation Add-in for Office 2007.
ii. It can also occur if the previous Windows error update was not proper.
iii. In addition, it may also occur due to system files on the Windows system.
How to resolve Windows update error 0x80240023 ?
Here, you will learn the step-by-step instructions to resolve the Error 0x80240023 in Windows 10 Update.
Method 1: Clear Windows Update temporary cache folder
Step 1: Stop Windows update service.
i. Firstly, type “services.msc” in the Run prompt and press Enter.
ii. A new window will open containing all Windows services on the system.
iii. Then search for “Windows Update”.
iv. Right-click and select Stop.
Step 2: Clear the Windows Update temporary cache folder.
i. Type %windir%\SoftwareDistribution\DataStore in Run prompt and click OK.
ii. This will open Windows Explorer in the correct location.
iii. Then Delete all contents of this folder.
Step 3: Start the Windows Update Service again.
i. Type “services.msc” in the Run prompt and press Enter.
ii. A new window will open containing all Windows services on the system.
iii. Here, search for “Windows Update”.
iv. Right-click the “Windows Update” and then click Start.
Method 2: Run SFC utility
If the problem still persists, we can run the System File Checker (SFC) utility. This handy in-built tool will check the filesystem.
i. Click Start and search for “cmd”.
ii. In the search results, cmd should show up with a black icon.
iii. Then right-click on it and select Run as administrator.
iv. If we see the prompt for the admin password, enter the password and click OK.
v. A new completely black window will open. Here, we can type commands directly into this window.
vi. Then type sfc/scannow and press Enter.
vii. This process will take a long time. As soon as the SFC process finish, restart the computer. After the restart, search for Updates again.
Method 3: Clean Windows Update download path
i. Type regedit in Run prompt and hit Enter.
ii. In the new window, we have a navigation on the left side. Use it to navigate to
HKEY_LOCAL_MACHINE\SOFTWARE\Policies\Microsoft\Windows\WindowsUpdate.iii. Once we found it, search for WUServer and WIStatusServer in the right-hand pane.
iv. If they are not listed, we cannot clean the download path. Otherwise, delete both.
v. Then restart the system.
Method 4: Check Date & Time
Similarly, if the date and time on the system are incorrect, it may cause the system to decline updates eventually leading to the error.
To check the date and time on the system, do the following:
i. Click Start menu.
ii. Open Settings.
iii. Then, click on “Time & Language”.
iv. Check if the date and time are correct.
v. Also, make sure the time zone is correct as well.
If the date and time are incorrect, we can manually set them by:
1. Click on “Additional date, time & regional settings” in the top right.
2. Click "Set the time and date".
3. Then click "Change date and time".
4. Enter the correct date and time.
5. Finally, Restart the system.
Once done, run windows update again.
Method 5: Run Windows troubleshooter
i. Click Start and click settings.
ii. Here, click on update & Security.
iii. In the left-hand side menu, click on troubleshoot, then click on windows update, then Run the troubleshooter.
iv. The troubleshooter tool will now check the system, when prompted click Apply this fix.
v. Then Restart the machine.
vi. Install the updates on the system again.
Method 6: Check Windows Activation
If Windows is not activated, this will also cause the error. To check the activation, follow these steps:
i. Click Start menu
ii. Open Settings
iii. Then click on Update & Security
iv. Click on the tab Activation
v. If Windows is activated, we will see the text “Windows is activated”.
vi. If not, we will need to click on “Change product key”, enter the product key and then click OK.
vii. Run windows updates again.
Method 7: Install the failing update manually
i. Run Windows updates again.
ii. Here, check the KB number of the update.
iii. The status should say “Installing”, then show the error 0x8024000b;
Operation was canceled or WARNING: Exit code = 0x8024000B.
iv. Then go to the Microsoft update catalog, with the KB number.
v. In the search bar, enter the KB number of the update.
vi. Download the update.
vii. Finally, run the update from the system.
The update should successfully install. If it does, restart the machine and try to run windows update again
Method 8: Install Manually the Microsoft Office File Validation Add-in.
i. Initially, open Windows Explorer and navigate to the following folder: C:\Windows\SoftwareDistribution.
ii. In the search bar, type OFV.CAB and press Enter.
iii. Then copy the OFV.CAB file to Desktop or to Downloads location. If two or more OFV.CAB files are in the results, copy any of them.
iv. Navigate to the location where we copied the OFV.CAB file and extract its contents.
v. Then double-click at extracted OFV.msi file to install the Microsoft Office File Validation Add-in for Office 2007 manually.
vi. Ask Yes at the ‘User Account Control’ window.
vii. Finally, go to Windows Update and click Retry.
Make sure the installation was successful. If everything is fine, delete the OFV.CAB and the OFV.MSI files from where we copied them.
Method 9: Prevent the installation of the Microsoft Office Validation Add-in for Office 2007
i. Initially, download and save the “Show or hide updates” troubleshooter tool on the computer.
ii. URL: https://support.microsoft.com/en-us/kb/3073930
iii. Then run the Show or hide updates tool and select Next on the first screen.
iv. On the next screen, choose Hide Updates.
v. Then select the Microsoft Office File Validation Add-in for Office 2007 and click Next.
vi. Wait until the troubleshooter applies the appropriate changes on the system and then click Close.
vii. Finally, navigate to Windows Update options and click Check for Updates.
[The Windows error still prevails? We'd be happy to help you fix. ]
Conclusion
This article will guide you on steps to fix #Windows #update #error #0x80240023 which usually triggers while updating the Windows #system.
When you encounter an error #message, reboot your #machine and try to run the updates again. If you haven't run Windows #Update for some time, then you might have to repeat this process several times before all updates have been installed.
To fix errors on Windows 10:
1. Make sure that your #device has enough space.
2. Run Windows Update a few times.
3. Check third-party #drivers and download any updates.
4. Unplug extra #hardware.
5. Check Device #Manager for errors.
6. Remove third-party security #software.
7. Repair hard-drive errors.
8. Do a clean restart into Windows.