
Administration Page Fails To Display in Nagios Log Server
This article covers how to resolve the 'Administration Page Fails To Display' in the Nagios Log Server issue for our customers.
To fix this Nagios error, all you need to do is to:
1. Increase the PHP memory_limit in php.ini file.
You can execute the following command:
$ find /etc -name php.ini2. Then make the necessary changes.
3. After which you should restart Apache for the changes to take effect using one of the commands below:
$ systemctl restart apache2.service4. Once the service has restarted, the Administration page will be accessible.
If the problem persists, please increase the value again.
When using the vi editor in Linux:
1. To make changes press i on the keyboard first to enter insert mode
2. Press Esc to exit insert mode
3. When you have finished, save the changes in vi by typing :wq and press Enter

No SSL library support - How to fix this Web Agent installation error
This article covers methods of resolving No SSL/library support: Web Agent installation error. This issue arises when you are trying to install a 32bit version of the agent on a 64bit system; the 32bit version of the agentadmin tool cannot open the 64bit SSL libraries.
Therefore, If your operating system does not include native openssl packages, you must install OpenSSL.
To fix this Web Agent installation error on Linux:
1. Ensure you are installing the appropriate version of the agent; if you have a 64bit operating system, you must install the 64bit agent.
2. Ensure either the operating system provides native openssl packages or OpenSSL is installed. If you are using OpenSSL, you can check that the OpenSSL libraries are in the correct location as follows and add them if they are missing:
a. Check that the LD_LIBRARY_PATH environment variable is set. For example: $ echo $LD_LIBRARY_PATH
b. Check that the OpenSSL libraries (libcrypto.so and libssl.so) are available in the path specified in this environment variable (LD_LIBRARY_PATH).
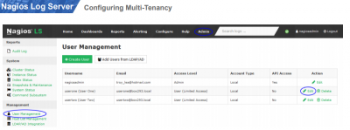
Configure Multi-Tenancy in Nagios Log Server - How to perform it
This article covers how to configure multi-tenancy in Nagios log server.
Multi-Tenancy works by assigning which hosts a user is allowed to see in the Nagios Log Server interface.
Hosts can also be placed in a host list and then applied to the users who will be allowed access.
NOTE: API users and administrators will be able to work around any restrictions placed on them, this
functionality only applies for regular users.
JFTP Bad response error in Joomla - Best Method to resolve
This article covers how to fix JFTP bad response error in Joomla for our customers.
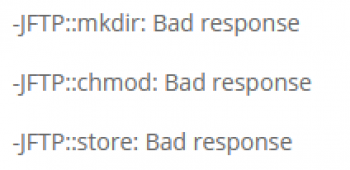
When trying to install new extensions in Joomla, some users might come across some errors indicating a “Bad Response”, where the extensions are not successfully installed.
These errors include:
-JFTP::mkdir: Bad response-JFTP::chmod: Bad response-JFTP::store: Bad responseTo fix this error, You could try to change the chmod permission to 777 (755 the default chmod) of your configuration.php file, and also the corresponding directory recursively.
To do this, modify the configuration.php file.
Simply search for the FTP settings within this file and input the FTP login details in the following fields:
public $ftp_host = '';
public $ftp_port = ’21’;
public $ftp_user = ”;
public $ftp_pass = ”;
public $ftp_root = ”;
public $ftp_enable = ‘1’;

Manage Scheduled Tasks with PowerShell - How to do it
This article covers how to use the PowerShell features to create scheduled tasks. The Get-ScheduledTask cmdlet gets the task definition object of a scheduled task that is registered on a computer. You can use PowerShell to create and manage scheduled tasks. Managing scheduled tasks with PowerShell is made possible with the use of the ScheduledTasks module that’s built-in to Windows.
With the PowerShell Scheduled Tasks module, setting up scheduled tasks using PowerShell commands is made possible. This module provides the opportunity and means to create and deploy scheduled tasks programmatically on the local and remote computers.
Important scheduled task component:
1. Action – the action that is executed by the scheduled task. An action is typically to run a program or a script. A scheduled task can have more than one actions.
2. Trigger – controls when the scheduled task runs. Triggers can be time-based, like, setting a schedule for daily or hourly recurrence. Triggers can also be activity-based, which runs a task based on detected activities like computer startup, a user logs in, or logged events.
3. Principal – controls the security context used to run the scheduled task. Among other things, a principal includes the user account and the required privilege used by the scheduled task.
4. Settings – is a set of options and conditions that controls how the scheduled task behavior. As an example, you can customize a task to get removed after a consecutive number of days that the task is unused.
To add a Trigger for a scheduled task using PowerShell:
The cmdlet to use for creating a trigger is the New-ScheduledTaskTrigger cmdlet.
The command below creates a trigger to run daily at 3 PM.
Copy and run the code in PowerShell:
# Create a new trigger (Daily at 3 AM)$taskTrigger = New-ScheduledTaskTrigger -Daily -At 3PM$tasktriggerThis will Create a Trigger (Daily at 3 AM)

Enable Windows Lock Screen after Inactivity via GPO - How to do it
This article covers how to Enable Windows Lock Screen on domain computers or servers using Group Policy. Locking the computer screen when the user is inactive (idle) is an important information security element.
The user may forget to lock his desktop (with the keyboard shortcut Win + L) when he needs to leave the workplace for a short time.
If any other employee or client who is nearby can access his data. The auto-lock screen policy will fix this flaw.
After some time of inactivity (idle), the user's desktop will be automatically locked, and the user will need to re-enter their domain password to return to the session.
To enable lock screen with group policy:
1. Create a new GPO then edit it and go to:
Computer Config>Policies>Windows Settings>Security Settings>Local Policies>Security Options.
2. Find Interactive logon: Machine inactivity limit .
3. Set that to whatever time you want and it will lock the PC after it hits that timer.
To change my lock screen wallpaper using group policy:
1. Run GPEDIT. MSC.
2. Go this path "Computer Configuration\Policies\Administrative Templates\Control Panel\Personalization".
3. Enable the GP "Force a specific default lock screen image".
4. Specify the path to the image file.
5. Click OK.
To Find Windows 10's Spotlight Lock Screen Pictures:
1. Click View in File Explorer.
2. Click Options.
3. Click the View tab.
4. Select "Show hidden files, folders and drives" and click Apply.
5. Go to This PC > Local Disk (C:) > Users > [YOUR USERNAME] > AppData > Local > Packages > Microsoft.Windows.ContentDeliveryManager_cw5n1h2txyewy > LocalState > Assets.


