
Date Time in Laravel and PHP with Carbon
This article covers how to manage date/time easily in Laravel and PHP with Carbon. Basically, Carbon is a package that helps us to deal with date/time in Laravel and PHP in a much easier and systematic manner.
Working with date and time in PHP is not the easiest or most clear of tasks. We have to deal with strtotime, formatting issues, lots of calculations, and more.
Carbon provides some nice functionality to deal with dates in PHP such as:
1. Dealing with timezones
2. Getting current time easily
3. Converting a datetime into something readable
4. Parse an English phrase into datetime (first day of January 2016)
5. Add and Subtract dates (+ 2 weeks, -6 months)
6. Semantic way of dealing with dates
Carbon is already included in Laravel so there's no need to go and add it with Composer.
Whenever we need to use Carbon, we can import it like so:
<?php
use Carbon\Carbon;
After importing you can do a lot with this great package.
Install Monit monitoring system on CentOS 8 - How to do it
This article covers how to #install Monit on #Centos 8 system. Also, we dealt with how to configure Monit on Centos, adjusting the configuration and setting up alerts to notify the users.
#Monit is a free, open-source process supervision tool for Unix and Linux. With Monit, system status can be viewed directly from the command line, or via the native HTTP(S) web server. Monit is able to do automatic maintenance, repair, and run meaningful causal actions in error situations.
To enable web interface you need to make changes in monit configuration file.
The main configuration file of monit located at /etc/monit. conf under (RedHat/CentOS/Fedora) and /etc/monit/monitrc file for (Ubuntu/Debian/Linux Mint).
Monit is very easy to use nearly out of the box. By default, it is set up to check that services are running every 2 minutes and stores its log file in “/var/log/monit.
To Install Monit to monitor your server running CentOS:
1. Install EPEL repository: yum install epel-release yum update.
2. Install Monit: yum install monit.
3. Activate Monit to start automatically during the system boot and start it: systemctl enable monit systemctl start monit.
To #Install #Monit Package on #Ubuntu:
Run the commands given below;
sudo apt update
sudo apt install monit
After installing Monit, the commands below can be used to stop, start and enable Monit service;
sudo systemctl stop monit.service
sudo systemctl start monit.service
sudo systemctl enable monit.service
mkvirtualenv command not found on Ubuntu - How to fix this error
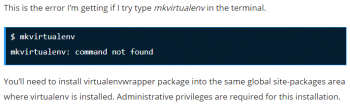
This article covers solution to the #error 'mkvirtualenv: command not found' which happens while running mkvirtualenv #command.
You'll need to install virtualenvwrapper package into the same global site-packages area where virtualenv is installed.
Administrative privileges are required for this installation.
Ensure you're logged in as root user or standard user with sudo privileges.
Start by Updating the System package list:
$ sudo apt update
Then install #Python build tools.
# Python 2
$ sudo apt-get install python-pip python-dev build-essential
# Python 3
$ sudo apt-get install python3-pip python3-dev build-essential
Then install virtualenv and virtualenvwrapper packages.
With APT package manager:
$sudo apt install virtualenv virtualenvwrapper
With Pip:
# Python 2
$ sudo pip install virtualenv virtualenvwrapper
# Python 3
$ sudo pip3 install virtualenv virtualenvwrapper
Unable to connect to MongoDB in Docker container - How to fix this error
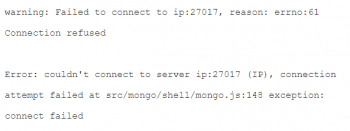
This article covers solution to the error "Unable to connect to MongoDB in docker container".
Basically, this Docker error happens when there is a port issue.
if a container listens on 127.0.0.1, then the host can't map ports to it.
You need to listen on 0.0.0.0 or similar, and then the -p can reach the container's interface.
How do Docker ports work?
The -P command opens every port the container exposes.
Docker identifies every port the Dockerfile exposes and the ones that are exposed with the Docker container build --expose parameter.
Every exposed port is bound directly on a “random” port of the host machine.
The docker build command builds Docker images from a Dockerfile and a “context”. A build's context is the set of files located in the specified PATH or URL .
The build process can refer to any of the files in the context.
For example, your build can use a COPY instruction to reference a file in the context.
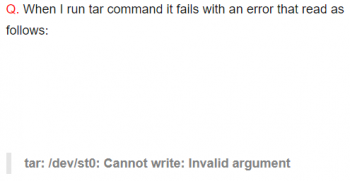
tar dev st0 cannot write invalid argument - How to resolve this error
This article covers resolve errors relating to Linux commands. You need to specify the block factor size. If you try to write a large file on tape this error may occur.
The data in an archive is grouped into blocks, which are 512 bytes. Blocks are read and written in whole number multiples called records. The number of blocks in a record (i.e., the size of a record in units of 512 bytes) is called the blocking factor.
Archives with blocking factors larger than 20 cannot be read by very old versions of tar, or by some newer versions of tar running on old machines with small address spaces.
With GNU tar, the blocking factor of an archive is limited only by the maximum record size of the device containing the archive, or by the amount of available virtual memory.
How to fix tar /dev/st0 cannot write invalid argument error?
Set blocking factor to 256 to avoid this error with the -b option.
For example, use the following command to backup the /webroot directory and its content to /dev/st0 with 256 blocking factor:
# tar cvf -b 256 /dev/st0 /webroot
MySQL crash – Causes Recovery and Prevention methods
This article covers methods to fix and prevent MySQL downtime. Basically, many issues such as resource limits, #database table errors, file system errors, and so on, can lead to a MySQL crash.
To fix MySQL errors in cPanel?
You can also restart the MySQL service from WHM.
1. Login to WHM.
2. Navigate to Restart Services.
3. Now you can restart the MySQL service by clicking the icon “SQL Server(MySQL)”.
To use mysqlcheck, follow these steps:
1. As the root user, type the following command: cd /var/lib/mysql.
2. Replace the database with the name of the database that you want to check.
3. Mysqlcheck checks the specified database and tables.
How do I know if MySQL is running?
We check the status with the service mysql status command. We use the mysqladmin tool to check if MySQL server is running.
The -u option specifies the user which pings the server.
The -p option is a password for the user.
What does repair table do MySQL?
REPAIR TABLE repairs a possibly corrupted table, for certain storage engines only.
This statement requires SELECT and INSERT privileges for the table. Although normally you should never have to run REPAIR TABLE , if disaster strikes, this statement is very likely to get back all your data from a MyISAM table.
What causes MySQL #tables to crash?
The major cause of the database corruption is the lack of free disk space on the server.
Other possible causes of MySQL table crashes include operating system problems, power failures, hardware issues, unexpected MySQL server termination, data corruption due to external programs, and so on.
To access your #MySQL database in Linux, please follow these steps:
1. Log into your Linux web server via Secure Shell.
2. Open the MySQL client program on the server in the /usr/bin directory.
3. Type in the following syntax to access your database: $ mysql -h {hostname} -u username -p {databasename} Password: {your password}


