Are you trying to resolve Mapped Network Drives Not Showing in Elevated Programs?
We can help you.
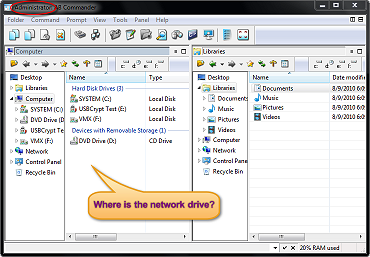
Often, mapped network drives will not be shown in the apps running with administrator privileges (including cmd and PowerShell).
The default User Account Control (UAC) settings don't allow to access mapped network drives (via net use) from applications running in elevated mode (Run as administrator). This indicates that when you run the command prompt or a file manager (like Total Commander) with elevated privileges, they won't display the drive letters of the mounted shared folders.
Here at Ibmi Media, as part of our Server Management Services, we regularly help our Customers to resolve similar Windows servers errors.
Main Causes for Mapped Network Drives Not Showing in Elevated Programs:
Here, let us see the causes for the error:
Firstly, We need to open a command prompt with user permissions and check if we can access the contents of the mapped network drive Z:\.
1. Firstly, Network drives are mapped in the user's session
2. Secondly, UAC is enabled on the computer
3. The current user has local administrator permissions on the computer and runs the app in the "Run as administrator" mode.
Mapped Network Drives not showing in Windows Apps - How to Resolve ?
Net use
Dir z:
This command must list the contents of the shared network folder.
Later, open the command prompt in the current session as administrator and try to access the same drive, we will receive the message that the path to the drive has not been found:
The system cannot find the path specified.
This action of Windows can cause some issue when we frequently run applications in elevated mode.
As a workaround, using the below commands mount network drives from the elevated command prompt:
net use
or
rundll32 SHELL32.dll,SHHelpShortcuts_RunDLL Connect
Below solution to fix the 'Mapped Network Drives not showing in Windows Apps' issue is much easier
Enablelinkedconnections: Enabling Mapped Drives in the Elevated Apps
In order to implement it, we need to make some changes to the registry:
1. Firstly, open the registry editor (regedit.exe).
2. Then, go to the registry key:
HKEY_LOCAL_MACHINE\SOFTWARE\Microsoft\Windows\CurrentVersion\Policies\System
3. After that, create a new parameter (DWORD type) with the name EnableLinkedConnections and the value 1.
The same change can be done with the following command:
reg add “HKEY_LOCAL_MACHINE\Software\Microsoft\Windows\CurrentVersion\Policies\System” /v “EnableLinkedConnections” /t REG_DWORD /d 0x00000001 /f
or with PowerShell:
New-ItemProperty -Path ‘HKLM:\SOFTWARE\Microsoft\Windows\CurrentVersion\Policies\System’ -Name EnableLinkedConnections -Value 1 -PropertyType ‘DWord’
4. Finally, restart the computer or restart the LanmanWorkstation service with the command:
get-service LanmanWorkstation |Restart-Service –Force, and re-logon Windows
At the end, make sure that the user can see the mapped network drives in programs running with admin rights after restarting the computer.
The reverse statement is true: all network drives mapped in the elevated mode will also be available in the unprivileged user session.
[Need urgent assistance in fixing Windows Errors? We can help you. ]
Conclusion
This article covers methods to fix 'Mapped Network Drives Not Showing in Elevated Programs' issue for our customers.
When UAC is enabled, the system creates two logon sessions at user logon. Both logon sessions are linked to one another.
One session represents the user during an elevated session, and the other session where you run under least user rights.
When drive mappings are created, the system creates symbolic link objects (DosDevices) that associate the drive letters to the UNC paths.
These objects are specific for a logon session and are not shared between logon sessions.
When the UAC policy is configured to Prompt for credentials, a new logon session is created in addition to the existing two linked logon sessions.
To resolve this Windows issue:
1. In Local Group Policy Editor, locate the following Group Policy path:
Local Computer Policy\Windows Settings\Security Settings\Local Policies\Security Options
2. Configure the following policy to Prompt for consent: User Account Control: Behavior of the elevation prompt for administrators in Admin Approval Mode
Note:
The EnableLinkedConnections registry entry forces the symbolic links to be written to both linked logon sessions that are created, when UAC is enabled.