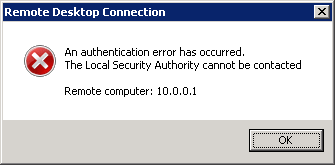
Are you facing Remote Desktop error "An authentication error has occurred: The Local Security Authority cannot be contacted" ?
This guide is for you.
As part of our Server Management Services here at Ibmi Media, we regularly help our Customers to fix Windows related errors.
In this context, we shall look at the causes of this error and how to tackle it.
What triggers the Remote Desktop error "An authentication error has occurred: The Local Security Authority cannot be contacted" ?
Before moving into the solution for "RDP authentication error: Cannot contact the local security administrator" we can see the different causes for this error.
i. This error can be due to network congestion that prevents secure connections to the Remote Desktop Server.
ii. An Error message appears if the Remote Desktop Server is configured for secure connections using TLS and TLS on a client (source computer) trying to connect using Remote Desktop Protocol (RDP).
iii. DNS addresses may be wrongly configured.
iv. Remote Desktop connections may be disabled by default on either the host or the client PC.
v. IP and DNS address conflicts.
The Three types of secure connections used for RDP
Remote Desktop in Windows Server includes three types of secure connections, they are:
i. Negotiate
This security method uses TLS 1.0 for server authentication if TLS is supported.
If TLS is not supported, the server is not authenticated.
ii. RDP security level
Uses Remote Desktop Protocol encryption to ensure secure communication between the client computer and the server.
If this option is selected, the server was not authenticated.
iii. SSL (Secure Sockets Layer)
Requires TLS 1.0 for server authentication.
If TLS is not supported, we cannot connect to the server.
Different ways to fix Remote Desktop error "An authentication error has occured: The Local Security Authority cannot be contacted" ?
The following are some of the methods which our Support engineers use to fix this error easily.
1. Change the Remote Desktop Security level.
We can change the Remote Desktop Security level on Remote Desktop Server to the RDP security level to allow secure connection using Remote Desktop Protocol encryption.
Steps to follow are given below:
i. First take Administration Tools and then move to Remote Desktop Session Host Configuration.
ii. Then in the RD Session Host Configuration view the Connections section.
iii. After that Right-click the Microsoft RDP 6.1 RDP Listener and select Properties.
iv. From Properties select the RDP security level as the security level.
v. Consequently click OK.
This setting does not require restarting the Server or Remote Desktop service.
2. Disabling or Restricting Authentication.
This can be done in two ways as given below:
a) When there is direct/local access to the machine we are trying to connect to.
i. First open the cmd and type sysdm.cpl {enter} > Remote.
ii. Next remove the tick from “Allow connections only from computers running Remote Desktop with Network Level Authentication” and Allow remote connections to this computer.
iii. Apply the changes.
b) When we do not have direct/local access to the machine we are trying to connect to.
i. First take Connect Network Registry and provide the details for the machine we are trying to connect to then click OK.
ii. After change UserAuthentication value to 1 (one) and click OK
3. Disable RDP Network Level Authentication via Group Policy
The steps to follow are:
i. First take Group Policy Management then either create a new group policy object or edit an existing one.
ii. Go to the Computer Configuration and take Security from Remote Desktop Session Host.
iii. After that locate the ‘Require user authentication for remote connections by using Network Level Authentication’ policy.
iv. Next disable the policy and then apply the changes
v. Finally, give OK.
4. Change the DNS Address
The steps our Support Techs follow are given below:
i. First open the command prompt and type ‘ncpa.cpl’ to open the Internet Connection Settings item in Control Panel.
ii. After that take the Active Network adapter and go to properties.
iii. Locate the Internet Protocol Version 4 (TCP/IPv4) item on the list. Click the Properties button below.
iv. Set the Properties window to “Use the following DNS server addresses” if it was set to something else.
v. After that set the Preferred DNS server to be 8.8.8.8 and the Alternate DNS server to be 8.8.4.4.
vi. And enable the “Validate settings upon exit” option and click OK in order to apply the changes.
5. Enable Remote Connections in Group Policy Editor
We can follow the steps below:
i. First open the command prompt and type“gpedit.msc” to open the Local Group Policy Editor tool.
ii. Then take the Local Group Policy Editor and go to Remote Desktop Session Host.
iii. After this we have to enable “Allow users to connect remotely by using Remote Desktop Services” in Connections.
iv. Then apply the changes.
v. After that reboot the computer to save the changes.
6. Run a Helpful Command on the Host
This method is usually to fix any connectivity issues.
i. First Open a command prompt as administrator.
ii. Then type in the following command:
ipconfig/flushdns[Need urgent assistance in fixing RDP errors? We can help you with it.]
Conclusion
This article will guide you on the steps to take to fix #Windows Remote Desktop error (#RDP)"An authentication error has occured: The Local Security Authority cannot be contacted" by applying different approaches.
This article will guide you on the steps to take to fix #Windows Remote Desktop error (#RDP)"An authentication error has occured: The Local Security Authority cannot be contacted" by applying different approaches.