Are you trying to create a self-signed SSL certificate for Apache in CentOS 8?
This guide is for you.
Here at Ibmi Media, as part of our Server Management Services, we regularly help our Customers to perform SSL related tasks.
In this context, we shall look into the process to create an SSL Certificate.
Process to create a self-signed SSL certificate for Apache in CentOS 8 ?
Follow the steps below to create the SSL certificate.
1. Mod_SSL installation
First, we need to install mod_ssl, n Apache module that provides support for SSL encryption.
Here is the DNF command that we use to install the mod_ssl.
$ sudo dnf install mod_sslBecause of a packaging bug, we need to restart the Apache once so it properly generates the default SSL and key. Otherwise, it results into an error such as this;
'/etc/pki/tls/certs/localhost.crt' does not exist or is emptyTo enable mod_ssl module, execute the sommand below;
$ sudo systemctl restart httpd2. SSL certificate creation
Now we create the SSL key and certificate files with the OpenSSL command:
$ sudo openssl req -x509 -nodes -days 365 -newkey rsa:2048 -keyout /etc/pki/tls/private/apache-selfsigned.key -out /etc/pki/tls/certs/apache-selfsigned.crtAfter you enter the command, you will be redirected to a prompt where you can enter information about your website. Fill the details appropriately. The most important line is the one that asks for the Common Name. Here, you need to enter either the hostname you will use to access the server by or the public IP of the server. Also, make sure that this field will match what you will put into your browser's address bar to access the site.
This is how the full list of prompts look like.
Country Name (2 letter code) [XX]:US
State or Province Name (full name) []:Example
Locality Name (eg, city) [Default City]:Example
Organization Name (eg, company) [Default Company Ltd]:Example Inc
Organizational Unit Name (eg, section) []:Example Dept
Common Name (eg, your name or your server’s hostname) []:your_domain_or_ip
Email Address []:webmaster@example.com
Both of the files you created will be placed in the standard directory provided by CentOS for this purpose i.e. the /etc/pki/tls directory.
3. Configuring Apache to Use SSL
On CentOS, you can store new Apache configuration files into /etc/httpd/conf.d and they will be loaded the next time the Apache process is reloaded or restarted.
In case, if you already have the Apache set up then you just need to add the SSL to it. For that, copy the configuration lines that start with SSL, and switch the VirtualHost port from 80 to 443.
Open a new file in the /etc/httpd/conf.d directory:
$ sudo vi /etc/httpd/conf.d/your_domain_or_ip.confPaste the below code into it:
/etc/httpd/conf.d/your_domain_or_ip.conf<VirtualHost *:443>
ServerName your_domain_or_ip
DocumentRoot /var/www/ssl-test
SSLEngine on
SSLCertificateFile /etc/pki/tls/certs/apache-selfsigned.crt
SSLCertificateKeyFile /etc/pki/tls/private/apache-selfsigned.key
</VirtualHost>Make sure to update the ServerName. The remaining lines specify a DocumentRoot directory to serve files from, and the SSL options needed to point Apache to our newly-created certificate and key.
Now we create a DocumentRoot and put an HTML file in it just for testing purposes:
$ sudo mkdir /var/www/ssl-testNow, open a new index.html file with your text editor:
$ sudo vi /var/www/ssl-test/index.htmlPaste the following code into the blank file so that we can verify the configuration.
/var/www/ssl-test/index.html
<h1>it worked!</h1>
Save and close the file, then check your Apache configuration for syntax errors by typing:
$ sudo apachectl configtestAs a result, you might see some warnings. But if the output ends with a Syntax OK, then you are safe to continue. However, if the output doesn’t end with OK then check for the syntax of your files and try again.
When all is well, reload Apache so that the configuration changes reflect:
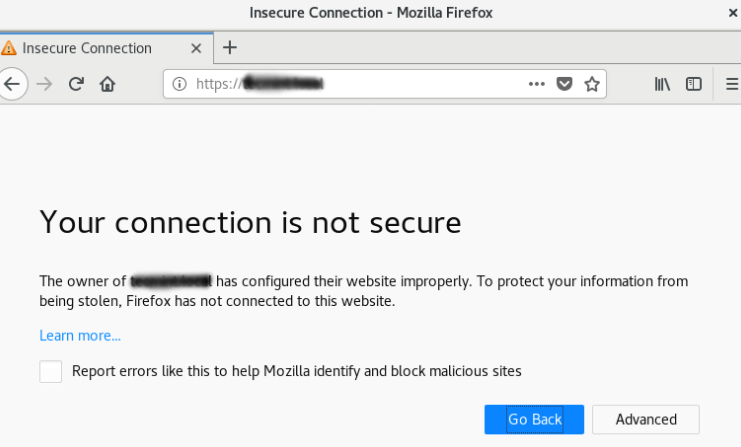
$ sudo systemctl reload httpdFinally, load your site in the browser using https:// in the beginning.
This is completely normal as we have used a self-signed certificate as it is not signed by any of the browser’s known certificate authorities. But for testing purpose and for personal use this can be fine.
To proceed to your website, click on the ‘Advanced’ or more information and choose to proceed.
4. Redirecting HTTP to HTTPS
Currently, our configuration will only respond to HTTPS requests on port 443. However, it would be good if it responds to port 80 as well if you want to force all traffic to be encrypted.
Now let's set up a VirtualHost to respond to these unencrypted requests and redirect them to HTTPS.
Open the Apache configuration file:
$ sudo vi /etc/httpd/conf.d/your_domain_or_ip.confAt the bottom, create another VirtualHost block to match requests on port 80 as below:
/etc/httpd/conf.d/your_domain_or_ip.conf<VirtualHost *:80>
ServerName your_domain_or_ip
Redirect / https://your_domain_or_ip/
</VirtualHost>Save and close this file. Now, test your configuration syntax again, and reload Apache:
$ sudo apachectl configtest
$ sudo systemctl reload httpd
You can now test the redirect by accessing the website with plain http:// in front of the address. You must be redirected to https:// automatically.
[Need urgent assistance with SSL queries? – We are here to help you.]
Conclusion
This article will guide you on how to configure #Apache to serve encrypted requests using a self-signed SSL certificate and to redirect unencrypted HTTP requests to #HTTPS. Self-signed #certificates or certificates issued by a private CAs are not appropriate for use with the general public. It can only properly verify the identity of the server when it is signed by a trusted third party because any attacker can create a self-signed certificate and launch a man-in-the-middle attack.
This article will guide you on how to configure #Apache to serve encrypted requests using a self-signed SSL certificate and to redirect unencrypted HTTP requests to #HTTPS. Self-signed #certificates or certificates issued by a private CAs are not appropriate for use with the general public. It can only properly verify the identity of the server when it is signed by a trusted third party because any attacker can create a self-signed certificate and launch a man-in-the-middle attack.


