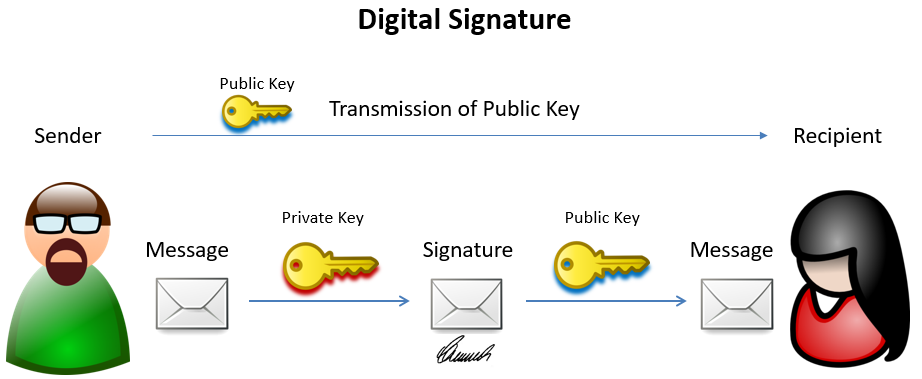
Are you trying to find Digitally Signed Files with PowerShell?
This guide is for you.
When there are many new files that are digitally signed with a certificate, we will at times need to check the status of the Digital Signatures of these files.
For this, we can use, the PowerShell ‘Get-AuthenticodeSignature’ cmdlet.
To use PowerShell, enter powershell at a command line prompt. Once you get the PowerShell prompt, which begins with PS , you can enter Get-AuthenticodeSignature followed by the name of the file whose signature you wish to check.
Here at Ibmi Media, as part of our Server Management Services, we regularly help our Customers to use PowerShell for reporting on Digitally Signed files.
Checking properties of Digitally Signed Files with PowerShell
These Cmdlets will examine a file and show the properties of the Digital Certificate on a file.
Here is an example of it:
PS C:\> Get-AuthenticodeSignature -FilePath C:\windows\notepad.exe
Directory: C:\windows
SignerCertificate Status Path
----------------- ------ ----
AE9C1AE54763822EEC42474983D8B635116C8452 Valid notepad.exe
A quick glance shows us the file has a valid digital signature.
For checking more details, we can pipe the results into Format-List using the following:
C:\> Get-AuthenticodeSignature -FilePath C:\windows\notepad.exe | Format-ListIt is possible to take a list of files, pipe them in to see their status using the following:
C:\> get-childitem c:\windows\*.exe | Get-AuthenticodeSignatureHowever, the Cmdlet has a particular format.
If we try to take this information and export it as a list to a CSV to report on a list of files, it will not give a clear result.
First, we will see the exposed ones using Get-Member using the following command:
C:\> get-childitem c:\windows\*.exe | Get-AuthenticodeSignature | Get-MemberWe can run the Get-AuthenticodeSignature and take only the correct ones and output them to a CSV file we can use the following:
Get-ChildItem c:\windows\notepad*.exe | Get-AuthenticodeSignature | ` Select-Object -Property Path,ISOSBinary,SignatureType,Status,StatusMessage | ` Export-CSV C:\report\Signature.csv -NoTypeInformationThis will provide a more clear result.
We can see the properties *IN* that X509Certificate2 object by using the following:
Get-ChildItem c:\windows\notepad*.exe | Get-AuthenticodeSignature | ` Select-Object -ExpandProperty SignerCertificate | Get-Member -MemberType PropertiesTo obtain a property such as the SerialNumber, we will use a feature of Select-Object called a “Calculated Property”.
Get-ChildItem C:\Windows\notepad.exe | Get-AuthenticodeSignature | ` Select-Object -Property @{Name=’SignerSerialNumber’;Expression={($_.SignerCertificate.SerialNumber)}}Using this in PowerShell will produce the following result:
SignerSerialNumber —————— 33000001C422B2F79B793DACB20000000001C4For producing a Calculated Property for each of the individual items from the X509Certificate2 object we can use the following:
Get-ChildItem C:\Windows\notepad.exe | Get-AuthenticodeSignature | ` Select-object -Property Path, Status,StatusMessage,SignatureType, ` @{Name=’SubjectName’;Expression={($_.SignerCertificate.Subject)}}, ` @{Name=’SubjectIssuer’;Expression={($_.SignerCertificate.Issuer)}}, ` @{Name=’SubjectSerialNumber’;Expression={($_.SignerCertificate.SerialNumber)}}, ` @{Name=’SubjectNotBefore’;Expression={($_.SignerCertificate.NotBefore)}}, ` @{Name=’SubjectNotAfter’;Expression={($_.SignerCertificate.NotAfter)}}, ` @{Name=’SubjectThumbprint’;Expression={($_.SignerCertificate.ThumbPrint)}}, ` @{Name=’TimeStamperName’;Expression={($_.SignerCertificate.Subject)}}, ` @{Name=’TimeStamperIssuer’;Expression={($_.SignerCertificate.Issuer)}}, ` @{Name=’TimeStamperSerialNumber’;Expression={($_.SignerCertificate.SerialNumber)}}, ` @{Name=’TimeStamperNotBefore’;Expression={($_.SignerCertificate.NotBefore)}}, ` @{Name=’TimeStamperNotAfter’;Expression={($_.SignerCertificate.NotAfter)}}, ` @{Name=’TimeStamperThumbprint’;Expression={($_.SignerCertificate.ThumbPrint)}}With this, we now have an object that would export directly to a CSV.
We can also write a function corresponding to this as given below:
Function Expand-AuthenticodeSignature($AuthenticodeSignature) { $AuthenticodeSignature | Select-object -Property Path, ` Status,StatusMessage,SignatureType, ` @{Name=’SubjectName’;Expression={($_.SignerCertificate.Subject)}}, ` @{Name=’SubjectIssuer’;Expression={($_.SignerCertificate.Issuer)}}, ` @{Name=’SubjectSerialNumber’;Expression={($_.SignerCertificate.SerialNumber)}}, ` @{Name=’SubjectNotBefore’;Expression={($_.SignerCertificate.NotBefore)}}, ` @{Name=’SubjectNotAfter’;Expression={($_.SignerCertificate.NotAfter)}}, ` @{Name=’SubjectThumbprint’;Expression={($_.SignerCertificate.ThumbPrint)}}, ` @{Name=’TimeStamperName’;Expression={($_.SignerCertificate.Subject)}}, ` @{Name=’TimeStamperIssuer’;Expression={($_.SignerCertificate.Issuer)}}, ` @{Name=’TimeStamperSerialNumber’;Expression={($_.SignerCertificate.SerialNumber)}}, ` @{Name=’TimeStamperNotBefore’;Expression={($_.SignerCertificate.NotBefore)}}, ` @{Name=’TimeStamperNotAfter’;Expression={($_.SignerCertificate.NotAfter)}}, ` @{Name=’TimeStamperThumbprint’;Expression={($_.SignerCertificate.ThumbPrint)}}}Now that we have the data in a more consumable and exportable form. We can get a list of files with their Digital Certificate status using the following:
$List=Get-ChildItem C:\Windows\*.exe | Get-AuthenticodeSignatureAfter that, we can produce the new output in a script with our function and Export it directly to a CSV file.
Expand-AuthenticodeSignature -AuthenticodeSignature $List | Export-Csv C:\report\working.csv[Need urgent PowerShell assistance? We are happy to help you! ]
Conclusion
This article will guide you on how to implement reporting on digitally signed files with PowerShell.
Get-Command gets the commands from PowerShell modules and commands that were imported from other sessions.
To get only commands that have been imported into the current session, use the ListImported parameter.
Without parameters, Get-Command gets all of the cmdlets, functions, and aliases installed on the computer.


