
Install CloudPanel Control Panel on Debian 10 - Step by Step Process ?
This article covers how to Install CloudPanel Control Panel on Debian 10. With Cloud panel, you can manage MySQL, NGINX, PHP-FPM, Redis, Domain, FTP, User management, and many more from the web-based interface.
It supports all major cloud providers including, AWS, Google, Digital Ocean, and specially designed for high performance with minimal resource usage.
It also offers a CLI tool that helps you to perform several operations including, database backup, password reset, permissions, and more.
To Install CloudPanel on Debian Linux:
1. You can download it with the following command:
# curl -sSL https://installer.cloudpanel.io/ce/v1/install.sh -o cloudpanel_installer.sh
2. Once the script is downloaded, set proper permission to the downloaded script with the following command:
# chmod +x cloudpanel_installer.sh
3. Next, run the script using the following command:
$ ./cloudpanel_installer.sh
Main Features of CloudPanel as listed in the official project website are:
1. It is open source and free to use
2. It provides a powerful intuitive interface for management
3. It is secure – provision of free SSL/TLS certificates
4. Designed for high Performance with minimal resource usage
5. It supports all major clouds – AWS, Digital Ocean, GCP, e.t.c
6. CloudPanel is available in more than ten languages, making it easy to install in any region

Graphs not recording for ICMP and ping checks - Fix it Now ?
This article covers method to fix Nagios error, Graphs not recording for ICMP and ping checks.
This problem happens after upgrading to Nagios XI 2014.
Solution to Nagios XI ICMP and Ping Checks Stopped Graphing:
1. First a Perl package needs to be installed using one of the commands below:
$ apt-get install -y librrd-simple-perl
2. Download and unzip the required files:
cd /tmp
wget https://assets.nagios.com/downloads/nagiosxi/scripts/rrd_ds_fix.zip
unzip rrd_ds_fix.zip
3. To run the script with RRD backups:
./fix_ds_quantity.sh -d /usr/local/nagios/share/perfdata/
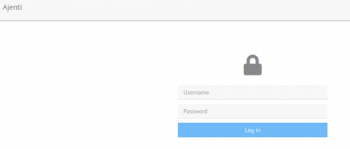
Install Ajenti Control Panel on Ubuntu 20.04 - Step by Step Process ?
This article covers step by step procedure to install Ajenti Control Panel on Ubuntu 20.04 for our customers.
Ajenti is a free to use and open source Server management and configuration Panel written in Python, JavaScript, and AngularJS. It provides a web dashboard for administration as opposed to command line management.
With this tool you can manage websites, DNS, Cron, Firewall, Files, Logs, Mail hosting services and so on.
The Ajenti Project consists of Ajenti Core and set of stock plugins forming the Ajenti Panel.
1. Ajenti Core: Web interface development framework which includes a web server, IoC container, a simplistic web framework and set of core components aiding in client-server communications.
2. Ajenti Panel: Consists of plugins developed for the Ajenti Core and a startup script, together providing a server administration panel experience.
To Install Ajenti Control Panel on Ubuntu 20.04:
1. Update and upgrade your Ubuntu machine.
$ sudo apt update
$ sudo apt dist-upgrade
2. If the upgrade is completed reboot the system before initiating installation of Ajenti on Ubuntu 20.04.
$ sudo systemctl reboot
3. There is a script provided for the installation of Ajenti control panel on Ubuntu 20.04. First download the script with curl.
$ curl -O https://raw.githubusercontent.com/ajenti/ajenti/master/scripts/install.sh
4. Run the installer script with sudo command.
$ sudo bash ./install.sh

PrestaShop back office error 500 or blank page - Fix it Now ?
This article covers methods to resolve PrestaShop back office error 500.
The error happens when the Back-office is accessed only from Debug mode activated or in production mode activated. The characteristic of this error is that it only occurs in one of the modes and not in both.
Also, this is an error that is occurring ONLY IN PRESTASHOP STORES VERSION 1.7, and that makes it impossible for us to enter the Back-office, showing an error 500 or the page goes blank.
That's why we call it a critical mistake, for leaving the store inoperative.
To fix a HTTP 500 error on PrestaShop online store website:
You can activate your web host's FTP or CPanel error reports in your PrestaShop shop.
1. From PrestaShop v1.4 to v1.5.2
i. Open config/config.inc.php
ii. On line 29, you will find this line: @ini_set('display_errors','off');
iii. Replace it with: @ini_set('display_errors','on');
2. PrestaShop v1.5.3 and later versions (including 1.6 and 1.7)
i. Open config/defines.inc.php
ii. On line 28, you will find this line: define('_PS_MODE_DEV_', false);
iii. Replace it with: define('_PS_MODE_DEV_', true);
Once error reports from the FTP or CPanel are activated, you can browse your store's front or back office to find out what the problem is.
More about Server error 500:
Error 500 means Internal server Error. Whenever a 500 error occurs, the task to return information by the server to the web browser will stop.
Therefore, as we mentioned above, this is a critical error that would leave the website inoperative.
The 500 errors, as we noted above, are internal server errors and their origin may be in a programming code error on any item that is included and related to the request for information returned by the server to the web browser.
Therefore, not all 500 errors come from the same source.
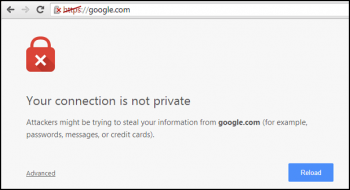
WordPress error "Your Connection Is Not Private" - Fix it Now ?
As a result of the SSL connection, sensitive information is protected from being stolen while being transferred between the server and the browser, which is one step in hardening your WordPress security
"Your Connection Is Not Private Error" message means that Google Chrome is preventing you from visiting your site because it is untrusted.
Ultimately, the chrome browser prevents you from gaining access to your website because the SSL certificates cannot be validated.
Typically, the "connection is not private" error in google chrome originates from issues from the side of the client, or from problems with the site's certificate.
To Fix Your Connection Is Not Private WordPress Error:
1. Reload the page
2. Check your network connection
3. Set time and date on your computer
4. Try browser's incognito mode
5. Clear your Browser Cookies, Cache, and History
6. Disable Antivirus Temporarily
7. Update your Operating System
8. Restart your Computer
Rebooting your device will help clear out the temporary cache.
This could surely very well fix your issue.

Prestashop parse error – How to fix the syntax error ?
This article covers ways to resolve Prestashop parse error.
Basically, Prestashop parse error happens when we install Prestashop 1.7 or above or accessing the admin panel of the store.
To fix this error:
1. You can start with emptying your cache by deleting the /var/cache directory.
If that doesn't work copy lines 28-30 from another shop and save it.
2. Also you can try to remove the following:
# php -- BEGIN cPanel-generated handler, do not edit
# Set the “ea-php72” package as the default “PHP” programming language.
<IfModule mime_module>
  AddHandler application/x-httpd-ea-php72 .php .php7 .phtml
</IfModule>
# php -- END cPanel-generated handler, do not edit
From end of .htaccess.
Just to be sure if that is not source of issues.


