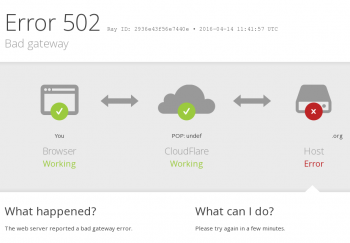
Cloudflare 502 error - Fix it Now ?
This article covers methods to resolve Cloudflare 502 error. Basically, the Cloudflare 502 error triggers when the origin web server responds with a standard HTTP 502 bad gateway or 504 gateway timeout error.
This happens due to firewall restrictions and server resource issues.
Cause of 502 Bad Gateway Errors:
1. Domain name not resolvable
The domain name is not pointing to the correct IP or it does not point to any IP this problem may happen. Also, DNS propagation could take some time to make changes in DNS setting. It may take 24 to 48 hours to make reflect which is dependent upon the TTL defined per record on the DNS.
2. server down
The origin server is not reachable, this may due to the server is down for some reason or there is no communication to the server given.
3. Firewall blocks
A firewall interrupts the communication between the edge servers and the origin server. This may be caused by security plugins of your CMS.
As a part of DDOS protection and mitigation process or due to some strict firewall rules servers can be blocked from accessing the original server.
Nginx upstream timed out error - Fix it Now ?
This article covers methods to resolve Nginx upstream timed out error. Basically, this error happens as a result of server resource usage and software timeouts.
A possible issue here could be that PHP is using too much RAM and the PHP FPM process gets killed.
Therefore, do the following to fix this nginx error:
1. Make sure that there is enough RAM on the server, to check that you could use the top, htop or free -m commands.
2. Make sure that the PHP memory limit is not too high compared to the actual available memory on the Droplet.
For example if you have 1GB of RAM available your PHP memory limit should not be more than 64MB otherwise only a few processes could consume all of your memory.
3. Optimize your website by installing a good caching plugin, that way you would reduce the overall resource usage on the server.
4. Delete any plugins that are not being used. Generally speaking, it is always recommended to try and keep the number of your plugins as low as possible.
5. Consider using a CDN like Cloudflare, that way it would offload some of the heavy liftings from your Droplet.
Nagios error Unable To Login Using Two Factor Authentication
This article covers how to resolve Two Factor Authentication error in Nagios.
To Reset nagiosadmin account Password:
1. Open an SSH or direct console session to your Nagios XI host and execute the following command:
/usr/local/nagiosxi/scripts/reset_nagiosadmin_password.php --password=newpassword
Note: If you would like to use special characters in your password, you should escape them with "\".
For example, if you want to set your new password to be "$new password#", then you can run:
/usr/local/nagiosxi/scripts/reset_nagiosadmin_password.php --password=\$new\ password\#
WordPress error "Sorry this file type is not permitted for security reasons" - Fix it Now ?
This article covers methods to resolve WordPress error "Sorry this file type is not permitted for security reasons". Basically, "Sorry this file type is not permitted for security reasons" in WordPress occurs when we try to upload a document to the WordPress library.
As we explained above, WordPress default configuration limits the types of files that you can upload to your site for security reasons.
To Fix "Sorry, This File Type Is Not Permitted for Security Reasons" Error in WordPress, Try to Use the Free WP Extra File Types Plugin:
1. If you'd prefer not to edit your wp-config.php file and/or you want more control over exactly which file types can be uploaded to your site, you can use the free WP Extra File Types plugin at WordPress.org
2. Once you install and activate the plugin, go to Settings → Extra File Types in your WordPress dashboard.
3. There, you'll see a lengthy list of file types. Check the box next to the file type(s) that you want to be able to upload and then click Save Changes at the bottom.
4. If you don't see the file type that you'd like to upload on the list, you can also add your own custom file types at the bottom of the plugin's settings list.
SNMP MIB Upload Problems in Nagios – Fix it Now ?
This article covers Nagios SNMP MIB Upload Problems.
This issue happens while uploading SNMP MIB files and it could be as a result of insufficient permissions on the SNMP MIB files.
Execute the following commands to reset the permissions and ownership on the Nagios SNMP MIB files:
# chmod -R ug+rw /usr/share/snmp/mibs
# chown -R root:nagios /usr/share/snmp/mibs
After executing those commands you should be able to upload the MIB file that previously did not work.
SNMPTT Service generates Cannot find module errors in Nagios
This article covers methods to fix "Cannot find module" errors in Nagios.
Basically, SNMPTT Service generates "Cannot find module" errors in Nagios when a MIB file contains spaces in the filename.
The MIB files are located in the /usr/share/snmp/mibs/ folder.
This was identified as an issue and resolved in Nagios XI 5.4.0. As of version 5.4.0, when you upload MIBs via the Manage MIBs page the filename will have any spaces replaced with an underscore.


