
dhclient to persistently look for an IP address lease - Configure it Now
This article covers how to use dhclient command. Basically, Linux dhclient command can provide an IP lease until DHCP Server/Router grants one.
With this guide, you can easily configure Linux dhclient command to continuously requests an IP lease until one is granted by DHCP Server / Router.

DHCP Client Error mv cannot move - Fix this error now
This article covers how to fix DHCP Client Error: mv cannot move. This DHCP error indicate that dhclient (Dynamic Host Configuration Protocol Client) is not able to update your name resolution configuration file /etc/resolv.conf.
To fix this DHCP error:
1. Run dhclient as root user
Use sudo command to run dhclient, enter:
$ sudo dhclient eth0
2. Make sure /etc/resolv.conf is not write protected
Use lsattr, command to view file attributes:
$ lsattr /etc/resolv.conf
Clear i attribute, enter:
$ sudo chattr -i /etc/resolv.conf
3. Now run dhclient again to update file and to obtained new IP address.

Create CentOS Fedora RHEL VM Template on KVM - How to do it
This article covers how to create CentOS/Fedora/RHEL VM Templates on KVM. VM Templates are more useful when deploying high numbers of similar VMs that require consistency across deployments. If something goes wrong in an instance created from the Template, you can clone a fresh VM from the template with minimal effort.
To install KVM in your Linux system:
The KVM service (libvirtd) should be running and enabled to start at boot.
$ sudo systemctl start libvirtd
$ sudo systemctl enable libvirtd
Enable vhost-net kernel module on Ubuntu/Debian.
$ sudo modprobe vhost_net
# echo vhost_net | sudo tee -a /etc/modules
How to Prepare CentOS / Fedora / RHEL VM template ?
1. Update system
After you finish VM installation, login to the instance and update all system packages to the latest versions.
$ sudo yum -y update
2. Install standard basic packages missing:
$ sudo yum install -y epel-release vim bash-completion wget curl telnet net-tools unzip lvm2
3. Install acpid and cloud-init packages.
$ sudo yum -y install acpid cloud-init cloud-utils-growpart
$ sudo sudo systemctl enable --now acpid
4. Disable the zeroconf route
$ echo "NOZEROCONF=yes" | sudo tee -a /etc/sysconfig/network
5. Configure GRUB_CMDLINE_LINUX – For Openstack usage.
If you plan on exporting template to Openstack Glance image service, edit the /etc/default/grub file and configure the GRUB_CMDLINE_LINUX option. Your line should look like below – remove rhgb quiet and add console=tty0 console=ttyS0,115200n8.
GRUB_CMDLINE_LINUX="crashkernel=auto rd.lvm.lv=cl/root rd.lvm.lv=cl/swap console=tty0 console=ttyS0,115200n8"
Generate grub configuration.
$ sudo grub2-mkconfig -o /boot/grub2/grub.cfg
6. Install other packages you need on your baseline template.
7. When done, power off the virtual machine.
How to Clean VM template ?
You need virt-sysprep tool for cleaning the instance.
$ sudo virt-sysprep -d centos7
Add Compute Host to oVirt Virtualization - How to do it
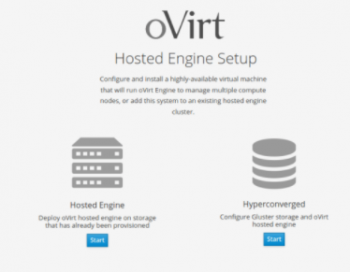
This article covers oVirt Virtualization and how to add Compute Host to oVirt Virtualization. oVirt is a free and open-source distributed virtualization solution that can be used to manage your entire infrastructure.
oVirt allows you to manage virtual machines, compute, storage and networking resources from the web-based interface. It uses KVM hypervisor and built upon several other community projects, including libvirt, Gluster, PatternFly, and Ansible.
To Add Compute Host to oVirt:
1. Validate oVirt Engine installation by logging into the console.
2. Navigate to Compute > Hosts > New and fill all required information.
3. Modify other settings in the left panel as you see fit and click "OK" button to provision the node.
4. The Status should change to Installing and will finish in few minutes.
To Configure Host Networking:
1. If you want to add additional networks – extra bridges with VLANs e.t.c, this can be done once the host is added.
2. First create a Logical Network on Network > New. Give Virtual Network correct details. For VLAN ID check "Enable VLAN tagging".
3. With the Host added and active you can configure its networking under Network Interfaces > Setup Host Networks.
4. Assign the Logical network to an interface.
5. Drag Virtual Network for mapping to host interface.
6. Configure IP addressing if required.
7. Once saved and successful it should turn green.
8. You can then proceed to create virtual machines using oVirt Management interface.
Icons images and javascript files missing from frontend in Magento - Fix it now
This article covers methods to resolve Magento error related to with icons, images, and javascript files missing from frontend. Basically, icons, images, and javascript files might not appear if we use the wrong Magento update command to upgrade the version.
If you are in production mode, and are running setup:upgrade and you don't want regenerate static content because there is no need to, then you can use the following:
php bin/magento setup:upgrade --keep-generated--keep-generated is an optional argument that does not update static view files.
It should be used only in production mode.
It should not be used in developer mode.
Solutions for the issue where stylesheets and images do not load after installing Magento ?
The following are possible solutions depending on the software you use and the cause of the problem:
If you are using the Apache web server, verify your server rewrites setting and your Magento server's base URL and try again. If you set up the Apache AllowOverride directive incorrectly, the static files are not served from the correct location.
If you are using the nginx web server, be sure to configure a virtual host file. The nginx virtual host file must meet the following criteria:
The include directive must point to the sample nginx configuration file in your Magento installation directory. For example:
include /var/www/html/magento2/nginx.conf.sample;
The server_name directive must match the base URL you specified when installing Magento. For example:
server_name ip_address;
If the Magento application is in production mode, try deploying static view files using the command magento setup:static-content:deploy.

PHP Handlers for your Server - Which is suitable
This article covers the pros and cons of different PHP Handlers. Basically, selecting the proper PHP handler plays a major role in the server's stability and performance.
Apache does not natively support PHP scripts without a special module. The module that tells Apache how to handle PHP scripts is referred to as a PHP handler.
Without a properly configured module, Apache will just send you the PHP file as a download since it doesn't know what else to do.
How does each PHP handler work and what are the pros and cons :
1. DSO/Apache Module
This is also referred to as mod_php. This module allows Apache itself to directly parse and display PHP files. PHP scripts parsed by mod_php run as the same user that Apache itself does (rather than the user account that hosts the PHP files.
Pros
i. One of the fastest handlers available.
ii. Works with mod_ruid2 or mpm_itk modules.
Cons
i. Only works with a single version of PHP on cPanel servers (you'll need to use other handers for other versions of PHP if you offer them).
ii. Scripts run as the Apache user rather than the owner of the domain or subdomain. For example, on a cPanel server, if the script creates a file or directory, that file will be owned by the user "nobody" which can cause problems when the account owner goes to backup or remove them.
2. CGI
Stands for Common Gateway Interface. Using this handler, the system will run PHP scripts as the user that owns the domain or subdomain.
Pros
Scripts run as the domain or subdomain user, not as the Apache user.
Cons
i. One of the slowest handers.
ii. Doesn't work well with PHP opcode caching.
iii. Cannot put PHP configuration changes in an .htaccess file.
3. FCGI/FastCGI
FastCGI is a variation of the CGI protocol that provides a number of benefits over the older CGI handler. Using this module, the system will run PHP scripts as the user that owns the domain or subdomain. There are some differences between mod_fastcgi and mod_fcgid, but none that are relevant to the scope of this article.
Pros
i. Scripts run as the domain or subdomain user, not as the Apache user.
ii. Very fast handler.
iii. Works with PHP opcode caching.
Cons
i. This handler uses more memory than most of the others.
ii. Cannot put PHP configuration changes in an .htaccess file.
4. PHP-FPM
FPM stands for FastCGI Process Manager. It is an improved way of implementing FastCGI processing of PHP. Using this handler, the system will run PHP scripts as the user that owns the domain or subdomain. Each FPM pool can have independent settings.
Pros
i. Scripts run as the domain or subdomain user, not as the Apache user.
ii. One of the fastest PHP handlers.
iii. Works with PHP opcode caching.
iv. Allows for some additional level of flexibility per pool.
Cons
i. This handler can use more memory than any other handler listed here, but that depends on the number of sites using PHP-FPM and the configuration of the FPM pool.
ii. Can be somewhat more complicated to manage.
iii. Cannot put PHP configuration changes in an .htaccess file and some directives can only be changed on a global level.
5. suPHP
This handler was specifically designed to serve PHP scripts as the owner of the domain or subdomain that is executing the PHP script. On cPanel servers, it is also configured to disallow execution of files with unsafe permissions. cPanel their copy of suPHP with the latest security fixes.
Pros
i. Scripts run as the domain or subdomain user, not as the Apache user.
ii. cPanel configures suPHP so that it blocks accessing or executing any files or directories with permissions higher than 755 for security.
Cons
i. Slowest PHP handler in most cases.
ii. PHP Opcode caching has no performance improvement and only wastes memory.
iii. Cannot put PHP configuration changes in an .htaccess file.
6. LSAPI
This handler implements the LiteSpeed Web Server (LSWS) SAPI. This handler requires CloudLiunx or LSWS for the maximum benefits. Using this handler, the system will run PHP scripts as the user that owns the domain or subdomain.
Pros
i. Designed to perform as well or better than PHP-FPM under certain circumstance.
ii. Less memory use than most other handlers.
iii. Scripts run as the domain or subdomain user, not as the Apache user.
iv. No special configuration required.
v. Can read PHP values out of a .htaccess file.
Cons
i. You don't get full benefits without purchasing a third-party commercial product.
ii. Not compatible with mod_ruid2 or mpm_itk (but it shouldn't need them).


