This guide will show you exactly how to make Azure File Storage a backup disk on Windows Server. AFS also known as Azure File Storage is used by many organizations out there as a backup storage system for files, data or running Amazon S3.
Here at IbmiMedia, We can help you do the setup of Azure file storage for your backups as part of our Server Support Services.
How to go about setting up Azure File Storage to server as a backup disk?
Having backups in Azure can be an amazing solution for storing your files and Data securely. This is true as it provides more flexibility and restoration capabilities.
To set up Azure for Storage of Files as a backup disk on Windows Server, you need to follow the steps below;
i. To begin, create a storage.
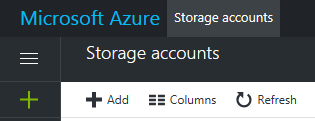
ii. Next, Log into your Azure Portal where you should click on "Storage Accounts" on the menu. From here click on "+Add" button to add a storage account.
iii. As soon as a Storage account is created, double click on the Storage and get the Access keys.
iv. Do a mapping of the storage as a local disk. To do this, use the cmd tool and enter the following command to enable you map the storage to a local disk on Windows Server.
net use X: \\xxxStorageName.file.core.windows.net\xxxFileFolder /u:xxxStorageName xxxKey
Anytime you want to disconnect the disk, you can simply use the command below;
net use X: /delete
v. A .bat file should be created and placed into a Task Scheduler. For instance, if you need to copy logs file from a particular folder on a different disk to the Storage disk, you can simply create a .bat file with name "copylogs.bat " and input the following attributes;
@echo offcopy D:\weekly\*.log X:\weeklydel D:\weekly\*.log
vi. Next, you can create a Task Scheduler programmed to run this .bat file at 3 AM Weekly.
vii. To end, the data or files should be saved on the cloud. This will provide Data loss security in cases when your server is damaged.
Need Support in setting up File Storage as a backup disk? We are available.
Conclusion
Steps to create a backup storage in Azure.
Steps to create a backup storage in Azure.


