Are you looking for guidiance on how to install TigerVNC server CentOS 7? This guide will help you out.
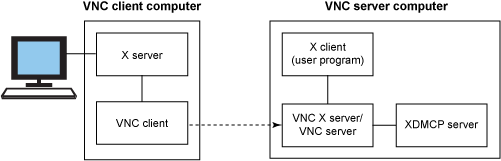
TigerVNC is open-source software based on Virtual Network Computing. It helps to launch and interact with graphical applications installed in a remote computer.
Here at Ibmi Media, as part of our Server Management Services, we regularly help our Customers to perform CentOS related Software installation tasks.
In this context, we shall look into the steps to install TigerVNC server CentOS 7.
More information about TigerVNC?
Basically, TigerVNC is a comprehensive piece of software aimed to provide both the client and server functions needed to establish a VNC connection efficiently on the same network.
Additionally, it is a high-speed version of VNC based on the RealVNC 4 and X.org codebases. It provides the better performance necessary to run 3D and video applications.
It also provides extensions for advanced authentication methods and TLS encryption.
How to install TigerVNC server on CentOS 7?
To get TigerVNC server installed, you need to follow the steps below;
Step 1: Install and Configure VNC Server in CentOS 7
Tigervnc-server is a program that executes an Xvnc server and starts parallel sessions of Gnome or other Desktop Environment on the VNC desktop.
1. Execute the below command to install the TigerVNC server in CentOS 7
sudo yum install tigervnc-server
2. After installing the program, log in with the user you want to run the VNC program. Then run the below command in the terminal so that you can configure a password for the VNC server;
su - your_user # If you want to configure the VNC server to run under this user directly from CLI without switching users from GUIvncpasswd
3. Next, add a VNC service configuration file for your user via a daemon configuration file placed in systemd directory tree. For that, run the below command;
cp /lib/systemd/system/vncserver@.service /etc/systemd/system/vncserver@:1.service
4. Then edit the copied VNC template configuration file from "/etc/systemd/system/" directory and replace the values to reflect your user as shown in the below example.
The value of 1 after @ sign represents the display number (port 5900+display). Also, for each started VNC server, the port 5900 will be incremented by 1. To do this, execute the command below;
vi /etc/systemd/system/vncserver@\:1.service
Now add the below to file "vncserver@:1.service".
[Unit]Description=Remote desktop service (VNC)After=syslog.target network.target
[Service]Type=forkingExecStartPre=/bin/sh -c '/usr/bin/vncserver -kill %i > /dev/null 2>&1 || :'ExecStart=/sbin/runuser -l my_user -c "/usr/bin/vncserver %i -geometry 1280x1024"PIDFile=/home/my_user/.vnc/%H%i.pidExecStop=/bin/sh -c '/usr/bin/vncserver -kill %i > /dev/null 2>&1 || :'
[Install]WantedBy=multi-user.target
5. After making changes to the VNC service file, reload systemd system initialization program to pick up the new VNC configuration file and start the TigerVNC server.
Also, make sure to check the VNC service status and enable the VNC daemon system-wide by running the below commands;
systemctl daemon-reloadsystemctl start vncserver@:1systemctl status vncserver@:1systemctl enable vncserver@:1
6. In order to list the opened ports that are in the listening state, run the ss command as shown below;
ss -tulpn| grep vnc
7. Then to allow external VNC clients to connect to the VNC server in CentOS, ensure that the proper VNC open ports are allowed to pass through your firewall.
firewall-cmd --add-port=5901/tcpfirewall-cmd --add-port=5901/tcp --permanent
Step 2: Connecting to CentOS Desktop via VNC Client
1. The remote Graphical User Interface VNC connections can be performed from almost any operating system with a GUI and a specialized VNC client as it is a platform-independent protocol.
A popular VNC client that is fully compatible with the Linux TigerVNC server, is the RealVNC VNC Viewer.
In order to remotely connect to CentOS Desktop from a Microsoft OS via VNC protocol, open the VNC Viewer program, add the IP address and port number of CentOS VNC server, and hit enter.
After establishing a VNC connection, a warning message appears saying that the connection is not encrypted.
2. In order to get rid of the warning hit the Continue button. Then add the password setup for the VNC server at point 2 and you should be remotely connected to CentOS Desktop with the user configured to run the VNC server instance.
3. If a new Authentication message appears on the screen and your user has no root privileges, just hit the Cancel button to continue to CentOS Desktop.
4. In order to remotely connect to CentOS Desktop via VNC protocol from other CentOS Desktop, first make sure that the vinagre package is installed on your system. If not, you can install it by running the following command;
sudo yum install vinagre
5. Then to open the vinagre utility, go to "Applications -> Utilities -> Remote Desktop Viewer".
6. To remotely connect to a CentOS Desktop, hit on the Connect button, select VNC protocol from the list and add the IP address and port (5900+display number) of the remote VNC server. Also, enter the password set up for the VNC user.
7. Another popular VNC client for Linux based platforms is Remmina. It is a remote desktop client that is used in Debian-based distributions that run the GNOME desktop environment.
Run the below command to install Remmina Remote Desktop client in Debian based distros.
sudo apt-get install remminaStep 3: Configure Multiple VNC Sessions in CentOS 7
1. In case, if you wish to run a new parallel VNC session under the same user, open a Terminal console, log in with the user you want to start the new VNC session, and run the following command;
vncserver
2. The new VNC sessions will open the next available VNC based ports. Then to display the open ports, execute the following ss command;
ss -tlpn| grep Xvnc
3. Now, remotely connect to CentOS Desktop using this new VNC session, supply the IP: port combination (192.168.1.20:5903) in VNC client
Then to stop the VNC server instances, run the following command;
su - your_userkillall Xvnc
This will destroy all started VNC instances owned only by the user who started them.
[Need additional support with CentOS related tasks? – We are available to help you today.]
Conclusion
This article will guide you on how to install TigerVNC server CentOS 7.
This article will guide you on how to install TigerVNC server CentOS 7.


