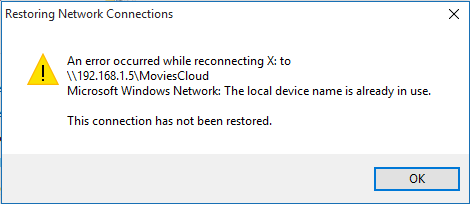
"The Local Device Name is Already in Use" error is generally experienced by users who work with network-based systems on a daily basis.
This error relates to network drive mapping.
Here at Ibmi Media, as part of our Server Management Services, we regularly help our Customers to fix network related issues.
What triggers Restoring Network Connections error "The Local Device Name is Already in Use" ?
This error is causes by different factors such as;
i. Drive mapping gone wrong:
The process of network drive mapping can sometimes produce problems like this one when it comes to drive letters.
ii. Unassigned drive letters:
Some drives may have incorrect or even missing drive letters which causes this error to appear.
iii. File and Printer Sharing is disabled:
Networking becomes difficult and full of errors if this option is disabled in the firewall we use.
iv. No space on the server:
Our support team found that we have to free up at least a couple of gigabytes on the root drive of the network’s server to get rid of the problem.
v. Registry Key:
The nuclear option – removing the associated registry key to the mapped drive and reloading the configuration can cause this error.
Ways to tackle "The Local Device Name is Already in Use" ?
To fix this network issue, simply follow the steps below;
Remap the Drive Using Command Prompt.
Remapping the network drive is the official solution recommended by Microsoft for users facing this problem. It has worked for many users and is one of the most used methods.
1. We search for “Command Prompt”, Right-click and select the “Run as administrator” option.
2. Users who are using an older version of Windows can use the Windows Logo Key + R key combination in order to bring up the Run dialog box.
3. Type in “cmd” in the box and use the Ctrl + Shift + Enter key combination in order to run Command Prompt as an administrator.
4. We give the bellow command and click Enter:
net use * /delete
5. After we see that the operation is a success, we run the following command:
net use Z: \\server\share /user:username password
6. We make sure to replace the username and password placeholders with the correct username and password.
How to Delete a Key in Registry?
If the method above has failed to work, we have to try deleting a certain registry key which might cause the problem. Users who struggle with certain CD/DVD and virtual drives were able to resolve the problem with this method.
i. Since we are going to delete a registry key, we recommend to safely backup the registry to prevent other problems.
ii. Still, nothing wrong will occur if we follow the steps carefully and correctly.
iii. Open the Registry Editor window by typing “regedit” in either the search bar, the Start menu, or the Run dialog box which can be accessed with the Windows Key + R key combination.
iv. Navigate to the following key in your registry by navigating at the left panel:
HKEY_CURRENT_USER\Software\Microsoft\Windows\CurrentVersion\Explorer
v. Click on this key and try to locate a key named MountPoints2 inside the Explorer key.
vi. Right-click on it, and choose the Delete option from the context menu.
vii. Confirm any dialog boxes which may show up.
viii. We check to see if the error message still appears after restarting computer.
How to Assign Drive Letters Properly?
We have clients who have seen a drive with no assigned drive letter in Disk Management which was mapped as the problematic drive letter during the networking process.
Additionally, if the drive in Disk Management has a different assigned letter than the one in network mapping, we should change it to something else.
We follow the steps below in order to do that:
1. To begin, we need to make sure that no files from the storage devices we want to edit are in use or open in any other way.
2. Next, we make sure not to copy or move anything from or to the disk before proceeding.
3. After that, we either use the Windows Key + X key combination or right-click on the Start menu and choose the Disk Management option in order to open its console.
4. Right-click the volume with the drive letter we want to change and choose the ‘Change Drive Letter’ and ‘Paths’.
5. After that, click on ‘Change’ and choose from a list of available drive letters.
6. We advise not to choose letters A or B because they are reserved for floppy drives on older operating systems.
7. Click on Apply and confirm any dialog boxes which may appear before closing the tool.
How to Enable File and Printer Sharing in Firewall?
When File and Printer Sharing is disabled in any firewall we use, problems occur with shared drives. If we are using a third-party firewall, we will have to locate the option manually.
However, the Windows Defender Firewall is turned on by default if there are no other firewalls installed. The step we follow is given below:
i. Start Control Panel by searching for the utility in the Start button or by clicking the Search button or the Cortana button at the left part of taskbar.
ii. Once open, change the view to Large or Small icons and navigate to the bottom in order to open the Windows Defender Firewall.
iii. Click on Windows Defender Firewall and click on the ‘Allow an app’ or ‘feature through Windows Firewall’ option from the left side list of options.
iv. A list of installed apps should open. We make sure to click the Change settings button at the top right part of the window and provide administrator permissions if needed.
v. Navigate to the File and Printer Sharing option and check the box right next to it before clicking OK and applying the changes.
vi. Click OK and restart computer before retrying to see if the error still appears.
How to Make Sure There is Enough Space on the Server?
This problem also occurs if there is no enough space on the server computer of the network we are a part of. We make sure to free enough space on the root drive of the server by deleting everything unnecessary.
There is no exact amount that needs to be freed, but we make sure to leave at least a couple of gigabytes available before checking if the problem is resolved.
How to go about Changing the value of ProtectionMode in Registry?
If none of the above methods work, we will attempt at changing the value of ‘ProtectionMode’ through the registry for Windows 10.
The ProtectionMode workaround is officially recognized by Microsoft itself and this error usually occurs in non-administrative users who are upgrading from an earlier version of Windows.
i. Press Windows + R, type “regedit” in the dialogue box, and press Enter.
ii. Once in the registry editor, navigate to the following path:
HKEY_LOCAL_MACHINE\System\CurrentControlSet\Control\SessionManager\iii. Search for the following key: ProtectionMode.
iv. Now, change the key from 0 to 1.
v. Save changes and exit.
vi. Restart computer and see if the issue is resolved for good.
If this workaround does not work, we manually try to delete the mappings by using the following command in an elevated command prompt:
net use * /del /y (sub the * for an actual drive letter.)How to go about Re-initializing Computer Browser?
In some cases, we observed that the computer's browser causes conflicts with certain elements of the operating system. In that case, we need to restart the Computer Browser.
[Need help to solve technical issues? We are are here for you.]
Conclusion
This article will guide you on how to tackle "The Local Device Name is Already in Use" which error occurs when attempting to access a network drive, generally a mapped drive.
This article will guide you on how to tackle "The Local Device Name is Already in Use" which error occurs when attempting to access a network drive, generally a mapped drive.


