When there is an improper RDP setting or local group policy security, an error such as Remote Desktop Connection: An Internal Error has Occurred will be triggered.
Here at Ibmi Media, as part of our Server Management Services, we regularly help our Customers to troubleshoot RDP connections related issues.
In this case, we shall look into the reasons why RDP client freezes with this error and how to fix it.
More about Remote Desktop Connection?
Remote desktop is a software program that allows you to connect to a different device and control it remotely, as if you were controlling it directly in person. Remote desktop programs are commonly used for IT support and maintenance, as they allow support staff to operate off-site, but they are also popular as a mobile office solution. While some remote desktop software, such as Windows Remote Desktop, only enable connections between devices running the same operating system, TeamViewer is fully cross compatible, giving you greater flexibility.
What triggers Remote Desktop Connection: An Internal Error has Occurred?
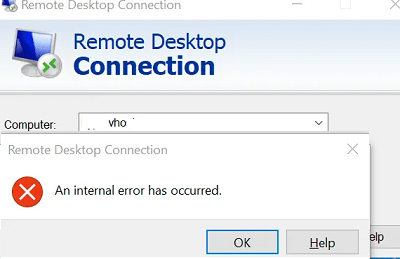
Sometimes, in the process of trying to establish connection via Remote Desktop Connection via a server running Windows Server 2012 R2 using RDP, you can come accross the following error;
An internal error has occurred.This issues might be as a result of of installation and configuration of RemoteApps.
The RDP console message "An internal error has occurred" may appear in different cases and the cause can be either Remote Desktop server or client issues.
The following factors can lead to Remote Desktop Connection error;
i. Connection settings:
For some users, their Remote Desktop Connection client settings can be a cause for this error.
ii. RDP Security:
In some cases, the error can appear due to the Security of the Remote Desktop Protocol. In this case, we have to change the security layer.
iii. Computer's domain:
Another possible reason can be the domain to which the system connects. In such a case, removing the domain and then joining it again will fix the issue.
Different tips employed to fix Remote Desktop Connection: An Internal Error has Occurred?
To begin, we should make sure that the RDP port 3389 accepts connection on the RDS server, and that the connection is not blocked by the firewall (Test-NetConnection your_rdp_server –port 3389).
For example, the Microsoft-Windows-RemoteDesktopServices-RdpCoreTS/Operational log once showed that it creates the RDP session:
The server accepts a new TCP connection from client (IP address):64379.Connection RDP-Tcp#4 createdHowever, the RDP session terminates the later without any error:
The server has terminated main RDP connection with the client.The disconnect reason is 0You need to check the status of the Remote Desktop Services on our remote server and restart the service.
We can do it remotely through the Services.msc console ("Connect to another computer" option), but it is easier to check a service status and restart it using PowerShell:
(Get-Service TermService -ComputerName ny-rds1).statusOnce the service is running, we restart it:
Get-Service TermService -ComputerName ny-rds1| Restart-Service –force –verboseLet us now see some more ways our Support Experts employed to fix, Remote Desktop Connection: An Internal Error has Occurred.
Here are some other ways to fix it
i. In the EventID 1057 in the TerminalServices-RemoteConnectionManager event log , go to the folder C:\ProgramData\Microsoft\Crypto\RSA, here, we rename the Machinekeys folder into Machinekeys_bak and restart the TermService.
ii. The RDP problem happen in Windows 10 1809 if the Configure H.264/AVC hardware encoding for Remote Desktop connections policy is enabled on the remote computer.It is located in the following GPO section: Computer Configuration -> Administrative Templates -> Windows Components -> Remote Desktop Services -> Remote Desktop Session Host -> Remote Session Environment.
iii. To solve the problem, we need to disable the UDP protocol for RDP by creating the fClientDisableUDP parameter with the value 1 in the registry key HKLM\SOFTWARE\Policies\Microsoft\Windows NT\Terminal Services\Client.
iv. If the error appears immediately after clicking connect, we have to try increasing the maximum outstanding RDP connections limit.On Windows 10 the SKUs by default is set to 100, but on Windows Server is 3000.
v. Run the regedit.exe and create the DWORD registry parameter MaxOutstandingConnections with the value 10000 in the reg key HKEY_LOCAL_MACHINE\SYSTEM\CurrentControlSet\Control\Terminal Server\.
vi. In the client machine, clear the RDP connection history in the registry key HKEY_CURRENT_USER\Software\Microsoft\TerminalServerClient\ServersOnce it is done, reset the RDP cache in C:\Users\%Username%\AppData\Local\Microsoft\Terminal Server Client\Cache. Prior to doing it, we have to close all running mstsc.exe sessions):
del “C:\Users\%Username%\AppData\Local\Microsoft\Terminal Server Client\cache”R
vii. Restart the computer.
Moving forward, our Support Experts found that there are various other possible ways to fix, "Remote Desktop Connection: An Internal Error has Occurred".
Now let us discuss it in detail.
Other methods to fix, "Remote Desktop Connection: An Internal Error has Occurred"?
1. Modifying Remote Desktop Connection Settings
To get started, we will try to isolate the issue by changing the RDP settings a little bit. Some users have reported that their issue was resolved once they checked the "Reconnect if the connection is dropped" box.
Let us see how we do it:
i. Go to the Start Menu, search for Remote Desktop Connection, and open it up.
ii. Click on Show Options to unveil all the settings.
iii. Switch to the Experience tab and then make sure ‘Reconnect if the connection is dropped’ box is checked.
Then, Try connecting again.
2. Rejoin Domain
The error message is sometimes generated due to the domain we have connected our system to. In such cases, removing the domain and then joining it again will fix the issue.
Here is how we do it:
i. Press Windows Key + I to open Settings.
ii. Navigate to Accounts and then switch to the Access work or school tab.
iii. Select the domain connected to our system to and then click Disconnect.
iv. Click Yes when prompted to confirm.
v. Disconnect the system and then restart as prompted.
vi. Once done, join the domain again if required.
Then, Try using RDP again.
3. Change MTU Value
Another way of fixing the issue would be to change the MTU value. Maximum Transmission Unit is the largest size of a packet that can be sent in a network. Dropping the MTU value can help in fixing the issue.
Here is how we do it:
i. To change MTU value, download TCP Optimizer.
ii. Once downloaded, open up TCP Optimizer as an administrator.
iii. At the bottom, select Custom in front of Choose settings.
iv. Change the MTU value to 1458.
v. Click Apply Changes and then exit the program.
Then, Check if it fixes the issue.
4. Change Security of RDP in Group Policy Editor
In some cases, the error message pops up due to our RDP security layer in the Windows group policies. In such scenarios, we will have to force it to use the RDP Security layer.
Here is how we do it:
i. Go to the Start Menu, search for Local Group Policy and open up ‘Edit group policy’.
ii. Navigate to the following directory:
iii. Computer Configuration > Administrative Templates > Windows Components > Remote Desktop Services > Remote Desktop Session Host > Security.
iv. On the right-hand side, locate the ‘Require use of specific security layer for remote (RDP) connections’ and double-click it to edit it.
v. If it is set to ‘Not configured’, select Enabled and then in front of Security Layer, choose RDP.
vi. Click Apply and then hit OK.
vii. Restart the system so that the changes take effect.
Then, Try connecting again.
5. Disable Network Level Authentication
We can also try to fix the issue by disabling Network Level Authentication or NLA. The issue can, at times, be caused if we or the target system is configured to only allow remote connections that are running Remote Desktop with NLA. Disabling it will fix the issue.
Here is how we do it:
i. Go to Desktop, right-click on This PC and select Properties.
ii. Click on Remote Settings.
iii. Under Remote Desktop, un-tick the ‘Allow connections only from computers running Remote Desktop with Network Level Authentication’ box.
iv. Click Apply and then hit OK.
Now, See if it isolates the issue.
6. Restart Remote Desktop Service
In some cases, restarting the Remote Desktop Service does the trick, so, in this step, we will be manually restarting it.
For that:
i. Press “Windows” + “R” to open Run prompt.
ii. Type in “services.msc” and press “Enter“.
iii. Double click on “Remote Desktop Service” and click on “Stop”.
iv. Click on “Start” after waiting for at least 5 seconds.
Now, Check to see if the issue persists.
7. Disable VPN Connection
It is possible that our computer might be configured to use a proxy or a VPN connection due to which its internet connection might be routed through another server.
This might be preventing from being able to properly establish a connection. Therefore in this step, we will be disabling the internet explorer’s proxy settings and we also have to make sure to disable any VPNs running on the computer.
i. Press Windows + R key on the keyboard simultaneously.
ii. A run dialog box will appear on the screen, type “MSConfig” in the empty box, and press OK.
iii. Select the boot option from the system configuration window and then check the “Safe Boot” option.
iv. Click apply and press OK.
v. Restart PC to boot into the safe mode.
vi. Again, press the same “Windows” + “R” keys simultaneously and type “inetcpl.cpl” in the Run dialog box and press “Enter” to execute it.
vii. An internet properties dialog box would appear, select the “Connections” tab from there.
viii. Uncheck the “Use a proxy server for your LAN” box and then click OK.
ix. Open MSConfig again now and this time uncheck the safe boot option save the changes and restart computer.
Now, Check to see if the error message persists.
8. Reconfigure Local Security Policy
This is another way to fix the issue in which we should use the Local Security Policy utility. We can do it by proceeding with the following steps:
i. Press “Windows” + “R” to open the Run prompt.
ii. Type in “Secpol.msc” and press “Enter” to launch the Local Security Policy Utility.
iii. In the local security policy Utility, click on the “Local Policies” option, and then select the “Security Option” from the left pane.
iv. In the right pane, scroll and click on the “System Cryptography” option
v. Use FIPS 140 compliant cryptographic algorithms, including encryption, hashing and signing algorithms” option.
vi. Double click on this option and then check the “Enabled” button on the next window.
vii. Click on “Apply” to save changes and then on “OK” to close out of the window.
Now, Check to see if doing so fixes the issue.
9. Allow Remote Connections
It is possible that Remote Connections are not allowed according to some system configurations. In this step, we will be re-configuring this setting from the Control Panel and then we will check to see if doing so fixes this issue on our computer.
In order to do that:
i. Press “Windows” + “R” to launch the Run prompt.
ii. Type in “Control Panel” and press “Enter” to launch the classical control panel interface.
iii. In the Control Panel, click on the “System and Security” option and then select the “System” button.
iv. In system settings, click “Advanced System Settings” from the left pane.
v. Click on the “Remote” tab and make sure that the “Allow Remote Assistance Connections to this Computer” option is checked.
vi. In addition to that, make sure that the “Allow Remote Connections to this Computer” tab below it is also checked.
vii. Click on “Apply” to save the changes and then on “OK” to exit out of the window.
Then, Check to see if doing so fixes this issue on computer.
10. Change the Startup of Service
It is possible that the Remote Desktop service has been configured in such a way that it is not allowed to start up automatically. Hence, we will be changing this configuration and we will allow the service to be started automatically.
To do it, we follow the steps below.
i. Press “Windows” + “R” to launch the Run prompt.
ii. Type in “Services.msc” and press “Enter” to launch the service management window.
iii. In the service management window, double click on the “Remote Desktop Services” option and then click on the “Stop” button.
iv. Click on the “Startup Type” option and select the “Automatic” option.
v. Closeout of this window and return to to the desktop.
vi. After doing so, restart computer and check to see if the issue persists.
11.Enable Persistent Bitmap Caching
Another possible reason is the “Persistent Bitmap Caching” feature being disabled from the RDP settings. In this step, we will launch the Remote Desktop Connections app and then change this setting from its experience panel.
In order to do this, we follow the steps below:
i. Press “Windows” + “S” on keyboard and type in “Remote Desktop Connection” in the search bar.
ii. Click on the “Show Options” button and then click on the “Experience” tab.
iii. In the experience tab, check the “Persistent Bitmap Caching” option and save changes.
Finally, Try to make the Remote Desktop connection and then check to see if the issue still persists.
12. Disable Static IP on Computer
One possible cause is that we might have configured our network adapter to use a static IP and it is not aligning with the Remote Desktop Connection properly. So, we will be disabling the Static IP on our computer through the network configuration settings.
For that:
i. Press “Windows” + “R” to launch the Run prompt.
ii. Type in “ncpa.cpl” and press “Enter” to launch the network configuration panel.
iii. In the network configuration panel, right-click on the network adapter and select “Properties”.
iv. Double-click on the “Internet Protocol Version 4 (TCP/IPV4)” option and then click on the “General” tab.
v. Check the “Obtain IP Address automatically” option and save changes.
vi. Click on “OK‘ to exit out of the window and check to see if the issue still persists.
13. Reconfigure SonicWall VPN
If we are using the SonicWall VPN client and use the default configurations with that application, this error might spring up. Therefore, in this step, we will be changing some settings from within the VPN.
For that:
i. Launch Sonicwall on the computer.
ii. Click on “VPN” and then select the “Settings” option.
iii. Look for “WAN” under the VPN policies list.
iv. Click on the “Configure” option to the right and then select the “Client” tab.
v. Click on “Virtual Adapter Settings” dropdown and select the “DHCP Lease” option.
vi. Check to see if doing so fixes the issue.
vii. If this issue still is not fixed, we will have to remove the current DHCP lease from the VPN.
viii. Navigate to the “VPN” option and then select the “DHCP over VPN” button.
ix. Delete the already existing DHCP lease and restart the connection
Then, Check to see if the issue persists after doing this.
14. Diagnose Connection through Command Prompt
It is possible that the computer that we are trying to connect to might not be available for connection. Hence, we will have to diagnose.
For this purpose, we will be using the command prompt to first identify the IP address of the computer and then we will use the command prompt on our computer to try and ping it.
If the ping is successful, the connection can be made, if it isn’t that means that the computer that we are trying to connect to is at fault.
For this purpose:
i. Gain access to the computer we want to connect to locally and press the “Windows” + “R” keys on its keyboard to launch the run prompt.
ii. Type in “Cmd” and press “Enter” to launch the command prompt.
iii. In the command prompt, type in the following command and press “Enter” to display the IP information for the computer.
iv. Note the IP address listed under the “Default Gateway” heading which should be in the “192.xxx.x.xx” or a similar format.
v. Once we have acquired the IP address of the computer, we can come back to our own computer for further testing.
vi. On personal computer, press “Windows” + “R” to launch the Run prompt and type in “Cmd” to open the command prompt.
vii. Type in the following command in the command prompt and press “enter” to execute it:
ping (IP ADDRESS of the computer that we want to connect to)
viii. Wait for the command prompt to finish the pinging of the IP address and note down the results.
ix. If the ping is successful, it means that the IP address is accessible.
x. Now we will be testing the “telnet” capability of the computer by checking if telnet is possible over the IP address.
xi. For that, press “Windows” + “R” and type in “Cmd” to open the command prompt.
xii. Type in the following command to check if telnet is possible on the port which is required to be open by the RDP client:
telnet <IP address> 3389
We should be seeing a black screen if this telnet is successful, if it is not it means that the port is being blocked on our computer.
15. Re-configuring the Windows Firewall
If the black screen is not returned, it means that the port might not be opened on our computer due to which this issue is being shown while trying to telnet on the port.
Therefore, in this step, we will be re-configuring the Windows Firewall to open the specific port on our computer. For that:
i. Press “Windows” + “I” to open settings and click on “Update & Security”.
ii. Select the “Windows Security” tab from the left pane and click on the “Firewall and Network Security” option.
iii. Select the “Advanced Settings” button from the list.
iv. A new window will open up, Click on the “Inbound Rules” option, and select “New Rule“.
v. Select “Port” and click on “Next”.
vi. Click on “TCP” and select the “Specified Local Ports” option.
vii. Enter in “3389” into the port number.
viii. Click on “Next” and select “Allow the Connection“.
ix. Select “Next” and make sure all three options are checked.
x. Again, click on “Next” and write a “Name” for the new rule.
xi. Select “Next” after writing a name and click on “Finish“.
xii. Similarly, go back to the 4th step that we have listed and select “Outbound Rules” this time and repeat the whole process to create an Outbound Rule for this process as well.
After creating both an inbound and an Outbound rule, check to see if the issue persists.
16. Turn off UDP on Client
It is possible to fix this issue by simply changing a setting inside the registry or from the group policy.
If we are using Windows Home version, we can try going about this solution using the registry method, and otherwise, implement the group policy method from the steps below.
Registry Method:
i. Press “Windows” + “R” to launch the run prompt.
ii. Type in “regedit” and press “Enter” to launch the Registry.
iii. Inside the registry, navigate through the following options.
HKLM\SOFTWARE\Policies\Microsoft\Windows NT\Terminal Services\Client
iv. Inside this folder, set the fClientDisableUDP option to “1”.
v. Save changes and exit out of the registry.
Check to see if adding this value to the registry fixes this issue.
Group Policy Method:
i. Press “Windows” + “R” buttons on keyboard to launch the run prompt.
ii. Type in “Gpedit.msc” and press “Enter” to launch the Group Policy Manager.
iii. In the Group Policy Manager, double click on the “Computer Configuration” option and then open the “Administrative Templates” option.
iv. Double click on “Windows Components” and then double click on the “Remote Desktop Services” option.
v. Double click on the “Remote Desktop Connection Client” and then double click on the “Turn off UDP on Client” option.
vi. Check the “Enabled” button and save changes.
Exit out of the Group Policy manager and then check to see if the issue persists.
17. Use PowerShell Command
If for some reason we are unable to add the registry value as indicated above, we can also implement this change using the Windows Powershell utility. For that purpose:
i. Press “Windows” + “X” on keyboard and select the “Powershell (Admin)” option.
ii. Type in the following command inside the PowerShell window and press “Enter” to execute it:
New-ItemProperty ‘HKLM:\SOFTWARE\Microsoft\Terminal Server Client’ -Name UseURCP -PropertyType DWord -Value 0
After the command is executed, check to see if the issue still persists.
[Still facing Remote Desktop Connection issues? We are here to help you fix today!]
Conclusion
In this article, we discussed about the different ways to fix Remote Desktop Connection Error: Internal Error has Occurred which is generally caused by issues in the RDP settings or its local group policy security.
In this article, we discussed about the different ways to fix Remote Desktop Connection Error: Internal Error has Occurred which is generally caused by issues in the RDP settings or its local group policy security.


