Trying to recover Zimbra LDAP database from a backup?
This guide is for you.
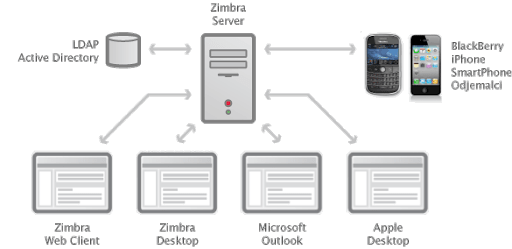
The Zimbra LDAP service is a directory service running a version of the OpenLDAP software that has the Zimbra schema already installed.
Here at Ibmi Media, as part of our Server Management Services, we regularly help our Customers to fix Zimbra related issues.
In this context, we shall look into the recovering process of the Zimbra LDAP database from backup.
How to restore Zimbra LDAP database from backup?
In a few cases, we have recieved a report from customer where they got the following error message in the process of restarting Zimbra services;
$ zmcontrol startHost mail.mydomain.comStarting ldap…Done.Unable to determine enabled services from ldap.Unable to determine enabled services. Cache is out of date or doesn’t exist.
We troubleshooted their system and discovered that the issue was the LDAP database. What we did was to rebuild the database to restore it to its functioning state.
Below, you shall learn the process taken to restore the Zimbra LDAP database from backup.
Before this process, ensure that the following conditions are met;
i. LDAP service is not running.
ii. The /opt/zimbra/data/ldap/config directory is empty and writeable
iii. The /opt/zimbra/data/ldap/db directory is empty and writeable
Now take the following steps to restore an LDAP from the backup;
Step 1: Stop Zimbra Services
Start by finding a recent Zimbra LDAP backup located at the "/opt/zimbra/backup" directory. Generally, backups are named ldap_[timestamp].tar.gz and contain the following files:
i. ldap.ldif
ii. ldap-schema.ldif (schema information)
iii. ldap-config.ldif (backup of all cn=config elements)
Then, we stop all Zimbra Services by executing the following command;
zmcontrol stopStep 2: Take Backup of Zimbra LDAP Data
After stopping the services, we back up the old data. We execute the following commands as a root user of the server;
mv /opt/zimbra/data/ldap/config/ /opt/zimbra/data/ldap/OLDconfig/mv /opt/zimbra/data/ldap/mdb/db /opt/zimbra/data/ldap/mdb/OLD_db/Next, recreate LDAP data folders and give them the correct permissions as shown below;
mkdir -p /opt/zimbra/data/ldap/mdb/db /opt/zimbra/data/ldap/mdb/logschown -R zimbra:zimbra /opt/zimbra/data/ldap/opt/zimbra/libexec/zmfixperms -verboseStep 3: Restoring the Zimbra LDAP database from backup.
Now, we have the data directory empty. So we navigate to the directory with the LDAP backup. The backups were archived, so we uncompressed them before restoration. To do this, execute the following commands;
cd /opt/zimbra/backup/sessions/incr-20200219.230008.918/ldaplsldap.bak.gz ldap-config.bak.gzNext, We run the following commands to uncompress the Zimbra LDAP configuration files;
gunzip *.gzlsldap.bak ldap-config.bakThen, we restore ldap-config.bak using the slapadd command executing it as Zimbra user;
$ slapadd -q -n 0 -F /opt/zimbra/data/ldap/config -cv -l ldap-config.bakadded: “cn=config” (00000001)added: “cn=module{0},cn=config” (00000001)added: “cn=schema,cn=config” (00000001)added: “cn={0}core,cn=schema,cn=config” (00000001)added: “cn={1}cosine,cn=schema,cn=config” (00000001)added: “cn={2}inetorgperson,cn=schema,cn=config” (00000001)added: “cn={3}dyngroup,cn=schema,cn=config” (00000001)added: “cn={4}zimbra,cn=schema,cn=config” (00000001)added: “cn={5}amavisd,cn=schema,cn=config” (00000001)added: “cn={6}opendkim,cn=schema,cn=config” (00000001)added: “olcDatabase={-1}frontend,cn=config” (00000001)added: “olcDatabase={0}config,cn=config” (00000001)added: “olcDatabase={1}monitor,cn=config” (00000001)added: “olcDatabase={2}mdb,cn=config” (00000001)added: “olcOverlay={0}dynlist,olcDatabase={2}mdb,cn=config” (00000001)added: “olcOverlay={1}unique,olcDatabase={2}mdb,cn=config” (00000001)added: “olcOverlay={2}noopsrch,olcDatabase={2}mdb,cn=config” (00000001)############## 100.00% eta none elapsed none fast!Closing DB…We do the same for ldap.bak.
$ slapadd -q -b “” -F /opt/zimbra/data/ldap/config -cv -l ldap.bakStep 4: Starting the Zimbra Services
After restoring the database, we start all the Zimbra Services. We start with LDAP service with the following commands;
ldap startldap statusOnce it is successful, we bring up all other Zimbra Services by executing the following commands;
# su – zimbra$ zmcontrol startThen you will see an output such as this;
Host mail.mydomain.com Starting ldap…Done. Starting zmconfigd…Done. Starting logger…Done. Starting convertd…Done. Starting mailbox…Done. Starting memcached…Done. Starting proxy…Done. Starting amavis…Done. Starting antispam…Done. Starting antivirus…Done. Starting opendkim…Done. Starting snmp…Done. Starting spell…Done. Starting mta…Done. Starting stats…Done. Starting service webapp…Done. Starting zimbra webapp…Done. Starting zimbraAdmin webapp…Done. Starting zimlet webapp…Done. Starting imapd…Done.Next, check the status of Zimbra to see if it is running. To do this, execute;
$ zmcontrol statusAnd you will get an output such as this;
Host mail.mydomain.com amavis Running antispam Running antivirus Running convertd Running imapd Running ldap Running logger Running mailbox Running memcached Running mta Running opendkim Running proxy Running service webapp Running snmp Running spell Running stats Running zimbra webapp Running zimbraAdmin webapp Running zimlet webapp Running zmconfigd RunningFinally, you will be able to access Zimbra Admin UI and perform the normal Email administration tasks.
[Need additional support with Zimbra related queries? – We are available to help you today.]
Conclusion
This article will guide you through the right steps to restore LDAP database from backup.
This article will guide you through the right steps to restore LDAP database from backup.


