LDAP stands for Lightweight Directory Access Protocol. It is basically a lightweight client-server protocol for accessing directory services, specifically X. LDAP runs over TCP/IP or other connection oriented transfer services.
Here at Ibmi Media, as part of our Server Management Services, we regularly help our Customers to perform Software Installation tasks on their Server.
In this context, we shall look into the steps to configure LDAP Client on Ubuntu.
More information about LDAP and its usefulness?
LDAP (Lightweight Directory Access Protocol) is a set of protocols for accessing directory services.
A directory service stores and provides access to information that must either be shared between applications or is highly distributed.
Directory services play an important role in developing intranet and Internet applications by helping us to share information about users, systems, networks, applications, and services throughout the network.
For instance, it helps us to offer centralized storage of usernames and passwords. This allows various applications (or services) to connect to the LDAP server to validate users.
How to Install and Configure LDAP Client on Ubuntu?
Initially, if we do not have an active DNS server in our network, we need to add an LDAP server address to /etc/hosts file.
$ echo “IP_address ldap.example.com” | sudo tee -a /etc/hostsHow to Install LDAP client utilities on an Ubuntu system ?
Now let us proceed to install the LDAP client utilities. Like in all other installation, we need to update the system prior to the installation
$ sudo apt-get update$ sudo apt -y install libnss-ldap libpam-ldap ldap-utilsDuring the installation, the package installer will ask us a variety of questions.
Enter the values according to the environment.
i. Set LDAP URI – On the first screen, enter the LDAP server details. Enter the LDAP server’s IP address or hostname.
ii. Set a Distinguished name of the search base – Here enter the DN (Domain Name) of the LDAP search base
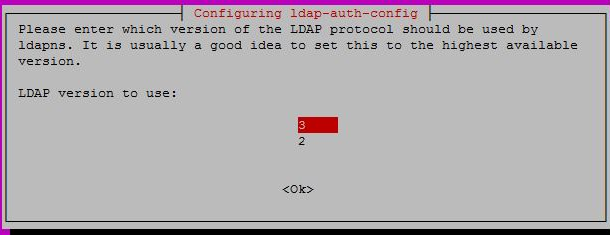
iii. Choose the LDAP version to use.
iv. Select Yes to make local root Database admin
v. Answer No for Does the LDAP database requires login?
vi. Set LDAP account for root, something like cn=admin,cd=example,cn=com
vii. Provide LDAP root account Password
How to Configure LDAP authentication?
The installer does most of the configurations based on our inputs given in the previous section. But, there are still some changes required for LDAP authentication to work.
After the installation, edit /etc/nsswitch.conf and add LDAP authentication to passwd and group lines.
passwd: compat systemd ldapgroup: compat systemd ldapshadow: compat ldap
Modify the file /etc/pam.d/common-password. Remove use_authtok on line 26 to look like below.
password [success=1 user_unknown=ignore default=die] pam_ldap.so try_first_pass
Enable creation of home directory on the first login by adding the following line to the end of file /etc/pam.d/common-session
session optional pam_mkhomedir.so skel=/etc/skel umask=077
To Restart the nscd service, execute;
$ sudo service nscd restartTest by switching to a user account on LDAP;
root@server1:~# su - ibmimediaCreating directory '/home/ibmimedia'.ibmimedia@server1:~$ iduid=10000(ibmimedia) gid=10000(sysadmins) groups=10000(sysadmins)
Use the getent command to get the LDAP entries from the LDAP server.
$ getent passwd ldapuserldapuser:x:9999:100:Test LdapUser:/home/ldapuser:/bin/bashFurther, to verify the LDAP, log in using the LDAP user “ldapuser” on the client machine.
[Need any further assistance to configure LDAP client on Ubuntu – We are available 24*7]
Conclusion
This article will guide you on the steps to set up LDAP client on Ubuntu.
This article will guide you on the steps to set up LDAP client on Ubuntu.


