VMWare vCenter Self-Signed Certificate Warning triggers when we connect to a VMWare vCenter server using a web-browser.
Here at Ibmi Media, as part of our Server Management Services, we regularly help our Customers to fix vCenter server related issues.
In this context, we shall look into the steps to fix this error.
More information about VMWare vCenter Self-Signed Certificate Warning?
Basically, this warning is experienced when trying to establish connection to a VMWare vCenter server using a web-browser.
In Firefox, we can disable it by adding a vCenter website to the list of exceptions. However, in Internet Explorer the procedure is more complicated.
Default SSL certificates with ESXi and vCenter servers is self-signed. Other systems do not trust them and show a warning or block the connection with these websites.
To disable the warning, you need to add the self-signed certificate in the list of trusted certificates.
You can also replace it with our own one issued by a trusted certification authority.
Now, let us consider the first variant, the procedure is trivial, but there are some not quite obvious moments.
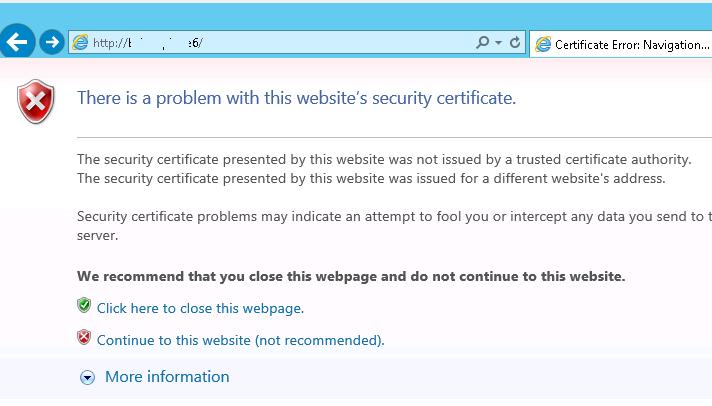
i. We encounter the warning "The security certificate presented by this website was issued for a different website's address" since the host name is different from the CN name.
ii. To download the certificate, click Download trusted root CA certificates.
iii. We save the file to any directory. The name of the file is download (with no extension).
iv. Then we change the extension of download to download.zip and extract it with the built-in archiver (Extract All).
v. The cert archive contains 2 files with the extensions .0 and .r0. Change the file extension .0 to .cer.
vi. Add root CA certificate to trusted certificates.
vii. Now we only have to add this root CA certificate to the list of trusted certificates.
viii. Suppose, we want this certificate to be trusted only with the current account. Open certmgr.msc console, go to Certificates > Trusted Root Certification Authorities and open the certificate import wizard (Import).
ix. We select the certificate file obtained earlier and place it to the Trusted Root Certification Authorities store.
x. Finally we submit adding the certificate.
xi. A new certificate with the name CA appears in the list.
xii. Open the vCenter webpage in the browser again. The warning will not appear.
Generally, these guidelines are applicable to vCenter Server Appliance. If we are using Windows vCenter Server, we can’t download the certificate file. There will be no link to download the archive with the certificate.
This file is on vCenter Server in "C:\ProgramData\VMware\SSL\".
We have to import the certificate from this directory on a client in the same way.
[Need to fix Outlook error urgently? We are available to help you today.]
Conclusion
This article will guide you on the steps to remove VMWare vCenter Self-Signed Certificate Warning.
This article will guide you on the steps to remove VMWare vCenter Self-Signed Certificate Warning.


