By simply creating a virtual machine and then connecting to Nagios Log Server, we can easily create a Nagios log server instance in the Amazon EC2 cloud.
Here at Ibmi Media, as part of our Server Management Services, we regularly help our Customers to perform Nagios related tasks.
In this context, we shall look into the steps to create a Nagios log server instance in amazon ec2 cloud.
How to create a Nagios log server instance in Amazon ec2 cloud ?
Here, we will launch a new pre-installed Nagios Log Server server in the Amazon EC2 cloud in order to quickly run a trial of Nagios Log Server.
1. Creating The Virtual Machine ?
In order to get the Official Nagios Log Server public Amazon Machine Images (AMIs), we recommend log into the Amazon Web Services (AWS) management console at https://console.aws.amazon.com/ec2/home?region=us-east-1#s=Images.
Also, images are currently available in the following zones:
i. US East (N. Virginia & Ohio), US West (N. California & Oregon)
ii. Canada (Central)
iii. EU (Frankfurt, Ireland, London)
iv. Asia Pacific (Mumbai, Seoul, Singapore, Sydney, Tokyo)
v. S. America (Sao Paulo)
We ensure to select the appropriate region and have the filter set to Public Images.
In the search bar, we enter 766915741798, this is the Nagios Tech Team official ID. From here we can select the image that meets our needs and click Launch.
Next, the Request Instance Wizard will begin. Within the wizard, we can select our instance type and customize the allocated resource settings and naming information. For Nagios Log Server, we recommend running an m1.small instance or larger.
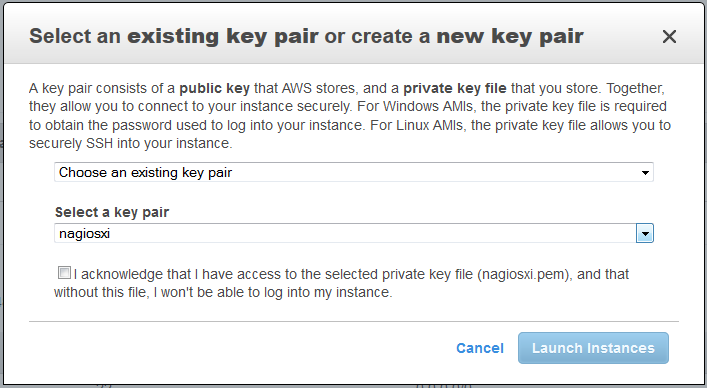
The wizard will have us to choose or create a key pair. If we are creating a key pair for the first time, we will be asked to download the key before continuing. The private key will be required to SSH into the machine.
Additionally, we need to select or configure a Security Group. The Security Group should allow public access on port 22 and port 80. For some installations, this may be fine. However, we will also require the use of additional ports that we will be sending our log data. By default, they are 2056, 2057, 3515, 5544.
2. Connecting To Nagios Log Server ?
Once the instance is running, we can complete the installation of Nagios Log Server through the web interface. In order to access Log Server, we type the following URL:
http://<ipaddress>/nagioslogserverOnce we access the login screen, we can log in as the Admin to begin using Log Server. The credentials are listed below;
Username: nagiosadmin
Password: random (this gets initialized during setup)
We may also need to occasionally make an SSH connection to the machine. For this connection, we must use the private key that we downloaded earlier. When connecting we must use the username ec2-user, NOT root. This user has full sudo access. Here is an example of how to establish an SSH session using this key from a terminal session in Linux:
ssh -i .ssh/mykey.pem ec2-user@<ipaddress>If we are using an SSH client like PuTTY, we may need to use the PuTTYgen app that allows converting the key to be used with PuTTY.
[Need urgent assistance with Nagios related queries? – We are here to help you. ]
Conclusion
This article will guide you on how to create a #Nagios log server instance in the amazon ec2 #cloud. To enable these reports, simply enable Detailed Billing Reports With #Resources and Tags for your account. Then open up the Reports tab of the Billing #Console. From there you can look at the EC2 Instance Usage Report and the #EC2 Reserved Instance Utilization Report.
This article will guide you on how to create a #Nagios log server instance in the amazon ec2 #cloud. To enable these reports, simply enable Detailed Billing Reports With #Resources and Tags for your account. Then open up the Reports tab of the Billing #Console. From there you can look at the EC2 Instance Usage Report and the #EC2 Reserved Instance Utilization Report.


