Are you trying to create bacpac file from the SQL server?
This guide is for you.
A BACPAC file is a ZIP file with an extension of BACPAC containing the metadata and data from the database. A BACPAC file can be stored in Azure Blob storage or in local storage in an on-premises location and later imported back into Azure SQL Database, Azure SQL Managed Instance, or a SQL Server instance.
Here at Ibmi Media, as part of our Server Management Services, we regularly help our Customers to perform SQL related queries.
In this context, we shall look into the process to create bacpac file from the SQL server.
How to create a BACPAC file from SQL server using SQL Server Management Studio (SSMS) ?
Now you will learn how our Support Engineers create a BACPAC file.
1. First, we connect to the desired SQL Server instance. Then in the ‘Object Explorer’ pane, we right-click on the name of the desired database.
2. Next, in the context menu, we select ‘Tasks’ and then ‘Export Data-tier Application’.
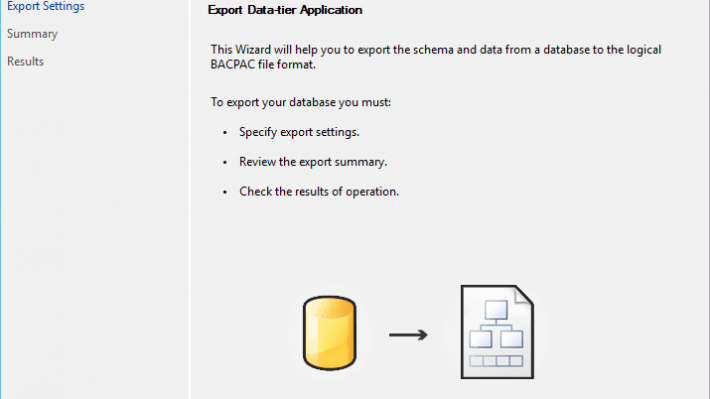
3. It launches an introduction page. This introduction page defines the summary and high-level steps for this wizard.
The high-level steps to create a BACPAC file from SQL are as follows:
i. Specify export settings.
ii. Review the export summary.
iii. Check the result of the operation.
We click on the ‘Next’ button and then click on the ‘Export Settings’ on the Introduction page.
iv. In the ‘Export Settings’, we insert the desired location to save the bacpac file by clicking on the ‘Browse’ button.
Now we have two options to save the bacpac file either ‘save it to the local disk’ or to an ‘Azure storage account’.
Note: We can manually select the database objects to be exported. The option is given in the ‘Advance’ Tab. By default, all the objects are selected.
v. After we set the location of the bacpac file and providing the name of the bacpac file, we click on the ‘Next’ button. As a result, a Summary page will appear with all the settings. We now verify and confirm all the settings.
vi. Finally, we click on the ‘Finish’ button to begin the ‘Export’ process. A success message appears for each step. Once the export process completes, we click on the ‘Close’ button. We can browse to the directory and verify a BACPAC extension file exists.
[Need urgent assistance with SQL queries? – We'll help you. ]
Conclusion
This article will guide you on how to export an existing #database into a #BACPAC file is through #SSMS. A bacpac is a dacpac + data, while a dacpac only contains the schema of the database.
To create a Bacpac file:
a. To #export a database using the Azure portal, open the page for your database and click Export on the toolbar.
b. Specify the BACPAC filename, select an existing Azure storage account and container for the export, and then provide the appropriate credentials for access to the source database.
c. Click OK.
To import from a BACPAC file into a new single database using the Azure portal:
1. Open the appropriate server page.
2. On the toolbar, select Import database.
3. Select the storage account and the container for the BACPAC file and then select the BACPAC file from which to import.


