Are you trying to upload a favicon to your DNN website?
This guide is for you.
We can upload it to DNN websites by using the Favicon upload option.
Favicons are icons with .ico extension which are associated with a particular website.
Typically, they are displayed in the address bar of a browser accessing the site. Also, they are displayed next to the site name in a user’s list of bookmarks.
Here at Ibmi Media, as part of our Server Management Services, we regularly help our Customers to upload favicons in DNN websites.
Now let us look into the process of uploading the favicon to a DNN website.
How to upload a favicon on the DNN website?
Recently, one of our customers approached us with the requirement to upload a favicon to his DNN website. Our Support Experts had a precise look into his requirement and sorted it out for him.
Now, let's see how our Support Experts uploaded it to the DNN website.
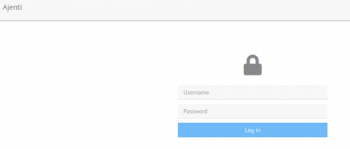
1. Firstly, we logged into his DNN website with host privileges.
2. Then, we navigated to Site Settings -> Site Info -> Logo and Icons -> Favicon.
3. Lastly, we uploaded the favicon’s .ico file from here.
Thus, we uploaded the favicon successfully for our customers.
Alternatively, we can also upload it to the DNN website using the "Enter URL Link" option.
In this case, our Support Experts follow the below steps:
1. Firstly, we upload the favicon image to the httpdocs folder via file manager.
2. Then, we navigate to Site Settings >> Site Info >> Logo and Icons >> Favicon in the website.
3. Next, we click on the “Enter URL Link option”.
4. Lastly, we enter the URL “http://<doman-name>/<faviconname>.ico” and press Enter and 5. Save the settings made.
This also uploads favicon to DNN websites.
[Need more assistance with Website favicons? We are available 24/7. ]
Conclusion
This article will guide you on steps to uploaded favicon on your Website.
Basically, we can upload favicon in DNN websites either by using the Favicon upload option or by the Enter URL Link option from Site Settings.
The favicon is an important aspect of a site's brand identity and is an important attribute which needs to be customized for marketing purposes:
1. Navigate to Admin > Site Settings.
2. Click on the country flag icon associated with the culture (language) to be updated. This field only displays when multiple languages are enabled. See "Viewing a Site in a Secondary Language".
3. Select the Basic Settings tab and expand the Appearance section.
4. At Logo, select from these options:
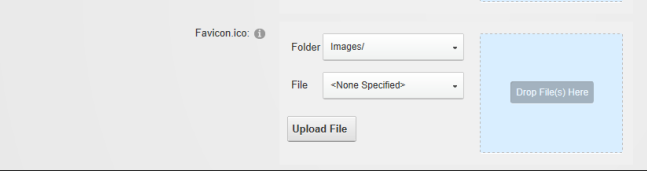
5. To select an existing image, select the folder where the file is located from the Folder drop down list, begin entering the file name into the File text box and select the required file from the search results.
6. Click the Upload File button to select the file from the local computer - OR - Drag the image file from the computer and release it over the "Drop File(s) Here" window.
7. At Body Background, select a new or existing image as detailed above. The background image will be tiled on all site pages, unless the skin applied to the page includes a background image.
8. At Favicon.ico, select a new or existing image as detailed above. Only files with an *.ico extension can be selected at this field, as these are the only files supported by Internet Explorer.
This article will guide you on steps to uploaded favicon on your Website.
Basically, we can upload favicon in DNN websites either by using the Favicon upload option or by the Enter URL Link option from Site Settings.
The favicon is an important aspect of a site's brand identity and is an important attribute which needs to be customized for marketing purposes:
1. Navigate to Admin > Site Settings.
2. Click on the country flag icon associated with the culture (language) to be updated. This field only displays when multiple languages are enabled. See "Viewing a Site in a Secondary Language".
3. Select the Basic Settings tab and expand the Appearance section.
4. At Logo, select from these options:
5. To select an existing image, select the folder where the file is located from the Folder drop down list, begin entering the file name into the File text box and select the required file from the search results.
6. Click the Upload File button to select the file from the local computer - OR - Drag the image file from the computer and release it over the "Drop File(s) Here" window.
7. At Body Background, select a new or existing image as detailed above. The background image will be tiled on all site pages, unless the skin applied to the page includes a background image.
8. At Favicon.ico, select a new or existing image as detailed above. Only files with an *.ico extension can be selected at this field, as these are the only files supported by Internet Explorer.