Are you trying to set up Remote Desktop on Debian?
This guide is for you.
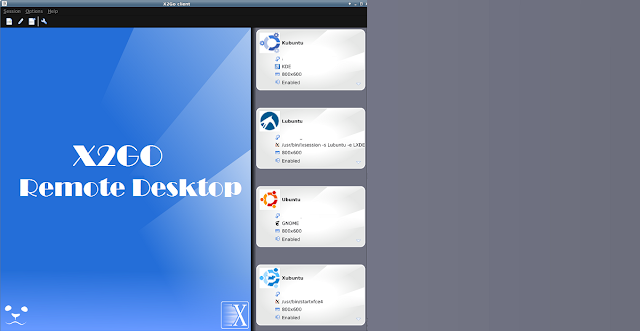
X2Go is an open source remote desktop software for Linux that uses a modified NX 3 protocol. X2Go gives remote access to a Linux system's graphical user interface.
Generally, Linux-based servers do not come with a graphical user interface (GUI) preinstalled.
In order to run GUI applications on the server, Virtual Network Computing (VNC) can be employed. VNC is very slow by default and considered to be less secure, it also needs a lot of manual configuration to get up and running. So we will overcome this by using X2Go.
Here at Ibmi Media, as part of our Server Management Services, we regularly help our Customers to set up a remote desktop on the Linux Server.
In this context, we shall look into how to set up Remote Desktop on Debian.
Steps to set up Remote Desktop on Debian using X2Go ?
Graphical remote desktop control for optimal operation on any type of network is something that makes accessing servers hassle-free.
X2Go helps us to create a robust and remote GUI-environment for the Debian operating system.
We will be doing this on a Debian server with 2GB of RAM,
Now, we will see the steps to set up X2Go.
1. Installing the Desktop Environment
There are two ways to easily install XFCE – the Minimal Desktop Environment or the Full Desktop Environment.
Here we will be installing the Full Desktop Environment using the following command:
$ sudo apt-get install task-xfce-desktopNext, we will install xfce4 and all of the additional dependencies needed to support it:
$ sudo apt-get install xfce4Once the graphical environment is installed, we can establish a way to view it remotely.
2. Installing X2Go on the Server
X2Go comes with two main components the server and the client.
To install X2Go on the server, we will use the following command:
$ sudo apt-get install x2goserver x2goserver-xsessionAfter this, we will exit or close the terminal window.
3. Installing the X2Go Client Locally
For Windows or Mac we can download the X2Go client software from the URL:
https://wiki.x2go.org/doku.php/download:startFor Debian or Ubuntu, we can install the X2Go client with the following command:
$ sudo apt-get install x2goclientAfter downloading the software, we will install it using the following steps:
i. First, open the installer and select the preferred language.
ii. Next, agree to the license.
iii. The wizard will guide us through the remaining steps.
As the desktop client is installed, we will configure its settings and connect to the X2Go server to use the remote XFCE desktop.
4. Connecting To the Remote Desktop
The steps to follow for connecting to RDP is given below:
i. While opening the X2Go client, a window appears asking for session preferences.
ii. We will click Session in the top-left menu and select New session.
iii. In the Session Name field, we can provide two different names to differentiate between the servers.
iv. Enter the server’s IP address or hostname in the Host field under Server.
v. After that we will enter the username for the SSH connection in the Login field.
vi. And, choose XFCE as your Session type.
Finally, we will click the folder icon next to the Use RSA/DSA key for ssh connection and browse to our private key.
After pressing the OK button, we can start our graphical session by clicking the white box having the name of our session.
[Need urgent assistance to set up remote desktop? We are happy to help you! ]
Conclusion
This article will guide you on the steps to set up remote desktop on #Debian. X2Go can be used to access Windows systems through a #proxy. Client packages can be run on #FreeBSD, Linux, #OS X, or #Windows.
With the desktop sharing function of X2go you can gain full-access to the desktop of another computer, similar to programs such as Remote Desktop, TeamViewer, and LogMeIn. You can see an #X2go session from somebody else, but you can also see a normal desktop. Desktop Sharing functionality requires access to port 22.
To Connect to Linux Remotely Using #SSH in #PuTTY:
1. Select Session > Host Name.
2. Input the #Linux computer's network name, or enter the IP address you noted earlier.
3. Select SSH, then Open.
4. When prompted to accept the certificate for the connection, do so.
5. Enter the username and password to sign into your Linux device.


