Steps to create SQL server alias
Steps for Deleting an alias using SQL Server Configuration Manager ?
#SQL aliases are used to give a table, or a column in a table, a temporary name. Aliases are often used to make column names more readable. An alias only exists for the duration of the query.
To find my SQL Server #alias name:
Expand SQL Native client #configuration, and you can find a subfolder Alias. By default, we do not have any alias defined for the SQL Server #instance. In the screenshot, we can see it does not see any items for the Alias. Right-click on Aliases and click on New Alias.
1. Take SQL Server Configuration Manager and go to SQL Server Native #Client Configuration, then click Aliases.
2. We can right-click the alias that we want to delete, and then click Delete.
3. A warning will pop up, we can click on Yes to remove the alias. This removes the SQL Server alias.
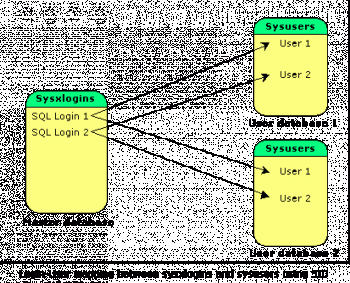
Orphaned users in SQL Server
This article will help you to identify #Orphaned #Windows #Logins and Groups in #SQL Server.
To Resolve an Orphaned User:
To map an orphaned user to a login which already exists in master, execute the ALTER USER #statement in the user database, specifying the login name.
ALTER USER <user_name> WITH Login = <login_name>; When you recreate a missing login, the user can access the database using the password provided.
To fix orphaned users for all databases in SQL Server:
1. Login with same name as user exists – generate ALTER LOGIN to map the user to the login.
2. No login with same name exists – generate DROP USER to delete the orphan user.
3. Orphan user is [dbo] – change the database owner to SA (or whatever SA was renamed to).
Auto shrink feature in SQL server
This article will guide you on how to enable and disable AutoShrink #database property. Basically, it is not recommended to enable the AutoShrink database property as it can cause many issues in the #SQL Server.
Auto Shrink is database property that allow SQL Server to automatically shrink database files if its value set to ON/True. Shrinking a database is not a good practice because it is very expensive operation in terms of I/O, CPU usage, locking and #transaction log generation.
Users can enable and disable database auto shrink option using SSMS and T-SQL both ways.
To turn on auto shrink in SQL Server:
1. Activating the database auto shrink by using #SSMS:
2. Enable database auto shrink using T-SQL:
3. Database >> #Reports >> Standard Reports >> Disk Usage.
4. Check free space for the database files:
5. Shrink database file:
SQL server Error 1053
This article will guide you on different methods of fixing error #1053 SQL server which occurs when attempting to pause or stop the SQL Server service in the #Windows Services Console.
The most common cause of this error is when one of the files needed by sql server was not on a shared resource, and Sql Server, once failed to the other node, couldn't access it.
The #SQL #Server Agent error log may include a path or a file name that is not correct.
In this case, verify that the path and file name for SQLAgent.out is valid:
1. In SQL Server Enterprise Manager, expand the Management folder.
2. Right-click SQL Server Agent, and then click Properties.
3. Under Error Log, make sure that the path that is specified next to File Name is valid.
4. Make sure that the file name is SQLAGENT.out.
Last Restore Time of SQL server database
This article will guide you on how to collect #database restoration #history. The #SQL server database last restore time can be found using the system table in 'msdb'.
We get the following database #restoration history in my environment.
i. restore_date: It shows the database restoration #date.
ii. destination_database_name: We can get the destination database name using this #column.
iii. user_name: it gives user name that performed the restoration for that particular database.
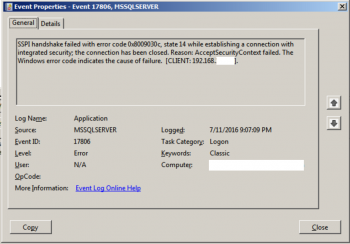
SQL error 17806 Steps to fix
This article will guide you on the steps to fix #SQL error #17806 which happen due to Active Directory configuration issue or #Network issues.


