Blog
- Home
- Blog
This article covers how to force a user to change their password in any Linux Distribution.
If we create a user account with the default password, we can use this trick to force the user to change their account's default password when they first login to their account.
This will hopefully improve the security of their account.
We can achieve this in two ways.
1. Using passwd command
2. Using chage command

This article covers how to check the system or hardware details of your Ubuntu 20.04 system.
If you want to check all the above details for Debian 10, click here. While to check system or hardware details for CentOS, click here.
For the command line tool, inxi is available to check:
i. Audio/sound card(s), driver, sound server.
ii. System battery info
iii. CPU output
iv. Hard Disk info
v. Graphics card, driver, display server, resolution, renderer, OpenGL version.
vi. vii. General info, including processes, uptime, memory, IRC client or shell type, inxi version.
vii. Memory (RAM) data (Require root)
viii. Network card, driver.
ix. system info, partition info, sensors output, USB data, and more.
To install inxi in Ubuntu, simply run command:
$ sudo apt-get install inxiThen run man inxi to get a list of command options, or run inxi -F to get a brief output containing system or hardware details.

This article covers how to easily install Visual Studio code on your Ubuntu 20.04 system. Visual Studio Code is an open-source cross-platform code editor developed by Microsoft.
It has a built-in debugging support, embedded Git control, syntax highlighting, code completion, integrated terminal, code refactoring and snippets.
To Install Visual Studio Code on Ubuntu:
1. First, update the packages index and install the dependencies by typing:
$ sudo apt update
$ sudo apt install software-properties-common apt-transport-https wget
2. Next, import the Microsoft GPG key using the following wget command :
$ wget -q https://packages.microsoft.com/keys/microsoft.asc -O- | sudo apt-key add -And enable the Visual Studio Code repository by typing:
$ sudo add-apt-repository "deb [arch=amd64] https://packages.microsoft.com/repos/vscode stable main"3. Once the apt repository is enabled , install the latest version of Visual Studio Code with:
$ sudo apt update
$ sudo apt install code

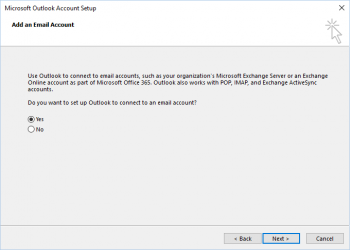
This article covers the best and most efficient cross-platform compatible email clients. Some of the listed are open-source and free, while others offer subscriptions.
The type of email service most compatible for every user depends on their needs and requirements from an email service client.
For example, people or organizations more inclined towards security assurance from a platform may prefer Inky over Thunderbird, which offers numerous advanced features but may fall behind Inky in terms of meeting user's security needs. Other listed platform also offers various unique and advanced features along with easy and interactive user interface assuring utmost performance and customer satisfaction.
Despite the ones listed here, there are many other cross-platform compatible email clients offering different features, however, we believe, that the email clients listed in the article outperform many of the existing cross-platform email service providers due to their assured reliability, user experience, and diverse features.
This article covers how open-source and cross-compatible CMS platforms are a great decision for both a programming novice and a computer science expert.
CMS enables users to readily develop websites by mere drag-and-drop or by simply configuring the ready-made templates.
The platform enables the experts to catch the bugs or flaws and then contribute to the development of the platform and enhance its extensive capabilities and extensions.
The listed CMS platforms are all one of the best currently available CMS, and so whichever platform is adopted by the user, can surely yield the utmost results.
However, the decision of selecting the CMS platform greatly depends on the nature of the desired project.
We see that many CMS platforms, to some extent, limit their capabilities for the development of large-scale projects. Therefore, for small to medium-sized enterprise solution websites, all the CMS platforms, i.e., WordPress, Joomla, Drupal, WikiSuite, and Grav can provide excellent outcomes and can offer almost every user-required feature.
Nevertheless, the ever-evolving and growing CMS communities are adding to the extensive functionalities and features of the CMS platforms every day thereby assuring their reliability, efficiency, and security.
Therefore, the day when these CMS platforms will be able to support large-scale enterprise software solutions is most definitely, not far.
This article covers how to install Composer on your Linux system and use it for handling the packages and dependencies of the PHP programming language. Composer is a dependency manager for PHP (similar to npm for Node.js or pip for Python ).
With Composer, you can specify the PHP libraries your project depends on, and it will pull and manage all libraries and dependencies for you.
Composer is used in all modern PHP frameworks and platforms such as Laravel, Symfony, Drupal, and Magento.
To install PHP Composer on Ubuntu:
1. Ensure that you have all the necessary requirements installed on your system:
$ sudo apt update
$ sudo apt install wget php-cli php-zip unzip
2. Composer offers an installer written in PHP that we’ll use to install Composer. Use wget to download the installer:
$ wget -O composer-setup.php https://getcomposer.org/installerThe command above will save the file as composer-setup.php in the current working directory .
3. Run the following command to install Composer in the /usr/local/bin directory:
$ sudo php composer-setup.php --install-dir=/usr/local/bin --filename=composer4. To install composer locally enter:
$ sudo php composer-setup.php --install-dir=/path/to/project5. When a new Composer version is available, you can update your installation using the following command:
$ sudo composer self-update


