Proxmox Virtual Environment (VE) is an enterprise-grade open-source server virtualization solution based on Debian Linux distribution with a modified Ubuntu LTS kernel.
It allows you to deploy and manage both virtual machines and containers.
Here at Ibmi Media, as part of our Server Management Services, we regularly help our Customers to perform Software Packages Installation tasks on Debian Linux System.
In this context, we shall look into method to Install Proxmox VE 6 on Debian Buster.
How to Install Proxmox VE 6 on Debian Buster (Debian 10) ?
Before proceeding with this Installation procedure, ensure that your have Debian 10 Buster Linux server (hypervisor) as well as a 64-bit processor with support for the Intel 64 or AMD64 CPU extensions.
Then perform the steps given below.
1. Update Debian OS
Firstly, update apt package index:
$ sudo apt -y update
$ sudo apt -y upgrade
$ sudo reboot
2. Set system hostname
Initially, set the hostname and make sure it is resolvable via /etc/hosts.
$ sudo hostnamectl set-hostname prox6node01.ibmimedia.com –static
$ echo “10.1.1.10 prox6node01.ibmimedia.com prox6node01” | sudo tee -a /etc/hosts
ibmimedia.com should be replaced with a valid domain name.
3. Add the Proxmox VE repository
Basically, all Proxmox packages will be pulled from matching upstream repository which is added manually to the system.
i. Import GPG key:
$ wget http://download.proxmox.com/debian/proxmox-ve-release-6.x.gpg
$ sudo mv proxmox-ve-release-6.x.gpg /etc/apt/trusted.gpg.d/proxmox-ve-release-6.x.gpg
$ chmod +r /etc/apt/trusted.gpg.d/proxmox-ve-release-6.x.gpg
ii. Then add Proxmox VE repository:
$ echo “deb http://download.proxmox.com/debian/pve buster pve-no-subscription” | sudo tee /etc/apt/sources.list.d/pve-install-repo.list
iii. We can now update our repository and system by running:
$ sudo apt update && sudo apt dist-upgrade
iv. Adding Proxmox VE Ceph Repository:
This is Proxmox VE's main Ceph repository and holds the Ceph packages for production use. We can also use this repository to update only the Ceph client.
$ echo “deb http://download.proxmox.com/debian/ceph-nautilus buster main” | sudo tee /etc/apt/sources.list.d/ceph.list
4. Install Proxmox VE packages
i. To install Proxmox VE packages, execute the below commands:
$ sudo apt install proxmox-ve postfix open-iscsi
If we have a mail server in our network, we should configure postfix as a satellite system and our existing mail server will be the 'relay host' which will route the emails send by the proxmox server to the end recipient.
If we do not know what to enter here, choose local only.
ii. Reboot Debian system after installation to boot with Proxmox VE kernel:
$ sudo reboot
5. Access Proxmox VE web interface
i. Connect to the Proxmox VE admin web interface on (https://ipaddress:8006).
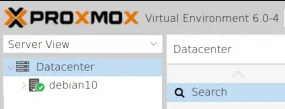
ii. Now you will see the Proxmox VE Dashboard.
iii. Select "PAM Authentication" and authenticate with server's root user password.
iv. Once logged in, create a Linux Bridge called vmbr0,
v. And add the first network interface to it.
How to resolve Common issues while installing Proxmox VE 6 on Debian Buster ?
1. resolv.conf gets overwritten
The PVE GUI expects to control DNS management and will no longer take its DNS settings from /etc/network/interfaces. Any package that auto-generates (overwrites) /etc/resolv.conf will cause DNS to fail.
For example, packages 'resolvconf' for IPv4 and 'rdnssd' for IPv6.
2. ipcc_send_rec[1] failed
If we see "ipcc_send_rec[1] failed: Connection refused", then we should review /etc/hosts file according to the instructions above.
3. Remove the Debian kernel
$ apt remove linux-image-amd64 'linux-image-4.19*'
Update and check grub2 config by running:
$ update-grub
[Need urgent support in fixing Software Packages Installation on Debian Linux System? We can help you. ]
Conclusion
This article covers the installation of Proxmox VE 6 server on Debian 10 (Buster) Linux system. Please note that you need a 64-bit processor with support for the Intel 64 or AMD64 CPU extensions.
Visit Proxmox Documentation website for advanced configurations and to master Proxmox VE Administration.
To Access Proxmox VE web interface:
1. Connect to the Proxmox VE admin web interface on (https://youripaddress:8006).
2. Select "PAM Authentication" and authenticate with server's root user password.
3. And add your first network interface to it.


