A very powerful innovation in Windows Server 2016 is the Virtual disks -VHD Set (VHDS). VHD set: shared virtual disks on hyper-v 2016 allows the use of one virtual disk simultaneous by multiple virtual machines.
Here at Ibmi Media, as part of our Server Management Services, we regularly help our Customers to create a new VHD Set on Windows Server 2016.
In this context, you will learn how to configure it.
Why is VHDS more useful than VHDX ?
Features of shared VHDX were replaced by VHD set as it does not require the configuration of virtual HBA and SAN for the presentation of one LUN to several VMs.
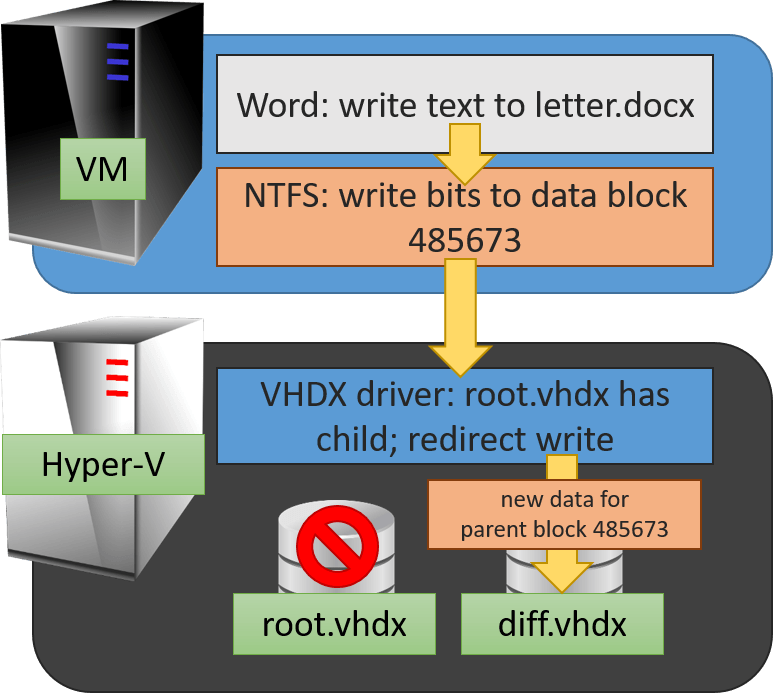
VHDX has drawbacks which does not allow us to change the size or migrate and also do not support backup, whereas VHDS overcomes all these drawbacks and allows hot disk migration and host-level backup.
VHD set: shared virtual disks on hyper-v 2016 do not have these restrictions, but it is available only in the VM running the guest Windows Server 2016.
Steps to create a new VHD Set (VHDS):
To create a new VHDS, simply follow the easy steps below;
1. Start by navigating to the Graphical menu of Hyper-V Manager.
2. Then, Select "New -> Virtual Disk".
3. Next, Specify VHD Set as disk format.
VHD set: shared virtual disks on hyper-v 2016
4. Now, Select the type of disk (fixed or dynamic).
5. You have to Provide file name, location, and size.
To create a disk of VHD Set format, two files will be displayed;
i. .avhdx – a disk file containing data (it can be both fixed and dynamic)
ii. .vhds – a small (260 KB) metadata file to coordinate the interaction between guest cluster nodes
[Need additional support ? We are here to help you!]
Steps to create the disk using PowerShell (Alternative method):
You can create the disk by navigating through the path in the system;
New-VHD –Path c:\clusterstorage\vmstorage01\DynamicDisk.vhds -SizeBytes 40Gb -Dynamic
In the process of creating a disk, it is enough to specify vhds file extension, and PowerShell will automatically create the VHD Set.
[Need urgent help with PowerShell? – We are available to help you today.]
Instances of creating a wo-node guest cluster using VHDS:
We need to create two new VHD Sets for this, one Witness disk and a disk for data.
We can do this in the Hyper-V graphical interface or in PowerShell:
Add-VMHardDiskDrive -VMName VMCL01 -Path "c:\ClusterStorage\SharedDisk\VM_Quorum.vhds" -SupportPersistentReservationsAdd-VMHardDiskDrive -VMName VMCL01 -Path "c:\ClusterStorage\SharedDisk\VM_Shared.vhds" -SupportPersistentReservationsAdd-VMHardDiskDrive -VMName VMCL02 -Path "c:\ClusterStorage\SharedDisk\VM_Quorum.vhds" -SupportPersistentReservationsAdd-VMHardDiskDrive -VMName VMCL02 -Path "c:\ClusterStorage\SharedDisk\VM_Shared.vhds" -SupportPersistentReservationsHow to install Failover Clustering feature on each virtual server
To install failover, simply navigate through;
Install-WindowsFeature -Name Failover-Clustering -IncludeManagementTools -ComputerName VMCL01
Install-WindowsFeature -Name Failover-Clustering -IncludeManagementTools -ComputerName VMCL02
How to Initialize the disks:
navigate through;
get-disk |? OperationalStatus -Like “Offline” | Initialize-Disk
How to Create NTFS partitions:
You can do this via;
New-Volume -DiskNumber 1 -FileSystem NTFS -FriendlyName Quorum
New-Volume -DiskNumber 2 -FileSystem NTFS -FriendlyName Data
Now create a cluster:
# Compatibility check
Test-Cluster VMCL01,VMCL02
# Creating cluster
New-Cluster -Name FSCluster01 -Node VMCL01,VMCL02 -StaticAddress 192.168.0.50
(Get-ClusterResource |? Name -like “Cluster Disk 1″).Name=”Quorum”
(Get-ClusterResource |? Name -like “Cluster Disk 2″).Name=”Data”
# Specify the Witness disk
Set-ClusterQuorum -DiskWitness Quorum
# Add Cluster Shared Volume
Get-ClusterResource -Name Data | Add-ClusterSharedVolume
If the steps are followed in the right way we will get a two-node guest cluster.
[Need additional help? – We are available to help you today.]
Conclusion
In this guide, we learnt the concept of VHDS on hyper-v 2016 and how to configure a new VHD Set (VHDS).
In this guide, we learnt the concept of VHDS on hyper-v 2016 and how to configure a new VHD Set (VHDS).


