When there is a improper permissions or a recent Windows 10 upgrade, you might experience an error which makes folder to Keep Reverting to Read Only on Windows 10.
Here at Ibmi Media, as part of our Server Management Services, we regularly assist our clients to fix Windows related issues.
In this context, we shall look into how to tackle this error.
What triggers "Folder Keeps Reverting to Read Only on Windows 10"?
Basically, you will notice that some folders/files will be read-only in order to protect file integrity. If this is the case, the affected folder keeps returning the read-only status automatically, making them uneditable.
The main causes of this error are:
i. Windows upgrade
If we have recently upgraded our system to Windows 10, our account permissions may have been altered. Hence resulting in the error.
ii. Account permissions
Sometimes, the error could simply be our account permissions. It is a most common cause, without us realizing it.
[Still experiencing this error? Do not worry. Simply Follow these easy tips provided by our Support Experts.]
How to fix "Folder Keeps Reverting to Read Only on Windows 10"?
Generally, to solve this error, you need to log in to the system with an administrative account.
Try to modify the folder/file from there. Once done, disable the antivirus and try it again.
You can also apply the following tips;
1. How to Disable the Controlled access?
Control access protects our files from getting modified by any third-party application. Hence, to disable this access we follow these steps:
i. Start by pressing "Windows key+S" and type "Windows Security".
ii. Then, click on the "Windows Security".
iii. After that, click on the "home icon" and then click on the "Virus & threat protection".
iv. Scroll down in the Windows Security window to locate Virus & threat protection settings.
v. Then, click on the "Manage settings".
vi. After that, scroll down to find the "Controlled folder access".
vii. Then, click on the "Manage Controlled folder access".
viii. Finally, Switch the "Controlled folder access" to "Off".
Close the Windows Security window and reboot the computer.
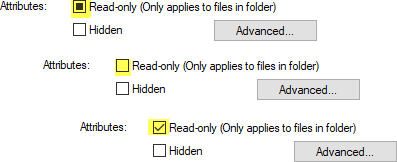
2. How to Modify the attribute of the problematic folder?
We can modify the attribute of the problematic folder. To do this follow the steps below;
i. Start by pressing the "Windows key+S" keys together. Then, type "cmd" in the search box.
ii. Then, right-click on the "Command Prompt" and click on the "Run as administrator".
iii. Once the terminal appears, paste this code, modify it according to our requirements, and hit Enter.
attrib -r +s drive:\<path>\<foldername>
Note: Replace "drive:\<path>\<foldername>" with the troublesome file/folder location on the system.
For instance, we have a file named "Test" in the "C:\Users\Bob\Pictures\New folder" location. So, the command will look like:
attrib -r +s C:\Users\Bob\Pictures\New folder\Test.txtThis will remove the read-only attribute from the file and attach a new default system attribute to the particular file.
Sometimes, changing the file attribute can create problems with some folders/files. Hence, to undo the changes to the file/folder attributes, follow this step:
Type and modify this command in the CMD terminal and press Enter.
attrib -r -s drive:\<path>\<foldernameThis should discard the system attribute assigned with the previous command.
3. How to Modify the Permissions of the drive?
Another solution is to adjust the permission for the drive and test it out. To the following;
i. Start by locating the drive where the file/folder is on our computer.
ii. Then, right-click on the drive and click on "Properties".
iii. Next, Click on the "Security" tab.
iv. Now, click on "Advanced".
v. Once the Advanced Security settings appear, click on the "Change Permission".
vi. Then, select the account from the list in "Permission Entries:".
vii. After that, click on "Edit".
viii. After this, click on the drop-down and choose "This folder, subfolders, and files".
ix. In the "Basic permissions:" tick the box of "Full control".
x. Click on "Apply" and "OK" to effect the changes made.
Now, if we have multiple user accounts on our system, we have some additional steps to cover;
1. Press the Windows key+R key.
2. Then, Type “C:\Users” and click on "OK".
3. In the Users folder, right-click on the other account (the account we are not using now) and click on "Properties".
4. In the Properties window, click on the "Security" tab.
5. Then, click on "Advanced".
6. In the Advanced Security settings click on "Enable inheritance".
7. We have to save this change. Click on “Apply” and “OK“.
Once again, Check out the folder/file.
4. How to Run SFC and DISM scan checks?
We can use the system file checker to repair the corrupt files on our system. To do this, follow the steps below;
1. Press the Windows key+R.
2. Then, type this code and hit Enter.
cmd3. To run an SFC scan type this command and hit Enter to run a simple SFC scan.
sfc /scannow4. Running a DISM scan is a very easy process. To do so, copy-paste these commands one by one and then hit Enter.
DISM.exe /Online /Cleanup-image /ScanhealthDISM.exe /Online /Cleanup-image /RestorehealthDISM.exe /online /cleanup-image /startcomponentcleanupOnce all these checks are complete, close the terminal and restart the device.
5. How to Log in as an Administrator?
If we have created multiple accounts on our system, we need to make sure we are signed in as an administrator while accessing the file.
The reason we are not able to read or edit the file/folder could be that the file/folder was created using an administrator account and we are trying to access it using a guest account or any other.
6. How to disable third-party antivirus?
If the error persists whenever the system restarts, it could be due to any third-party antivirus software. The antivirus might be detecting the files as a threat and consequently, stopping us from accessing them.
In such a case, we will have to disable the antivirus software, change the attributes of the files/folders as mentioned above and restart the system to see if the files/folders still revert to read-only.
If they do not, it means the antivirus is causing the issue and we should probably uninstall it.
[Does the issue persists? We are ready to help you today!]
Conclusion
This article will guide you on the methods to fix "Folder Keeps Reverting to Read Only on Windows 10".
This article will guide you on the methods to fix "Folder Keeps Reverting to Read Only on Windows 10".


