Need help to set up Microsoft Outlook for Zimbra?
This guide is for you.
Microsoft Outlook is basically a personal information manager software system from Microsoft, available as a part of the Microsoft Office suite.
Here at Ibmi Media, as part of our Server Management Services, we regularly help our Customers to perform Software Installation and Configuration tasks on their Systems.
In this context, we shall look into the steps to configure Microsoft Outlook for Zimbra email server to send and receive emails.
How to go about setting up Microsoft Outlook for Zimbra?
As earlier stated, Microsoft Outlook is the default email client in the Microsoft space which helps millions of users connect all their email accounts, calendars, and files in one convenient spot.
Similarly, Zimbra is one of the most common open source email collaboration solutions used by most enterprise setups.
In addition, to see how our Support Experts configured Microsoft Outlook for Zimbra, simply follow the steps below:
1. Start by ensuring that Microsoft Outlook application is installed.
2. When we first open Outlook, it will prompt us to set up an account.
3. If it does not, go to File > Info > Add Account.
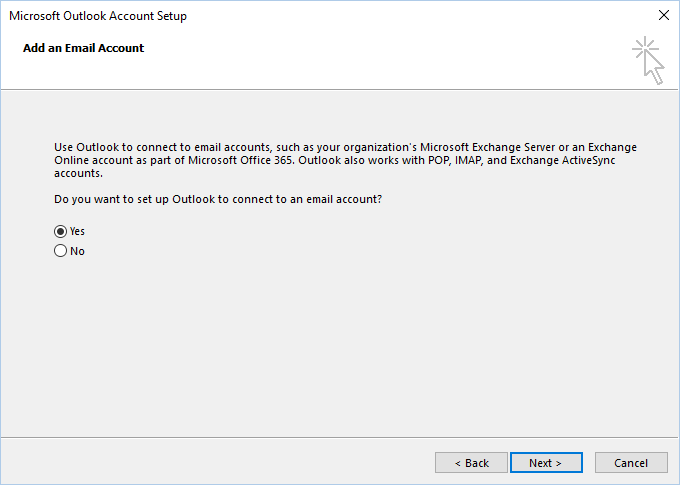
4. Select Yes for the question: Do you want to set up Outlook to connect to an email account?
5. Click on Next
6. Select Manual setup or additional server types. Click Next. Microsoft Outlook for Zimbra
7. Choose POP or IMAP, and then choose Next.
8. Enter all the required information:
Your Name: Enter name which will appear when we send out an email
Email address: Enter full email address
Account type: Select IMAP
Incoming mail server: hostname of Zimbra mail server (MX record value)
Outgoing mail server: hostname of Zimbra mail server
User Name: Enter full email address
Password: Enter a strong password
Remember password: If we do not want to type in the password whenever Outlook opens, check this box.
9. Once done, on More Settings, the internet email dialogue box will appear.
10. Under the Outgoing Server tab, check “My outgoing server (SMTP) requires authentication”.
11. If not already selected, we select Use same settings as my incoming mail server.
12. Under the Advanced tab:
In the Incoming Server area, choose SSL for the type of encrypted connection, and change the port number to 993.
In the Outgoing Server area, choose TLS for the type of encrypted connection, and change the port number to 465.
Incoming Server: Zimbra server hostname
Protocol: IMAP
Port 993 (SSL Enabled)
Outgoing server: Zimbra hostname | or relay server if any
Protocol: SMTP
Port 465 (SSL Enabled)
13. Click Next.
14. Then click Finish.
Finally, try to login to the account and send a test email.
The system is now ready to start sending and receiving emails on the Outlook application.
[Need help to set up Microsoft Outlook for Zimbra? We are available 24*7]
Conclusion
This article will guide you on the steps to configure Microsoft Outlook to connect to the Zimbra email server for sending and receiving emails.
This article will guide you on the steps to configure Microsoft Outlook to connect to the Zimbra email server for sending and receiving emails.


