Most Windows users experience the error "Windows No Longer Detects a HomeGroup on this Network".
Here at Ibmi Media, as part of our Server Management Services, we regularly help our Customers to fix Windows issues.
In this context, we shall look into the causes of this error and how to fix it quickly.
More information HomeGroup on Windows?
A HomeGroup is a collection of Windows computers connected to each other on a Local Area Network (LAN) that can share printers and files with one another, through the network.
Windows's HomeGroup feature is extremely useful for those with more than one Windows computer at home as it makes sharing printers and files between computers easy.
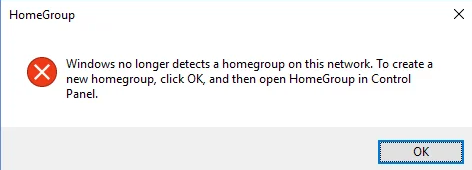
However, when trying to connect a Windows 10 computer to a HomeGroup that already exists on the network, Windows users have often reported the computer not being able to connect to the HomeGroup and instead displays an error message that states:
Windows no longer detect a HomeGroup on this network. To create a new HomeGroup, click OK, then open HomeGroup in Control Panel.
What triggers error "Windows no Longer Detects a HomeGroup on this Network" ?
There will be many factors that may cause 'Windows no Longer Detects a HomeGroup on this Network' error. In most cases, this problem is seen after upgrading all the computers on an already existing HomeGroup to Windows 10 with the HomeGroup still active.
If a user affected by this problem click on OK and navigates to HomeGroup in the Control Panel. That user will not be provided with any option to create a new HomeGroup – they only see an option to join the already existing HomeGroup.
It is always better to decommission an existing HomeGroup before upgrading all the computers on the HomeGroup to Windows 10.
Steps to fix the error "Windows no Longer Detects a HomeGroup on this Network" ?
1. Disable any and all Antivirus and Firewall programs on the affected computers.
Often the affected computers will not be able to join the existing HomeGroup this can be because of something as trivial as an antivirus or firewall program – either stock or third-party.
The first thing we can do to fix this is to try to disable any and all antivirus and firewall programs on every single one of the affected computers.
For Windows Security:
1. First, go to Settings then take Update & Security.
2. Then go to Windows Security.
3. From Windows Security take Virus & threat protection >Manage settings
4. Switch Real-time protection to Off.
For Avast:
1. Search for Avast and open it.
2. Click on Avast shields control.
3. Locate the options to disable the program – the options are to disable it for 10 minutes, an hour, until the computer is restarted or permanently (until you yourself turn it back on).
4. We have to select from the above options and disable it.
For AVG:
1. First search for AVG and open it.
2. Click on Temporarily disable AVG protection.
3. Then choose the duration for which AVG should be off
4. Also, we can specify if we wish to disable AVG Firewall too.
5. Click on OK to disable the antivirus program.
For McAfee:
1. Open McAfee Antivirus
2. Click on Exit.
3. We can see a dialog box warning asking for confirmation to disable McAfee give OK to disable.
Steps to disable Firewall on Windows:
We can turn off the firewall to eliminate the possibility that it is causing the problem.
1. First press Windows Key + I to open up Settings.
2. Then search for "Windows Defender Firewall".
3. After that select "Windows Defender Firewall".
4. Click on "Turn Windows Defender Firewall on or off".
5. Then check the "Turn off Windows Defender Firewall" boxes under both the settings.
After that, we have to check If "Windows no longer detects a HomeGroup on this network." error message still appears while trying to connect the affected computers to the HomeGroup.
[Need assistance with Windows error? We are here for you!]
2. Leave the HomeGroup on the computer that created it and then create a new HomeGroup.
One way to fix "Windows no longer detects a HomeGroup on this network." error is to leave the existing HomeGroup and create a new HomeGroup.
Steps to follow are:
i. On the computer that was used to create the existing HomeGroup, quit/leave the HomeGroup.
ii. While creating a new HomeGroup on the same computer as the one that was used to create the old HomeGroup works in most cases, it is still recommended that you use a different computer for the job.
iii. After creating a new HomeGroup we have to note down the password.
iv. Then we can try to connect all the computers in the network with the HomeGroup.
3. Remove all traces of the old HomeGroup and create a new one.
If you are simply not getting an option to quit or leave the old HomeGroup on the computer the old HomeGroup was created on, we can resolve it by getting rid of every trace of the old HomeGroup and creating a new HomeGroup on a computer other than the one that was used to create the original HomeGroup.
Steps to follow are:
i. On every single computer we wish to connect to the new HomeGroup that we will create later on, navigate to the following directory and delete all the PeerNetworking folder's contents:
X:\Windows\ServiceProfiles\LocalService\AppData\Roaming\PeerNetworkingReplace X with the drive letter corresponding to the partition of the computer’s hard drive that Windows is installed on.
ii. On every single computer we wish to connect to new HomeGroup, press the Windows Logo key + R to open a Run dialog, type services.msc into the Run dialog and press Enter to launch the Services manager.
iii. And then scroll down and locate the HomeGroup Provider service, right-click on it and click on Stop to stop it.
iv. Now turn all the computers connected to the network off.
v. Then turn on any one of the computers on the network that was NOT the computer on which the original HomeGroup was created.
vi. After turning on the computer we can see that there is no trace of an existing HomeGroup on the network, we can now create a new HomeGroup on the network using this computer.
vii. Once we create the new HomeGroup, turn the other computers on the network ON one by one and have them join the new HomeGroup.
We can see that all the computers will be able to connect with the newly created HomeGroup thus fixing the ‘Windows no Longer Detects a HomeGroup on this Network’ issue.
[Still facing this Windows issue? We are here for you!]
Conclusion
This article will help to fix "Windows no Longer Detects a HomeGroup on this Network" issue.
This article will help to fix "Windows no Longer Detects a HomeGroup on this Network" issue.


