Taking Backups and Restoring Nagios System are important aspects of the administration and maintenance of the system.
Here at Ibmi Media, as part of our Server Management Services, we regularly help our Customers to perform Nagios related queries.
In this context, we shall look into how to backup and restore a Nagios XI installation from a previously made backup.
How to perform Backup and Restore Nagios System ?
They can easily facilitate the migration of a Nagios XI installation between a virtual server and a physical server, and the design of a fail-over or disaster recovery instance of Nagios XI.
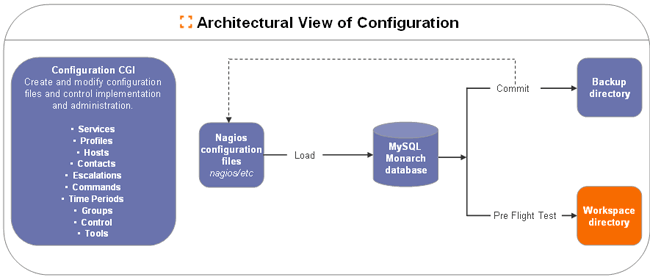
Backup Overview
The backup script will:
i. Gather all the files into a directory in /store/backups/nagiosxi/
ii. After collecting all of this data it then creates the .tar.gz file
iii. Then, it will then delete all the files it collected during the gathering process
iv. In relation to the scheduled backups, the .tar.gz file will copy to the location defined in the scheduled backup method and then delete from /store/backups/nagiosxi/
If we change the MySQL root password to something different than “nagiosxi” (the default), we will need to edit the script and change the themysqlpass= definition found in the first few lines of the script.
There are multiple methods for creating a backup. Today, let us focus on a method to do this.
1. How to create A Backup From The Command Line ?
To create a backup of the Nagios XI system from the command line;
i. Open a terminal or SSH session and log into the Nagios XI server as the root user.
ii. Next, we can create a backup of the Nagios XI installation by running the following script:
# /usr/local/nagiosxi/scripts/backup_xi.shA successful backup will complete with the following message:
===============
BACKUP COMPLETE
===============
Backup stored in /store/backups/nagiosxi/1479858443.tar.gz
2. Create A Manual Backup In The Web Interface
i. We can create manual backups in the web UI via Admin > System Backups > Local Backup Archives.
ii. Click the Create Backup button and the backup process will begin. There is no status of the backup process on this page, we will only know it is completed when the .tar.gz file appears in the list of backups.
3. Schedule Backups In The Web Interface
We can schedule backups in the web UI via Admin > System Backups > Scheduled Backups.
There are three methods available for scheduling backups (FTP, SSH, Local). We are not restricted to choose any particular method, multiple options are available however it is advisable to not overlap backup schedules.
To enable a scheduled backup method we need to check the Enable box at the top of the tab.
Any of the methods allow to schedule it for Daily, Weekly, or Monthly (first day of) along with specifying a particular time.
These methods allow us to define the Backup Limit, this is how many backups we would like to keep before replacing the oldest backup.
FTP
The FTP method is fairly straight forward and the options do not require explaining.
SSH
The SSH method has similar options as the FTP method however it does allow for different authentication types:
Password
– Simpler to setup
– Less secure
Public Key
– Requires a public key to use in conjunction with a passphrase
– More secure but requires some additional setup steps
Local
The Local method is fairly straight forward, the options do not require explaining.
We recommend saving a copy of the backups we create on another server or backup medium. There is no point in having backups if they reside on a disk that just crashed.
4. Configure SSH Public Key
i. Click the Generate Public/Private Key button to create the required keys. The screen will refresh with a message at the top saying “Successfully created a Public/Private SSH Keypair” and we will see several fields now populated with values.
ii. The keys are in the /usr/local/nagiosxi/var/keys/ directory on the Nagios XI server and the filename will generate randomly.
iii. We now need to copy the Public Key to the remote machine we use for the SSH backups. The key, by default, is on the remote machine in the user’s home directory under ./ssh/authorized_hosts.
There are two methods available to copy the public key to the remote machine.
iv. We can click the Show Public Key button which displays the value of the public key that needs to place into the authorized_hosts file on the remote machine in the user’s home directory under ./ssh/.
v. We can also copy the key from a terminal session from the Nagios XI server. Executing the command in a terminal session is a fool-proof way of ensuring the public key correctly copy to the remote machine.
In this case, the remote machine has a Nagios user account and this will be used in the command:
# cd /usr/local/nagiosxi/var/keys/
# ssh-copy-id -i ssh.xi.1570495238.pub nagios@remote_machine
There are several options in that command that require explaining:
a. ssh.xi.1570495238.pub
This is the public key we copy, refer to the Public Key Location field for this value
b. nagios@remote_machine
Nagios is the user account on the remote machine
This account requires a password, if it does not have one then the following command can be executed:
passwd nagiosc. remote_machine
This is the remote machine we use for SSH backups
It needs to be the same value we use in the SSH Server field
When we execute the command you will first see output similar to this:
The authenticity of host ‘remote_machine (2001:44b8:3132:25:10:25:5:32)’ can’t be established.
ECDSA key fingerprint is 5e:ef:1c:c4:f9:6b:95:29:fd:57:93:44:16:00:aa:e1.
Are you sure you want to continue connecting (yes/no)? Yes
We need to type Yes to proceed. Then we will receive output similar to:
/usr/bin/ssh-copy-id: INFO: attempting to log in with the new key(s), to
filter out any that are already installed
/usr/bin/ssh-copy-id: INFO: 1 key(s) remain to be installed – if you are
prompted now it is to install the new keys
nagios@remote_machine’s password:
Subsequently, we will need to type the password of the user account on the remote machine.
If it was successful then the output should be similar to:
Number of key(s) added: 1
Now try logging into the machine, with: “ssh ‘nagios@remote_machine'”
and check to make sure that only the key(s) you wanted were added.
To confirm that it was successful we can execute the following command:
ssh -i ssh.xi.1570495238 nagios@remote_machineWe will receive a prompt:
Enter passphrase for key ‘ssh.xi.1570495238’:We can get the passphrase can from the Nagios XI Scheduled Backups page by clicking the eye icon next to the Private Key Password field.
Then, we should be logged in as:
Last login: Wed Apr 4 15:00:30 2018 from nagios_xi_serverThis means we have correctly copied the key to the remote server. Type exit to log out of the remote server.
The last step is to define the settings on the Nagios XI Scheduled Backups page. You will need to define:
1. SSH Server- The address of the remote server
2. SSHPort – The port used for SSH, 22 is the default
3. SSH Username – This is the username to connect as explained above
4. The Key fields will already populate
5. Remote Directory – The backups will store in this location
Once we populate the field, click the 'Update Settings' button to save the values. The screen will refresh and will display “Updated scheduled backup settings” at the top of the page.
We should now test that it works correctly.
i. Test Connection – This will confirm if it can connect
ii. Test SCP Transfer – This will confirm that a file can copy to the remote location
If it fails we may need to correctly define the permissions on the remote server, for example:
– chown -R nagios:nagios /backups/nagiosxi
– chmod o+w /backups/nagiosxi
Once we complete these steps the SSH backups configure to use a Private Key.
[Failed installation of Software in Linux? We are available 24*7. ]
5. Restoring Overview
Before we restore from a backup, we must make sure that we have performed an installation of Nagios XI on the target machine we plan on restoring. This ensures that the required users, groups, and packages are set up and installed on the target system.
The version of the fresh install of Nagios XI that we restore should match the version of Nagios XI that the backup was taken from.
For example, The server we are restoring to must have Nagios XI 5.2.2 on it
We can download all versions of Nagios XI from https://assets.nagios.com/downloads/nagiosxi/versions.php
After performing the restore we can then proceed to upgrade to the latest version available.
If we have Nagios XI configured with a RAM Disk we need to make sure the system we are restoring to already has the RAM Disk configured.
6. Restore A Backup From The Command Line
To restore a backup of the Nagios XI system, we must execute the restore script from the command line.
However, if we perform the restore on a new system we will need to copy the .tar.gz file to the /store/backups/nagiosxi/ directory.
To restore a backup of the Nagios XI system from the command line, we establish a terminal session to the Nagios XI server as the root user.
Start the restore by running the following script, pointing it to the full location of the .tar.gz file:
# /usr/local/nagiosxi/scripts/restore_xi.sh </full/path/to/backupfile.tar.gz>For example,
# /usr/local/nagiosxi/scripts/restore_xi.sh /store/backups/nagiosxi/1279411912.tar.gzWe wait while it performs the restore.
A successful restore will complete with the following message:
===============
RESTORE COMPLETE
===============
7. After The Restore
If we perform a restore on the same server that the backup was created, we only need to login to Nagios XI to confirm it is working as we expect.
If we restore Nagios XI to a different server, we may require the following additional steps:
a. Changed IP Address
If the IP Address of the Nagios XI server changed:
i. Navigate to Admin > System Config > System Settings and ensure the Program URL and External URL are correct
ii. Then we navigate to Admin > System Config > License Information and ensure the server is licensed
iii. Reconfigure and agents/clients like NRPE or NSClient++ to allow the new IP address to connect
b. Changed Operating System Version/Architecture/Family
If we restore a backup from a different OS version, architecture or family this can be a problem because the backup is overwriting the compiled binaries.
To fix this we need to execute the following commands:
# cd /tmp/
# wget https://assets.nagios.com/downloads/nagiosxi/scripts/restore_repair.sh
# chmod +x restore_repair.sh
# ./restore_repair.sh
The script downloads the Nagios XI tarball for the version we restore and installs a series of components, this fixes a few minor incompatibilities between the operating systems.
However, if we migrate from a 32 bit to a 64-bit machine, we will have to convert the performance data to XML and import it into RRD’s on the new machine.
8. Restore Troubleshooting
In certain circumstances the restore can fail, generally, the script will give an error message which can highlight the reason for the failure. After fixing the problem re-run the restore script again.
If we changed the themysqlpass= definition in the restore script, we will most likely need to make that change again as the restore script will have been deleted and restored from the backup.
However, the most common problem experienced in the restore script is MySQL permission issues:
ERROR 1045 (28000): Access denied for user ‘root’@’10.26.5.12’ (using password: YES)
Error restoring MySQL database ‘nagios’ – check the password in this script!
Generally, we resolve it by changing the themysqlpass= definition in the restore script to match that of the root password on the MySQL server.
If we have offloaded the MySQL databases to an external server, we may need to grant the root user permission to connect to allow the restore to work.
The following commands will do just that (these commands will use mypassword as the example password).
Establish a terminal session to the offloaded MySQL server and execute the following commands:
mysql -u root -p’mypassword’Once logged in, we execute these commands:
GRANT ALL PRIVILEGES ON *.* TO ‘root’@’10.26.5.12’ IDENTIFIED BY ‘mypassword’ WITH GRANT OPTION;
FLUSH PRIVILEGES;
QUIT;
We will need to change the address 10.26.5.12 to the IP address of the Nagios XI server. After making these changes the restore script should successfully complete.
[Stuck with your restoration of Nagios Database? We'd be happy to assist. ]
Conclusion
This article will guide you on how to perform #Backup and #Restore of the #Nagios System are important aspects of the #administration and #maintenance of the #system.
Backups are an important aspect of administration and maintenance of your system. They can easily facilitate the #migration of a Nagios XI #installation between a virtual server and physical server, and the design of a fail-over or #disaster #recovery instance of Nagios XI.
There are three main types of backup: full, incremental, and differential:
1. #Full backup. As the name suggests, this refers to the process of copying everything that is considered important and that must not be lost.
2. #Incremental backup.
3. #Differential backup.


