
Smartermail 601 error - Ways to fix it ?
This article covers methods to fix the Smartermail 601 error. This can arise as a result to DNS lookup failure. You can try to contact your ISP and ask them to active PTR record on your ip and domain name.
Also, you can try the following fix:
- check your domain or IP to be unblocked by spam checking website, the powerful website in this range is Barracuda'.
- Try to test SMTP OUT by Telnet command by type: telnet IP port ( mostly 25 or 2525).
- Get details about your PTR on the main domain you defined on Smartermail or etc mail server software.
- Contact to your ISP to check to open the specific port 25).
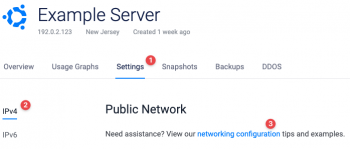
Enable private networking Vultr - Step by Step Process ?
This article covers how to enable private networking vultr for our customers. Vultr provides many flexible networking options for your cloud servers. Private networks do not have DHCP. When deploying a Vultr cloud server with private networking, you must manually configure the private adapters or supply your own DHCP server.
To setup a private IP address:
- Allocate an IP range.
- Go to the VPC networks page in the Cloud Console. Open the VPC networks page.
- Under Name, click the VPC network in which you want to create a private Cloud Data Fusion instance.
- On the VPC network details page, click the Private service connection tab.
- Click Allocate IP range.

Install DirectAdmin on AlmaLinux - Step by Step Process ?
This article covers how to install Directadmin on Almalinux. AlmaLinux OS is an open-source, community-driven project that intends to fill the gap left by the demise of the CentOS stable release. AlmaLinux OS is a 1:1 binary compatible fork of RHEL 8 guided and built by the community.
Operating systems supported by DirectAdmin:
- CloudLinux - 6.x 64-bit, 7.x 64-bit, 8.x 64-bit.
- AlmaLinux / RHEL / CentOS - 7.x 64-bit, 8.x 64-bit.
- Debian - 8.x 64-bit, 9.x 64-bit, 10.x 64-bit, 11.x 64-bit ALPHA.
- Ubuntu - 16.04 64-bit, 18.04 64-bit, 20.04 64-bit.
- FreeBSD - 11.x 64-bit, 12.x 64-bit.
To Install Directadmin on Almalinux:
Login as root to your server, download the installation script, and run it.
bash <(curl -Ss https://www.directadmin.com/setup.sh || wget -O - https://www.directadmin.com/setup.sh) auto
Main Features of AlmaLinux:
1. Stable, production-ready, RHEL-based
AlmaLinux is an enterprise-grade server Operating System and a stable Linux distribution with normal releases. AlmaLinux is able to run critical workloads.
2. Easy to switch from CentOS
AlmaLinux will be a 1:1 binary compatible fork of RHEL, which implies that the applications and administrations will stay viable, so switching is simple from CentOS to AlmaLinux.
3. Free Operating System, and supported by Cloudlinux
CloudLinux offers a support commitment with Patches and maintenance through 2029 for AlmaLinux with a great investment. They also deliver AlmaLinux free of limitations, fees, and charges.

Access Nagios Network Analyzer Reports - How to do it ?
This article covers how to access Nagios Network Analyzer Reports. This is done by configuring the Nagios Network Analyzer Component within Nagios XI. Having the Network Analyzer reports available in Nagios XI will allow quick and easy access to your Nagios Network Analyzer Network Report and Network Query report.
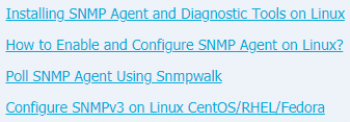
Install and Configure SNMP on RHEL/CentOS/Fedora - How to do it ?
This article covers how to install and configure SNMP on RHEL. SNMP (Simple Network Management Protocol) is widely used for monitoring and central management purposes.
To Install SNMPd Agent on Ubuntu Server:
1. Type the following commands as root, then click Enter:
$ sudo apt-get update
$ sudo apt-get install snmp snmp-mibs-downloader
$ sudo apt-get update
$ sudo apt-get install snmpd
2. You might also need to execute:
$ sudo download-mibs
SNMPd Configuration
The snmpd daemon must be configured to work with Atera. The configuration file is located at "/etc/snmp/snmpd.conf".
Make sure you are editing the snmpd.conf file and not the snmp.conf file.
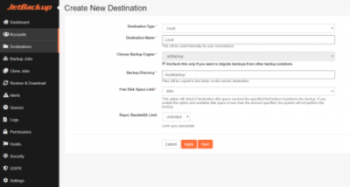
Create New Destinations for JetBackup
This article covers how to create New Destinations for JetBackup. Basically, clients choose to store at least one copy of backups locally and additional copies in at least one or more remote destinations. Remote destinations are usually slower than local destinations to backup and restore from due to bandwidth requirements. With this in consideration, many clients choose to store at least one copy of backups locally and additional copies in at least one or more remote destinations.
Whatever backup destination option(s) you choose, please make sure that your destination path is secure and has the appropriate privileges.
How To Secure Local Backup Storage ?
Prior to adding a destination to JetBackup, we advise securing the backup directory, so that only the allowed users can access that folder.
In order to do that, please connect to the destination via console/GUI, and make the directory in which you want to store your backups.
For example:
$ mkdir [-p] /mnt/backup_vol/jetbackup
Then we advise securing that destination so only one user can access it's content (except root):
$ useradd <jetbackup>
$ chown jetbackup:jetbackup /mnt/backup_vol/jetbackup
$ chmod 700 /mnt/backup_vol/jetbackup
Right now only two users that can access this directory are root and jetbackup.
Please search online, how to secure a backup folder for your particular file system (EXT, NTFS, FAT, etc..) on your system (Windows, Linux, macOS, BSD, etc..)


