
SQL Server Error 19471: Create failed for Availability Group Listener
This article covers methods to fix SQL Server Error 19471. Basically, "SQL Server Error 19471" can happen while configuring Always On Availability Group again on the database server.
To fix SQL Server Error 19471:
- Create a Client Access Point (CAP) for the AOAG listener in Failover Cluster Manager.
- Bring CAP Online.
- Repair the CAP, if it is not coming ONLINE.
- Once CAP comes online, remove it from failover cluster manager.
- Add listener to AOAG in SSMS.
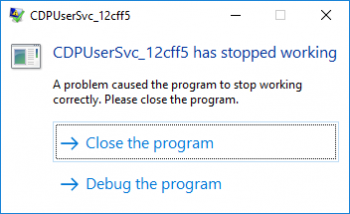
CDPUserSvc has stopped working – Fix it Now ?
This article covers different methods to fix CDPUserSvc has stopped working error. Basically, The function of the service as its description suggests is to make the connection with Bluetooth devices easier.
You can fix CDPUserSvc has Stopped Working in Windows 10 by isolating the process too.
1. Type cmd Cortana text field and from the suggestion, put a right-click on Command Prompt.
From the options that pop-up, click "Run as administrator".
2. Run the following command:
sc config cdpusersvc type=own
With this command, Windows will isolate this module forcibly. We know that isolation of any process is a default activity for that service.
As a result, Microsoft will find another correct way to run CDPuserSvc service in another mode by default.

MySQLdump: Got error: 1044 when selecting the database - Fix it Now ?
This article covers methods to resolve MySQLdump: Got error: 1044 when selecting the database.
When this error happens, you will get an error message such as this:
mysqldump: Got error: 1044: Access denied for user ‘root’@’localhost’ to database ‘information_schema’ when using LOCK TABLES
To fix this MySQLdump error:
1. You can pass the –single-transaction option to mysqldump command:
$ mysqldump --single-transaction -u user -p DBNAME > backup.sql
2. Also, you can simply grant LOCK TABLES to your user:
$ mysql -u root -p
And type:
mysql> GRANT SELECT,LOCK TABLES ON DBNAME.* TO 'username'@'localhost';

WMI Monitoring With Nagios - How to do it ?
This article covers how to monitor Windows machines with Nagios XI using WMI.
Basically, to set up WMI monitoring with Nagios, we need to configure A WMI User Account On The Windows Machine and then set up the WMI permissions. Windows Management Instrumentation (WMI) is a technology that allows for agentless monitoring of Windows servers and workstations.
Benefits of WMI Monitoring With Nagios:
- Increased server, services, and application availability.
- Fast detection of server and operating system failures.
- Fast detection of service and application failures.
- Agentless monitoring.

Install WMI Client in Nagios XI Server for Windows monitoring
This article covers how to perform the installation of the WMI Client in Nagios. Nagios provides complete monitoring of Windows operating systems via WMI – including operating system metrics, service state, process state, file system usage, and more.
Windows Management Instrumentation (WMI) is a technology that allows for agentless monitoring of Windows servers and workstations.
Agentless technologies like WMI and SNMP allow IT administrator to deploy monitoring solutions without having to install agent software on each monitored system.

Configure inbound checks with Nagios – How to do it ?
This article covers how to easily configure inbound checks using both these APIs. Basically, there are two APIs available to handle inbound check transfers in Nagios XI:
- NRDP - This api works on port 80 (HTTP) or 443 (HTTPS).
- NSCA - This api works on TCP port 5667.
This will guide Nagios Administrators that needs to configure inbound checks.


