
Configure outbound checks in Nagios - How to do it ?
This article covers how to effectively Configure outbound checks with Nagios. Outbound checks are used in federated and distributed monitoring environments, as well as environments where the monitoring server sends passive check results to external applications.
What is a distributed monitoring in Nagios ?
This is a method of scaling Nagios Xi and Nagios Core to monitor a lot of devices / machines - sometimes across different networks. Large organizations often want distributed monitoring, as do MSPs. Nagios Fusion's central dashboard can be ideal for distributed monitoring solutions. Both Nagios XI and Nagios Core can be configured for distributed monitoring.
What is a server ?
This is a dedicated computer system that generally runs databases, websites, etc. Servers are not used by people on a regular basis (as compared to workstations), but are rather used to run batch jobs, applications, and services.
What is passive check in Nagios ?
This is a check that is performed by an external application, operating system, or device and is submitted to Nagios Core or Nagios XI for processing.
Some monitoring agents - including NSCA, NCPA, and NRDP can be used to send passive checks to Nagios.
An SNMP trap is also considered a passive check.

Install Python 3.9 on Debian 10 - Step by Step Process ?
This article covers Python installation on Debian Linux System. Basically, Python is a programming and scripting language developed under open source license, making it freely usable and distributable, even for commercial use.
Python 3.9 is the latest major release of the Python language. It includes many new features such as new dict operators, new str functions, support for IANA time zone, and more.
After Python 3.9 installation on your Linux System, you can verify it easily by running the command:
python3.9 --version
The output should show the Python version installed.
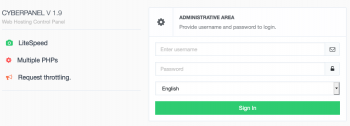
Install Joomla with CyberPanel on Ubuntu - Step by Step Process ?
This article covers method to install Joomla from the CyberPanel dashboard.
Basically, CyberPanel can be your ideal web hosting control panel. It is easier to use in some cases compared to other control panels.

Install Joomla in CloudPanel - Step by Step Process ?
This article covers how to Install Joomla in CloudPanel control Panel. Basically, Joomla is a free and open-source content management system for publishing web content on websites.
Step by Step how to setup Joomla 3.9 with CloudPanel:
1. Login via SSH to the server e.g. with john-ssh and go to the users tmp directory:
$ cd ~/tmp
2. Download and extract the latest Joomla 3.9 version.
$ mkdir ~/tmp/joomla-3.9 && curl -sL https://downloads.joomla.org/cms/joomla3/3-9-25/Joomla_3-9-25-Stable-Full_Package.tar.gz | tar xfz - -C ~/tmp/joomla-3.9/
3. Move files to the htdocs directory of the domain:
$ cp -R joomla-3.9/* /home/cloudpanel/htdocs/www.domain.com/
4. Reset permissions.
$ cd /home/cloudpanel/htdocs/
$ clpctl system:permissions:reset www.domain.com 775
5. Clean up the tmp directory.
rm -rf ~/tmp/*
6. Open your domain in the browser and go through the installation wizard.
7. Done! Joomla 3.9 is now installed.
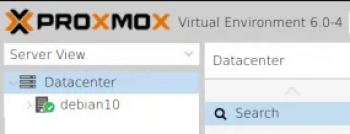
Install Proxmox VE 6 on Debian Buster (Debian 10) - Step by Step Process ?
This article covers the installation of Proxmox VE 6 server on Debian 10 (Buster) Linux system. Please note that you need a 64-bit processor with support for the Intel 64 or AMD64 CPU extensions.
Visit Proxmox Documentation website for advanced configurations and to master Proxmox VE Administration.
To Access Proxmox VE web interface:
1. Connect to the Proxmox VE admin web interface on (https://youripaddress:8006).
2. Select "PAM Authentication" and authenticate with server's root user password.
3. And add your first network interface to it.

Dnsmasq DHCP Server in Proxmox – How to use for VMs IP ?
This article covers methods to install, configure and resolve matters relating to Dnsmasq DHCP Server in Proxmox. When creating the VM we just need to specify the MAC address for specific IP and than just use DHCP to get the assigned IP.
To Install the DHCP server, run the command:
$ apt install isc-dhcp-server


