Webmin is a very great control panel for managing websites and creating Emails for your business. The process of installing Webmin involves configuring SSL to work with domains added to the Server as well as creating users and databases to be used by your website project.
Here at IbmiMedia, We have helped numerous customers to install Webmin on Ubuntu as part of our Server Support Services.
In this context, we shall look into the best method to get Webmin Installed to your Server.
The important aspect in the process of installing Webmin on Ubuntu
As earlier reported in this article, Webmin is a very interesting control panel for managing websites, Email accounts, DNS management via a browser based interface.
The key tasks to get Webmin up and running includes;
i. Actual Webmin Installation
ii. Configuring the Server to work with LetsEncrypt which is a provider of SSL Certificates to service all your domains.
iii. managing Email, Users and Databases.
We will touch on each tasks briefly as we progress below.
Actual Webmin Installation
As a norm on Server Management and every experience Server Support expert would always recommend that the Server Software and Packages must be updated to ensure that the system is up to date and to maintain the latest security level. To update the system, use the following command;
sudo apt update
This process would not take too long and after the update process is completed, add Webmin repository to the system package sources list file located at /etc/apt/sources.list. Now edit this file with the command below;
sudo nano /etc/apt/sources.list
Next, Add Webmin repository provided below to the sources list file;
deb http://download.webmin.com/download/repository sarge contrib
To allow the system to trust the new repository, add its PGP Key by first installing the gnupg1 package with the following command;
sudo apt install gnupg1
The next step is to use the system wget feature to download the Webmin PGP key and then add it to the list of system keys.
Sometimes, wget tool might not be available in the system, thus download wget with the command but first ensure that yum is also available;
apt install yumyum install wget
After wget installation is complete, proceed with downloading the Webmin PGP key with the command below;
wget -q -O- http://www.webmin.com/jcameron-key.asc | sudo apt-key add
Now you have to update the packages and system again to add the Webmin repository. You can use the update command specified at the beginning of this step.
After the update process, install Webmin with the command;
sudo apt install webmin
Upon completion of the Webmin Installation, you will get an output which looks like;
Webmin install complete. You can now login tohttps://your_server:10000 as root with yourroot password, or as any user who can use sudo.
At this stage, you can enter the above webmin url in your web browser to see if it would work. If it does not then that means that the port 10000 which Webmin uses by default is not open. So allow webmin through the firewall with the following command;
sudo ufw allow 10000/tcpConfiguring the Server to work with LetsEncrypt
Webmin is configured to use HTTPS by default and uses a self signed certificate which is untrusted. It is best to replace it with a valid reputable certificate provided by Let's Encrypt.
To achieve this, go to your webmin url, https://server_ip_address:10000 via your web browser as previously advised and sign in using your root and password. (Replace "server_ip_address" with your actual server Ip Address). You will see an SSL security warning showing that your server or website is using an "Invalid SSL". To proceed, allow the exception.
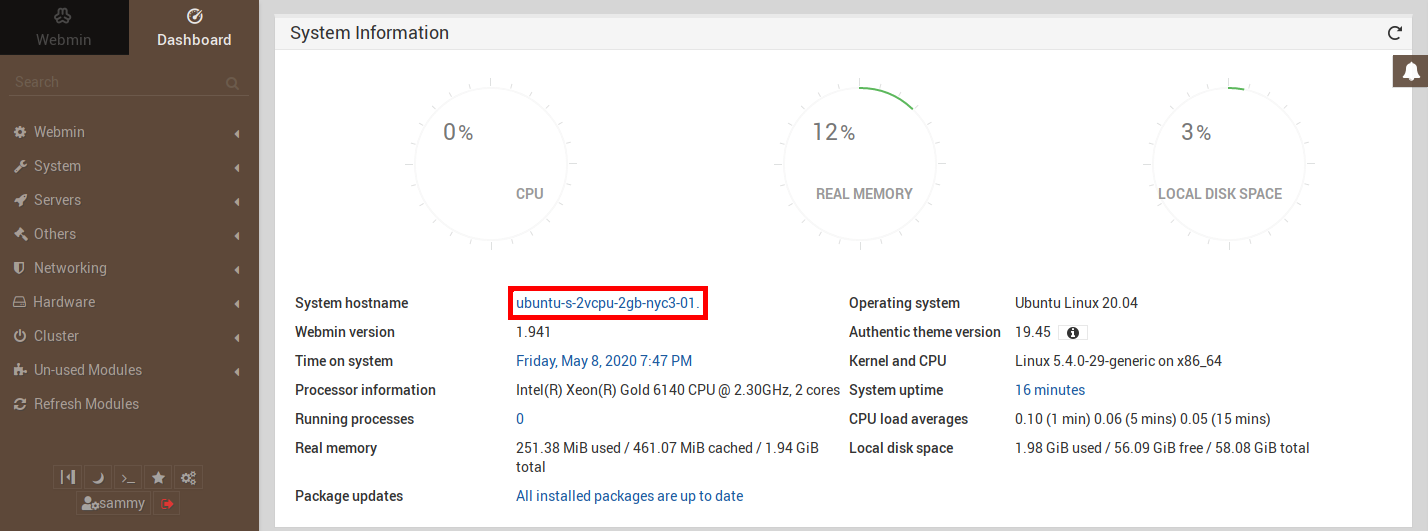
Before implementing the Valid Certificate from Let's Encrypt, configure the server's hostname in the Webmin dashboard field named "System hostname" and click on the link on the right side of it. This will lead you to the Hostname and DNS Client page where you should enter a Fully-Qualified Domain Name as the hostname. Next is to Save changes to apply this settings.
After setting the hostname, Click on the Webmin dropdown menu located in the left-hand pane of the page and click on Webmin Configuration.
Select SSL Encryption from the Webmin Configuration page and then click on Let's Encrypt tab to set the make a request for the Certificates. Here you can set the automatic renewal period in months but take note that lets encrypt certificate expires in 3 months. As a long time user of Webmin, we recommend you set "2" as a value as this represents that the Certificates should renew on its own every two months.
When you request Certificate, Let's Encrypt try to locate a verification file placed on the server. To make it easy for it to reference to this file, you can set the folder which Apache web server uses which is /var/www/your_domain.
After making the Certificate request successfully, navigate to Webmin Configuration page in the Webmin dashboard and restart Webmin. This will effect changes and when you reload the page, you will see that your Server is not secured with a valid Certificate.
Webmin is a very flexible control panel and it comes with a load of modules which can be used to perform different tasks ranging from BIND DNS to adding users and Managing groups in the system. With the Users and Groups section you can add a new user.
Finally, Webmin's capabilities can be optimized by installing Virtualmin along with it to allow you manage virtual hosts, domain, email databases for your projects.
Need support in Installing and Setting up Webmin on Ubuntu? We are here to help you today.
Conclusion
The complete process of Installing Webmin on Ubuntu and Configuration of Let's Encrypt Certificate on the Server.
The complete process of Installing Webmin on Ubuntu and Configuration of Let's Encrypt Certificate on the Server.