
Install Cockpit on Ubuntu 20.04 - Step by step process to do this ?
This article covers how to install Cockpit on Ubuntu 20.04 system. Cockpit is a free and open source web console tool for Linux administrators and used for day to day administrative and operations tasks.
To Install the Cockpit package on Ubuntu 20.04 LTS Server, run the command:
$ sudo apt update
$ sudo apt install cockpit -y
Once cockpit package is installed successfully then start its service using the following systemctl command,
$ sudo systemctl start cockpitRun the following to verify the status of cockpit service,
$ sudo systemctl status cockpitFeatures of Cockpit:
Cockpit allows you to perform:
1. Service Management – Start, stop, restart, reload, disable, enable, mask e.t.c
2. User Account Management – Add users, delete, Lock, assign Administrator role, set password, force password change, Add Public SSH keys e.t.c.
3. Firewall Management
4. Cockpit Container management
5. SELinux Policy management
6. Journal v2
7. iSCSI Initiator configurations
8. SOS-reporting
9. NFS Client setup
10. Configure OpenConnect VPN Server
11. Privileged Actions – Shutdown, Restart system
12. Join Machine to Domain
13. Hardware Device Management
14. System Updates for dnf, yum, apt hosts
15. Manage the Kubernetes Node
Install Docker Compose on Ubuntu 20.04 - Step by step process to perform it ?
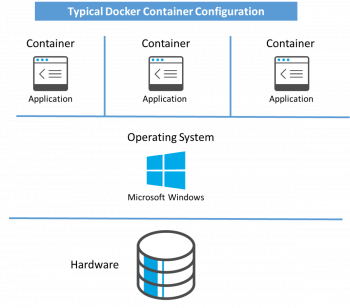
This article covers how to install and run Docker Compose on your Ubuntu 20.04 LTS machine. Docker Compose is yet another useful Docker tool. It allows users to launch, execute, communicate, and close containers with a single coordinated command. Essentially, Docker Compose is used for defining and running multi-container Docker applications.
To Install Docker Compose on Ubuntu:
1. Start by updating the default repository to ensure you download the latest Docker Compose:
$ sudo apt update2. Then, upgrade the system to ensure all local packages and programs are up to date:
$ sudo apt upgrade3. Then install Docker Compose from the Ubuntu repository by running:
$ sudo apt install docker-composeTo install Install curl on Ubuntu:
To download the binary package using an URL, you need curl. You can check whether you have this command-line utility by typing in the terminal window:
$curlIf the output displays "try 'curl --help' or 'curl --manual' for more information", move on to the next step.
This message means curl is installed.
However, if the terminal says "command not found", you need to install curl with:
$ sudo apt install curlTo Check Docker Compose Version on Ubuntu:
To verify the installation, check the Docker Compose version by running:
$ docker–compose –versionTo uninstall Docker Compose on Ubuntu:
Uninstalling Docker Compose from your Ubuntu system is a simple 3-step process.
1. Delete the Binary
First, delete the binary with the command:
$ sudo rm /usr/local/bin/docker-compose2. Uninstall the Package
Then, use the apt remove command to uninstall the software:
$ sudo apt remove docker-compose3. Remove Software Dependencies
Finally, remove the unwanted software dependencies by running:
$ sudo apt autoremove
Setup Teampass Passwords Manager on Ubuntu 20.04 - Do it Now ?
This article covers perform the installation of TeamPass using the LAMP stack on Ubuntu. Now you can easily manage your credentials within your Organization to save credentials and manage access to every individual.
TeamPass is a Collaborative Passwords Manager used for managing passwords and sharing them among team members.
To Download Teampass on Ubuntu:
1. Start by cloning the Teampass repository to your web server root directory as shown below;
$ git clone https://github.com/nilsteampassnet/TeamPass.git /var/www/html/teampass2. Set the ownership of the teampass web directory to web server user (www-data)
$ chown -R www-data.www-data /var/www/html/teampass/3. Next, edit the /etc/php/7.2/apache2/php.ini configuration file and increase the script execution time from 30 to 60 secs.
vim /etc/php/7.2/apache2/php.ini
...
;max_execution_time = 30
max_execution_time = 60
...
4. Restart Apache web server
$ systemctl restart apache2To Finalize TeamPass installation on Ubuntu:
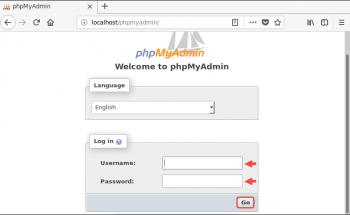
Final installation of Teampass can be done from the browser.
Hence, navigate to the browser and enter the Teampass server URL,
http://Server_IP/teampass.
This will redirect you to Teampass welcome page

Install and Configure Apache Kafka on Ubuntu 20.04 - Step by Step process to implement this task ?
This article covers how to install and configure Apache Kafka on your Ubuntu 20.04 LTS machine. Apache Kafka is a distributed events streaming platform which has the ability to handle the high-performance data pipelines. It was originally developed by Linkedin then to be public as an open-source platform and used by many IT companies in the world.
Terms related to Apache Kafka Infrastructure:
1. Topic: A topic is a common name used to store and publish a particular stream of data. For example if you would wish to store all the data about a page being clicked, you can give the Topic a name such as "Added Customer".
2. Partition: Every topic is split up into partitions ("baskets"). When a topic is created, the number of partitions need to be specified but can be increased later as need arises. Each message gets stored into partitions with an incremental id known as its Offset value.
3. Kafka Broker: Every server with Kafka installed in it is known as a broker. It is a container holding several topics having their partitions.
4. Zookeeper: Zookeeper manages Kafka's cluster state and configurations.
Main advantages of using Apache Kafka:
1. Message Broking: In comparison to most messaging systems Kafka has better throughput, built-in partitioning, replication, and fault-tolerance which makes it a good solution for large scale message processing applications
2. Website Activity Tracking
3. Log Aggregation: Kafka abstracts away the details of files and gives a cleaner abstraction of log or event data as a stream of messages.
4. Stream Processing: capturing data in real-time from event sources; storing these event streams durably for later retrieval; and routing the event streams to different destination technologies as needed
5. Event Sourcing: This is a style of application design where state changes are logged as a time-ordered sequence of records.
6. Commit Log: Kafka can serve as a kind of external commit-log for a distributed system. The log helps replicate data between nodes and acts as a re-syncing mechanism for failed nodes to restore their data.
7. Metrics: This involves aggregating statistics from distributed applications to produce centralized feeds of operational data.
To install Apache Kafka on Ubuntu:
1. Update your fresh Ubuntu 20.04 server and get Java installed as illustrated below.
$ sudo apt update && sudo apt upgrade
$ sudo apt install default-jre wget git unzip -y
$ sudo apt install default-jdk -y
2. Fetch Kafka on Ubuntu 20.04.
$ cd ~
$ wget https://downloads.apache.org/kafka/2.6.0/kafka_2.13-2.6.0.tgz
$ sudo mkdir /usr/local/kafka-server && cd /usr/local/kafka-server
$ sudo tar -xvzf ~/kafka_2.13-2.6.0.tgz --strip 1
3. Create Kafka and Zookeeper Systemd Unit Files
i. Let us begin with Zookeeper service.
$ sudo vim /etc/systemd/system/zookeeper.service
[Unit]
Description=Apache Zookeeper Server
Requires=network.target remote-fs.target
After=network.target remote-fs.target
[Service]
Type=simple
ExecStart=/usr/local/kafka-server/bin/zookeeper-server-start.sh /usr/local/kafka-server/config/zookeeper.properties
ExecStop=/usr/local/kafka-server/bin/zookeeper-server-stop.sh
Restart=on-abnormal
[Install]
WantedBy=multi-user.target
ii. Then for Kafka service. Make sure your JAVA_HOME configs are well inputted or Kafka will not start.
$ sudo vim /etc/systemd/system/kafka.service
[Unit]
Description=Apache Kafka Server
Documentation=http://kafka.apache.org/documentation.html
Requires=zookeeper.service
After=zookeeper.service
[Service]
Type=simple
Environment="JAVA_HOME=/usr/lib/jvm/java-11-openjdk-amd64"
ExecStart=/usr/local/kafka-server/bin/kafka-server-start.sh /usr/local/kafka-server/config/server.properties
ExecStop=/usr/local/kafka-server/bin/kafka-server-stop.sh
Restart=on-abnormal
[Install]
WantedBy=multi-user.target
iii. Reload the systemd daemon to apply changes and then start the services.
$ sudo systemctl daemon-reload
$ sudo systemctl enable --now zookeeper
$ sudo systemctl enable --now kafka
$ sudo systemctl status kafka zookeeper
4. Install Cluster Manager for Apache Kafka (CMAK) | Kafka Manager.
$ cd ~
$ git clone https://github.com/yahoo/CMAK.git
5. Configure CMAK on Ubuntu.

Add and Remove Users on Ubuntu 20.04 - How to perform this task ?
This article covers how you can add and remove users on Ubuntu and assign them administrator privileges. Based on your convenience, you can either choose to add and remove users either through the command line or GUI.
Ubuntu, like any other Linux distribution, is a multi-user operating system. Each user can have different permission levels and specific settings for various command-line and GUI applications.
Knowing how to add and remove users is one of the basic skills a Linux user should know.
To add a user in Ubuntu via GUI:
1. Open the Activities overview and start typing Users.
2. Click on Users to open the panel.
3. Press Unlock in the top right corner and type in your password when prompted.
4. Press the + button, below the list of accounts on the left, to add a new user account.
To remove a user from Ubuntu:
1. Open the terminal app.
2. Login to server using the ssh user@server-ip-here command.
3. Run sudo deluser --remove-home userNameHere command to delete a user account on Ubuntu.
4. Verify it by running id command.
To Remove a Linux user:
1. Log in to your server via SSH.
2. Switch to the root user: sudo su -
3. Use the userdel command to remove the old user: userdel user's username.
Optional: You can also delete that user's home directory and mail spool by using the -r flag with the command: userdel -r user's username.
To Add a User to Linux:
1. Log in as root.
2. Use the command useradd "name of the user" (for example, useradd linuxapt)
3. Use su plus the name of the user you just added to log on.
4. "Exit" will log you out.
Linux operations commands:
1. adduser : add a user to the system.
2. userdel : delete a user account and related files.
3. addgroup : add a group to the system.
4. delgroup : remove a group from the system.
5. usermod : modify a user account.
6. chage : change user password expiry information.
How do I assign a user to a group in Linux?
1. To create a new group, enter the following: sudo groupadd new_group.
2. Use the adduser command to add a user to a group: sudo adduser user_name new_group.
3. To delete a group, use the command: sudo groupdel new_group.
4. Linux comes with several different groups by default.
Install Nginx on Ubuntu 20.04 - Step by Step process to implement it ?
This article covers how to install Nginx on the Ubuntu system. Also, you will learn how to configure the firewall and manage Nginx services.
Finally, you will see how to uninstall Nginx in case you no longer need it in your system.
Nginx is a free, open-source Linux application for web servers. It works as a reverse proxy server by directing web traffic to specific servers.
Also, Nginx is used for security and load-balancing, but can also function independently as a web server.
To Install Nginx From Ubuntu Repositories:
1. Update Software Repositories
It is important to refresh the repository lists before installing new software. This helps make sure that the latest updates and patches are installed.
Open a terminal window and enter the following:
$ sudo apt-get update2. Nginx is included in the Ubuntu 20.04 default repositories. Install it by entering the following command:
$ sudo apt-get install nginxHow to manage Nginx on Ubuntu ?
The behavior of Nginx can be adjusted. Use this to start or stop Nginx, or to enable or disable Nginx at boot.
Start by checking the status of the Nginx service:
$ sudo systemctl status nginxIf the status displays active (running), Nginx has already been started.
Press CTRL+z to exit the status display.
If Nginx is not running, use the following command to launch the Nginx service:
$ sudo systemctl start nginxTo set Nginx to load when the system starts, enter the following:
$ sudo systemctl enable nginxTo stop the Nginx service, enter the following:
$ sudo systemctl stop nginxTo prevent Nginx from loading when the system boots:
$ sudo systemctl disable nginxTo reload the Nginx service (used to apply configuration changes):
$ sudo systemctl reload nginxFor a hard restart of Nginx:
$ sudo systemctl restart nginxTo Test the Configuration
$ sudo nginx –tThe system should report that the configuration file syntax is OK, and that the configuration file test is successful.


