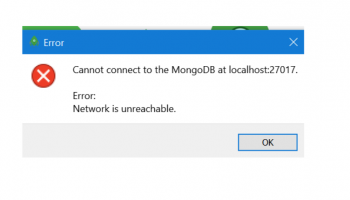
MongoDB error network is unreachable - Fix it now
This article covers methods to resolve the error 'MongoDB error network is unreachable' which can occur due to many reasons that include network issues, if the mongo server is not started, and so on.
To resolve this #MongoDB #error:
1. On Ubuntu server, to open mongo shell run:
$ mongo2. Inside mongo shell, type following command to create new a admin user.
> use admin;> db.createUser({user:"admin", pwd:"password", roles:[{ role: "root", db: "admin" }]});3. By default mongodb is configured to allow connections only from localhost(IP 127.0.0.1).
We need to allow remote connections from any ip address. The following change should only be done in your development server. Open up etc/mongod.conf file and do the following change.
# network interfacesnet:port: 27017bindIp: 0.0.0.0 #default value is 127.0.0.1
Also in the same mongod.conf file uncomment security option and add authorization option as shown below:
security:authorization: enabled
4. Save and exit the mongod.conf file and restart mongodb server:
$ sudo servcie mongod restart
MongoDB error topology was destroyed - Fix it now
This article covers method to fix the error 'MongoDB error topology was destroyed' which happens due to many reasons that include interruption of the node server’s connection to the MongoDB instance while it was trying to write to it. If the mongo driver drops the connection for any reason.
Another reason could be mongoose disconnecting before the creation of mongo document indexes.
You might try updating mongo.
There's also a mongo config setting that can easily in the database using too much memory and being killed by the kernel.
Ignore permission denied message from find command in Linux
This article covers how to resolve the error 'ignore permission denied message from find' which occurs while running a 'find' command in Linux.
The find command is used to locate files on a Linux or Unix like operating system.
The find command will search directory to match the supplied search criteria.
You can search for files by type, name, owner, group, date, permissions and more. By default the find will search all subdirectories for you.
Linux divides the file permissions into read, write and execute denoted by r,w, and x.
The permissions on a file can be changed by 'chmod' command which can be further divided into Absolute and Symbolic mode.
The 'chown' command can change the ownership of a file/directory.
If you prefer using the command line, you can easily find a file's permission settings with the ls command, used to list information about files/directories.
You can also add the –l option to the command to see the information in the long list format.
To change directory permissions in Linux, use the following:
1. chmod +rwx filename to add permissions.
2. chmod -rwx directoryname to remove permissions.
3. chmod +x filename to allow executable permissions.
4. chmod -wx filename to take out write and executable permissions.
Use Nmap to Scan Open Ports - How to
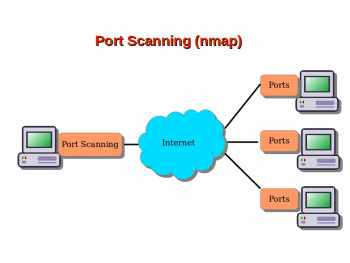
This article covers how to use Nmap to Scan Open Ports. Nmap is the world's leading port security network scanner. The Nmap hosted security tool can help you determine how well your firewall and security configuration is working.
How would you tell Nmap to scan all ports?
By default, Nmap scans the 1,000 most popular ports of each protocol it is asked to scan.
Alternatively, you can specify the -F (fast) option to scan only the 100 most common ports in each protocol or --top-ports to specify an arbitrary number of ports to scan.
The OS and Service scanning options are helpful for scanning a particular port or service to get more information.
If a service is running on a non-default port, it might be by design – or it might suggest there is a security breach.
Ports often have a default usage. Most ports under 1000 are dedicated and assigned to a specific service.
What file does Nmap use to determine which ports to scan?
Nmap needs an nmap-services file with frequency information in order to know which ports are the most common.
Malicious ("black hat") hackers (or crackers) commonly use port scanning software to find which ports are "open" (unfiltered) in a given computer, and whether or not an actual service is listening on that port. They can then attempt to exploit potential vulnerabilities in any services they find.
Nginx Ingress with Cert-manager on DigitalOcean
This article covers how to set up Nginx ingress on DigitalOcean Kubernetes with cert-manager. Popular Ingress Controllers include Nginx, Contour, HAProxy, and Traefik. Ingresses provide a more efficient and flexible alternative to setting up multiple LoadBalancer services, each of which uses its own dedicated Load Balancer.
Here, you will learn how to set up an Nginx Ingress to load balance and route external requests to backend Services inside of your Kubernetes cluster.
You also secured the Ingress by installing the cert-manager certificate provisioner and setting up a Let's Encrypt certificate for two host paths.
Most Ingress Controllers use only one global Load Balancer for all Ingresses, which is more efficient than creating a Load Balancer per every Service you wish to expose.
Helm is a package manager for managing Kubernetes. Using Helm Charts with your Kubernetes provides configurability and lifecycle management to update, rollback, and delete a Kubernetes application.
Once you’ve set up the Ingress, you’ll install Cert Manager to your cluster to be able to automatically provision Let’s Encrypt TLS certificates to secure your Ingresses.
dbus launch terminated abnormally
This article covers tips to resolve this #dbus #error message, dbus-launch terminated abnormally. You need to install D-Bus. It is nothing but a message bus system, a simple way for applications to talk to one another.
In addition to interprocess communication, D-Bus helps coordinate process lifecycle; it makes it simple and reliable to code a "single instance" application or daemon, and to launch applications and daemons on demand when their services are needed.
The dbus-launch command is used to start a session bus instance of dbus-daemon from a shell script.
It would normally be called from a user's login scripts.
With no arguments, dbus-launch will launch a session bus instance and print the address and PID of that instance to standard output.
To fix /bin/dbus-launch terminated abnormally without any error message on a CentOS/RHEL:
Type the following yum command to install D-Bus and Fonts:
$ sudo yum install dbus-x11
To install Fonts, type:
$ sudo yum groupinstall 'Fonts'
Now, you can run and tunnel X over ssh:
$ ssh -X user@server1.ibmimedia.com
$ xeyes
$ firefox


