CloudPanel is an open source, PHP based host control software built for the cloud that helps to manage hosted services, including email, domain, FTP, cronjobs, system security through IP and Bots blocking, user management etc.
It also supports major cloud services for seamless integration.
Here at Ibmi Media, as part of our Server Management Services, we regularly help our Customers to perform Software Installation tasks on Ubuntu Linux System.
In this context, we shall look into the steps to install CloudPanel on Ubuntu.
How to install CloudPanel on Ubuntu 20.04 ?
CloudPanel does not fully support Ubuntu and there is not an easy installation script yet. It is built for Debian Buster.
In this guide, let us see how to install CloudPanel on Ubuntu 20.04/18.04.
To install CloudPanel on Ubuntu, follow the steps given below.
1. Prepare Ubuntu
Before installing CloudPanel, ensure to update Ubuntu and install the required packages:
$ sudo apt update
$ sudo apt upgrade
$ sudo apt install curl wget
After updating and installing the above packages, continue below to install Postfix.
2. Install Postfix
CloudPanel requires Postfix mail transport agent to handle emails. To install Postfix on Ubuntu, run the commands below:
$ sudo apt install gnupg apt-transport-https
$ sudo apt install postfix
During the installation, we will be prompted to select the configuration settings. Choose Internet Site.
We will also be prompted to enter our mail server name. For instance, mail.example.com.
3. Install various repositories
CloudPanel requires PHP, Node.js and Percona. Use the steps below to add these repositories to make packages available to Ubuntu.
i. To add Node.js, follow this steps below:
$ curl -s https://deb.nodesource.com/gpgkey/nodesource.gpg.key | sudo apt-key add -
$ curl -sS https://dl.yarnpkg.com/debian/pubkey.gpg | sudo apt-key add -
$ echo 'deb https://deb.nodesource.com/node_14.x focal main' | sudo tee /etc/apt/sources.list.d/nodesource.list
$ echo 'deb https://dl.yarnpkg.com/debian/ stable main' | sudo tee /etc/apt/sources.list.d/yarn.list
ii. Then to add PHP, we follow the steps below:
$ sudo add-apt-repository ppa:ondrej/php
$ sudo apt-get update
iii. The next step is to add Percona:
$ wget https://repo.percona.com/apt/percona-release_latest.$(lsb_release -sc)_all.deb
$ sudo apt install ./percona-release_latest.$(lsb_release -sc)_all.deb
$ sudo percona-release setup ps57
4. Install CloudPanel Dependencies
After adding the repositories above, install these dependencies to support CloudPanel:
$ cd /tmp
$ wget http://ftp.us.debian.org/debian/pool/main/s/startpar/startpar_0.64-3_amd64.deb
$ wget http://ftp.us.debian.org/debian/pool/main/s/sysvinit/sysvinit-utils_2.96-6_amd64.deb
$ wget http://ftp.us.debian.org/debian/pool/main/l/lsb/lsb-base_11.1.0_all.deb
$ wget http://ftp.us.debian.org/debian/pool/main/i/insserv/insserv_1.21.0-1_amd64.deb
$ wget http://ftp.us.debian.org/debian/pool/main/s/sysvinit/sysv-rc_2.96-6_all.deb
$ wget http://ftp.us.debian.org/debian/pool/main/r/rcconf/rcconf_3.2+nmu1_all.deb
$ sudo dpkg -i *.deb
5. Install CloudPanel
i. First, add the CloudPanel’s Debian Buster repository to Ubuntu:
$ echo "deb https://d17k9fuiwb52nc.cloudfront.net/ buster main" | sudo tee /etc/apt/sources.list.d/packages.cloudpanel.io.list
$ sudo curl -Lks https://d17k9fuiwb52nc.cloudfront.net/key.gpg | sudo apt-key add -
$ sudo apt update
ii. After adding the repository above, run the commands below to download CloudPanel file:
$ wget https://github.com/cloudpanel-io/cloudpanel-ce/releases/download/v1.0.5/cloudpanel.deb
iii. Finally, install it by running the commands below:
$ sudo apt install ./cloudpanel.deb
iv. That will prompt to create a root user password. Type and confirm it to continue.
v. When we are done, open the web browser and type in the server hostname or IP address followed by 8443:
https://SERVER_IP:8443
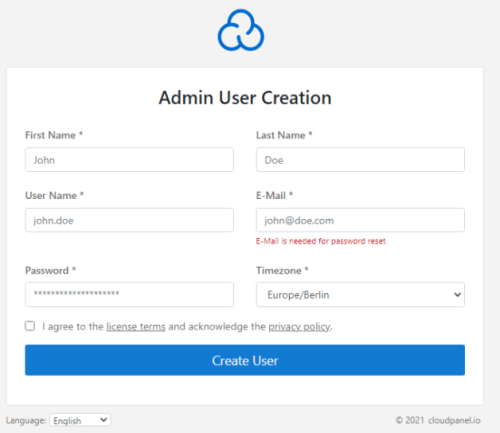
vi. Accept SSL warning as this is a self-signed certificate and then create admin user.
vii. Login using username and password created.
How to fix failed install of CloudPanel on Ubuntu 20.04
Sometimes, the installation of CloudPanel fails in Ubuntu.
A force install helps to fix this:
$ sudo apt -f install
[Need urgent assistance in fixing software installation errors? – We're available 24*7. ]
Conclusion
This article covers the Installation procedure of CloudPanel on Ubuntu 20.04. Basically, CloudPanel, an open source, PHP-based host control software built for the cloud helps to manage hosted services.
CloudPanel is a server management control panel designed to be fast, easy to use and customizable. This piece of software supports management of Domains, Linux services, Cron jobs, FTP services, System security through IP and Bots blocking, User management, Cloud platforms support, among many others.
Main features of CloudPanel Includes:
1. Free to use and open source
2. Provides powerful intuitive interface for management
3. Designed for high Performance with minimal resource usage
4. It is secure – provision of free SSL/TLS certificates
5. It supports all major clouds – AWS, Digital Ocean, GCP, e.t.c
6. CloudPanel is available in more than ten languages, making it easy to install in any region
7. One-Click Let's Encrypt Certificates
8. NGINX Support
9. Multiple PHP Versions
To fix failed CloudPanel installation:
$ sudo apt -f install