DNN reindexing crawling
This article will guide you on how to resolve DNN #websites not #indexing. When the DNN site re-indexing is not #crawling properly, we delete the files in \App_Data\Search folder and we click the re-index button.
1. You may clear the search tables and re-index, but I suggest upgrading to DNN 7.3.4 or 7.4.1, where a log of issues with new (#DNN 7.1) search engine).
2. You might Need to remove all Content of /app_Data/search Folder, if there are issues with indexing.
Disable ModSecurity for a domain
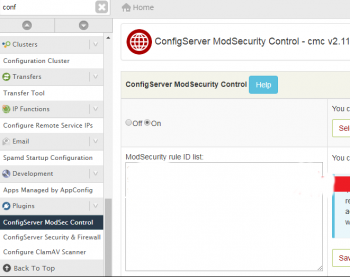
This article will guide you on how to disable Mod_Security for a specific domain. Basically, ConfigServer #Modsecurity Control allows us to disable the #rules that are blocking access to a specific #domain.
1. Mod_security module helps to protect your website from various #attacks.
2. ModSecurity is an open-source web-based firewall application (or #WAF) supported by different web servers: Apache, Nginx and IIS. The module is configured to protect web #applications from various attacks.
3. If mod-security is disabled on your account, your website will be at risk from vulnerabilities.
4. To disable modsecurity, all we need to do is remove/rename that file and restart apache. Remove the include line loading mod_security (or more likely mod_security2) from your Apache config.
Automate Windows Server 2019 Administration with Ansible
This article will guide you on steps to automate Windows Server 2019 #Administration with Ansible.
Ansible can be used to manage and execute core functions in Windows #environments, from security updates to remote management using #WinRM. Although Ansible must be run on #Linux, Windows administrators can use Ansible to manage and automate their systems without needing to know how to use a Linux #terminal.
To Connect Ansible on Windows from #Ubuntu:
1. Create Ansible Windows User. Create a new user for the Ansible windows connection setup.
2. Setup Libraries and WinRM.
3. Update the Ansible Inventory file.
4. Update the Ansible Group Variables.
5. Configure #Windows Servers to Manage.
6. Test Connectivity to the Windows Server.
Optimize Opencart website speed
This article will guide you on methods to optimize #OpenCart #Website to boost and improve speed and pages load time.
OpenCart is one of the most recommended e-commerce platforms used by online merchants to set up their digital store. This PHP based platform provides users with an open source solution, allowing users to download and integrate any additional features to optimize one's e-commerce store.
Sometimes #websites load slowly because of the server. How this works is that your browser notifies your server asking it to send the data for your website over, so that the site can load.
If there is an issue with the server, this will take longer than normal. The cause of slow servers usually lays with the web host.
To increase your Website page #speed:
1. Enable compression.
2. Minify CSS, JavaScript, and HTML.
3. Reduce redirects.
4. Remove render-blocking JavaScript.
5. Leverage browser caching.
6. Improve server response time.
7. Use a content distribution network.
8. Optimize images.
Azure Cache for Redis client-side issues
This article will guide you on troubleshoot Azure #Cache for Redis client for issues and fix common Redis #error.
Azure Cache for Redis gives you the ability to use a secure open source Redis cache. It is a dedicated offering managed by Microsoft, to build highly scalable and responsive applications by providing you super-fast access to your data.
All #Redis #data resides in the server's main memory, in contrast to databases such as PostgreSQL, Cassandra, MongoDB and others that store most data on disk or on SSDs.
The way to test for this in Redis is to simply query the key. If the key is empty, populate it. If it is a string use get (or exists).
To configure a storage account for your cache metrics:
1. In the Azure Cache for Redis page, under the Monitoring heading, select Diagnostics.
2. Select + Add diagnostic setting.
3. Name the settings.
4. Check Archive to a storage account.
5. Select Configure to choose the storage account in which to store the cache metrics.
Cloudflare error 1014 CNAME Cross-User Banned
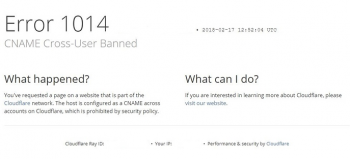
This article will help to resolve #Cloudflare #error 1014 by applying different methods. By default, Cloudflare prohibits a DNS CNAME record between domains in different Cloudflare accounts. #CNAME records are permitted within a domain (www.example.com CNAME to api.example.com) and across #zones within the same user account (www.example.com CNAME to www.example.net).
To fix error 520:
1. Start by logging into Cloudflare. Then, find your site on the list and click on it. Click on your listed site.
2. Next, click on the #DNS tab, then on the orange cloud under the Proxy status section in the table.
You'll know Cloudflare was disabled because the cloud will have turned gray.
