
Configure RDS User Profile Disks on Windows
This article covers method to configure and use User Profile Disks on a server with Remote Desktop Services role running on Windows Server 2012 / 2012 R2 / 2016.
In a single RDS collection, there can exist only one VHDX profile file for one user. If a user connects to the resources from two different collections, a separate profile disk should be created for each of them.
Also note that the UPD drive is bound to the RDS server Windows OS version. You can’t transfer (use) an UPD user profile from an RDS server from one version of Windows Server to another.
To Setup & Enable RDS User Profile Disks:
1. Create a shared network location for the disks.
2. Launch SERVER MANAGER.
3. Expand REMOTE DESKTOP SERVICES > COLLECTIONS.
4. Click on your Collection.
5. Click TASKS > EDIT PROPERTIES (top right corner).
6. Click USER PROFILE DISKS (bottom of the menu on the left).
7. Click ENABLE USER PROFILE DISKS.
8. Set the location to what you created in step 1
i.e. \\YourServerNameHere\UserProfileDisks$
9. Set the maximum size of those disks.
10. Scroll down and set what you want to have stored on those VHD's.
How to Resize User Profile Disks Using PowerShell ?
You can extend the virtual vhdx drive with the user's UPD profile using the PowerShell cmdlet Resize-VirtualDisk from the Hyper-V module:
Net use U: \\rdvh1\DemoLabOficeApps
Resize-VHD -Path u:\UVHD-<SID>.vhdx -SizeBytes 40GB
Net use U: /delete
If you want to run the Resize-VHD cmdlet from a desktop with Windows 10, you must install the feature Hyper-V -> Hyper-V Platform -> Hyper-V Services.
Set-ADUser Modify Active Directory Users with PowerShell - Do it now ?
This article covers how to use Set-ADUser Modify Active Directory Users with PowerShell.
Basically, the Set-ADUser cmdlet is part of the Active Directory module for Windows PowerShell.
The Identity parameter specifies the Active Directory user to modify.
You can identify a user by its distinguished name, GUID, security identifier (SID), or Security Account Manager (SAM) account name.
You can also set the Identity parameter to an object variable such as $<localUserObject>, or you can pass an object through the pipeline to the Identity parameter.

Clean Up and Compress WinSxS Folder on Windows Server / Windows 10 - Do it Now ?
This article covers methods to Clean Up and Compress WinSxS Folder on Windows Server/Windows 10.
WinSxS folder in Windows is the reasons of its constant growth and ways to clean up it.
The C:\Windows\WinSxS directory is the repository of Windows components. This directory contains DLLs, binary and XML files necessary for installation and operation of various Windows roles or features.
When installing the Windows updates (usually this happens every month), the new version of the updated component is installed on the system, while the old one is saved to the WinSxS folder (it is necessary to provide compatibility and make it possible to rollback to the previous versions of the components when you uninstall the Windows update).
To clean up the WinSxS folder on Windows 10 and Windows Server 2016/2019:
1. Optimize the component store and remove old versions of Windows component files left after installing Windows updates;
2. Features on Demand – allows you to remove unused Windows components from the disk;
3. Enable NTFS compression on the WinSxS folder – a way to reduce the size of the WinSxS directory using the built-in compression of the NTFS file system.
How to Check the Actual Size of WinSxS Folder on Windows 10?
The easiest way to get the current size of the WinSxS folder on Windows is to open the properties of the %windir%\WinSxS folder in File Explorer (or use a PowerShell script).
You can find out the real size of the WinSxS folder on disk using the du tool from Sysinternals:
du -v c:\windows\winSXS

Mapped Network Drives Not Showing in Elevated Programs
This article covers methods to fix 'Mapped Network Drives Not Showing in Elevated Programs' issue for our customers.
When UAC is enabled, the system creates two logon sessions at user logon. Both logon sessions are linked to one another.
One session represents the user during an elevated session, and the other session where you run under least user rights.
When drive mappings are created, the system creates symbolic link objects (DosDevices) that associate the drive letters to the UNC paths.
These objects are specific for a logon session and are not shared between logon sessions.
When the UAC policy is configured to Prompt for credentials, a new logon session is created in addition to the existing two linked logon sessions.
To resolve this Windows issue:
1. In Local Group Policy Editor, locate the following Group Policy path:
Local Computer Policy\Windows Settings\Security Settings\Local Policies\Security Options
2. Configure the following policy to Prompt for consent: User Account Control: Behavior of the elevation prompt for administrators in Admin Approval Mode
Note:
The EnableLinkedConnections registry entry forces the symbolic links to be written to both linked logon sessions that are created, when UAC is enabled.
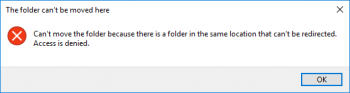
Can't move the folder because there is a folder in the same location that can't be redirected
This article covers Steps to resolve Windows error, Can't move the folder because there is a folder in the same location that can't be redirected.
To resolve this error, try the following:
1. Open Registry Editor by pressing Windows logo+R then type "regedit". Press Enter.
2. Now head to this address:
HKEY_CURRENT_USER\Software\Microsoft\Windows\CurrentVersion\Explorer\User Shell Folders
3. Locate a personal folder at the right panel that is displaying the error and double-click on it.
4. Replace the current value data with the corresponding Default Value in the below list:
Desktop - %USERPROFILE%\Desktop
Favorites - %USERPROFILE%\Favorites
Music - %USERPROFILE%\Music
Pictures - %USERPROFILE%\Pictures
Videos - %USERPROFILE%\Videos
Documents - %USERPROFILE%\Documents
Downloads - %USERPROFILE%\Downloads
Note the Corresponding registry key for the Downloads folder.
5. Click Ok to save the changes, close Registry Editor and restart the computer.
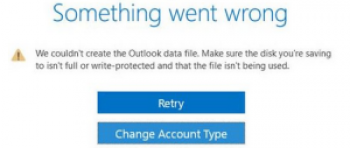
Outlook error "We Couldn't Create The Outlook Data File" - Fix it Now ?
This article covers different methods to fix the Outlook error 'We Couldn't Create The Outlook Data File'.
Main Causes of 'We couldn't create Outlook Data File' error:
This error is fairly well known among Outlook users, so people have found possible causes that led to this error happening.
1. Gmail account: The error seems to only occur when you’re trying to add a Gmail account to Outlook. The exact cause of this is unknown, however, it might have something to do with Gmail’s security options.
2. Outlook bug: A common cause of this issue is a bug within Outlook itself. The bug prevents you from adding an email account via the Add account option.
3. Simplified Account Creation Wizard: This is a relatively new Outlook feature. Generally, whenever a new feature is added to an application, it's bound to cause errors and bugs.
How to Remove Outlook Write Protection from a Hard Disk ?
One of the easiest ways of removing write protection from a disk is by using the Diskpart utility:
1. Hold the Windows and R keys down on your keyboard at the same time.
2. Type in diskpart and press OK.
3. Type in the following command and press Enter after each one:
i. list disk
ii. select disk (number)
iii. For example, if your Drive 1 is protected, you're going to type in select disk 1.
attributes disk clear read-only
4. Once the Diskpart utility finished clearing the Read-only protection, you can type in exit and hit Enter to close the command prompt.


