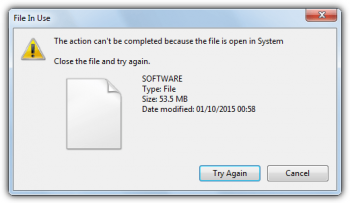
Unlock a file locked by any process or system - Do it now
This article covers how to unlock a file locked by any process or system.
If everything goes correctly, you will fix this Windows problem without killing the process and – more importantly – without having to reboot the system.
To unlock a locked file in Windows 10?
1. Type the name of the locked file in the field, and click the Search button.
2. Select the file from the search result.
3. Behind the search window, in "Process Explorer," right-click the locked file, and select Close Handle to unlock it.
To Open a Locked File When Another Program Is Using It:
1. Close The Program That Is Using The Locked File.
2. Kill The Program Process Using Task Manager.
3. Turn Off The Preview Pane In File Explorer.
4. Toggle The Folder Process In File Explorer.
5. Launch & Close The Locked File.
6. Restart Your Windows Computer.
7. Use Command Prompt To Delete The File.
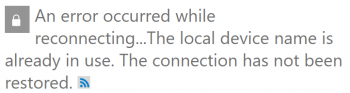
An error occurred while reconnecting - Fix this Windows error now
This article covers methods to resolve fix 'An error occurred while reconnecting' Windows error.
Causes for 'The Local Device Name is already in Use' Error on Windows:
1. Drive mapping has gone wrong – The process of network drive mapping can sometimes produce problems like this one when it comes to drive letters.
2. Some drive letters are unassigned – Some drives may have incorrect or even missing drive letters which causes this error to appear.
3. File and Printer Sharing is disabled – If this option is disabled in any firewall you might be using, networking becomes difficult and full of errors.
4. No space on the server – Users have reported that they had to free up at least a couple of gigabytes on the root drive of the network’s server to get rid of the problem.
To fix 'The Local Device Name is already in Use' Error on Windows:
Remap the Drive Using Command Prompt
Remapping the network drive is the official solution recommended by Microsoft for users facing this problem. However, it has worked for many users and it has become one of the most used methods for this problem.
Check out the steps to implement this;
1. Search for “Command Prompt” either right in the Start menu or by tapping the search button right next to it. Right-click on the first result which will appear at the top and select the “Run as administrator” option.
2. Users who are using an older version of Windows can use the Windows Logo Key + R key combination in order to bring up the Run dialog box. Type in “cmd” in the box and use the Ctrl + Shift + Enter key combination in order to run Command Prompt as an administrator.
3. Copy and paste the command shown below and make sure you click the Enter key on your keyboard.
net use * /delete
4. After you see that the operation is completed successfully, run the following command:
net use Z: \\server\share /user:username password
5. Make sure you replace the username and password placeholders with the correct username and password. Check to see if the problem is resolved!
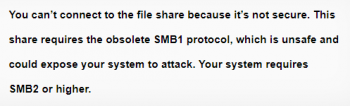
Your system requires smb2 or higher Windows error - Fix it now
This article covers how to fix the Windows error 'Your system requires smb2 or higher'. SMB1 protocol is vulnerable and your system will give you a warning message saying that it requires SMB2.
Most Windows 10 users reported Your system requires SMB2 or higher error message on their PC.
SMB stands for Server Message Block, and it's a protocol for sharing files. The protocol has two versions, the SMB1, and the SMB2, and while both can be used, the latter is the more secure one.
To enable SMB2 on Windows 10:
Check if your system can install SMB2
1. Start PowerShell as administrator. Press the Windows Key+ X and select PowerShell (Admin).
2.Type Get-SmbServerConfiguration | Select EnableSMB2Protocol in the command prompt of the Window PowerShell and press Enter.
3. If your system can run SMB2 protocol, type windows features in the Search box and select Turn Windows features on or off.
4. Once the Windows Features window opens, check SMB1/CIFS File Sharing Support option and hit OK.
5. Restart your PC and check if the problem with SMB2 is resolved.
To enable SMB2 on Windows 10 using Powershell:
1. Start PowerShell as administrator. We already showed you how to do that in our previous solution.
2. Enter Set-SmbServerConfiguration –EnableSMB2Protocol $true and press Enter.
3. Press Y to confirm.
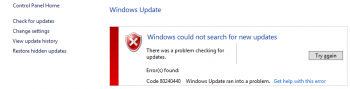
Windows Update Error 0x80240440 - Fix it now
This article covers how to fix Windows Update Error 0x80240440.
To fix Windows Update error 0x80240440:
1. Click Start and start typing on your keyboard for "services.msc"
2. In your search results "services.msc" should show up. Open it with a click.
3. A new windows will open containing all Windows services on your system.
Search for "Windows Update"
5. Right-click the "Windows Update" and then click Stop.
Also, you can clean the Windows Update temporary cache folder:
1. Hold your windows-key pressed and hit "R" key simultanous.
2. A small new windows will appear.
3. Type %windir%\SoftwareDistribution\DataStore in this new window and click OK.
4. This will open Windows Explorer on the correct location.
5. Delete all contents of this folder. (Hint: Use Ctrl + A to select all files and folders).
Eventually, you can start the Windows Update Service again:
1. Switch back to the windows Services.
2. Locate Windows Update.
3. Right-click on it and choose Start.
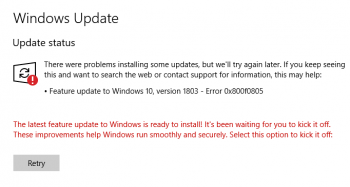
Windows update error 0x800f0805 - Fix it now
This article covers methods to resolve windows update error 0x800f0805.
Windows update error #0x800f0805 indicates that the Windows edition was not detected. Check that the specified image is a valid Windows operating system image. All you need to do is restart your computer and try to activate it again, and it should work.
Causes of #error 0x800f0805 in Windows Update:
1. Bugs in update delivery to your system – This means that there is no fault in your system, instead, the Microsoft servers are experiencing issues.
2. Corrupted Windows files
Methods to fix the #Windows error 0x800f0805:
1. Using Windows Troubleshooter
This built-in feature can automatically identify and apply fixes to issues on your device.
2. Manually downloading and installing the update
We can use the official Microsoft Update Catalog to download and install system updates manually.
3. Using System File Checker (SFC)
4. Using DISM
We recommend using a DISM scan after using SFC.
5. Resetting Windows Update components
This method will reset the Windows Update.
6. Reset your PC
If none of the above methods worked, you can freshly reinstall your OS without losing any files or settings by using 'Reset this PC' feature.
Windows update error 0xC190012E - Fix it now
This article covers methods to resolve Windows update error 0xC190012E.
This error generally happens when the user either tries to update their Windows operating system to Windows 10 v 1903 or when upgrading Windows 10 from insider preview for security reasons.
What triggers Windows Update Error 0xC190012E?
If the Windows Update is continuously failing to search for the Updates or are unable to install them due to error 0xc190012e then here is the problem that causing this error.
1. Missing Registry
2. No Internet accesses
3. An issue in Windows update service
4. Corrupt system files
5. Misconfiguration
6. Virus or Malware attack


