Genericons XSS Vulnerability - How to Protect your WordPress Site
The article covers Genericons #XSS Vulnerability and saw how to protect the WordPress Site from it.
The Genericons package includes a file called example.html which has been found to be vulnerable to a DOM-based XSS #vulnerability.
This package is included in various WordPress plugins and themes.
You can fix this issue by trying to Remove the example.html file located in the genericons directory.
The recommended way to patch your system is simply to upgrade WordPress.
This will not only secure your system against this vulnerability, but also any other issues that may have been fixed.
If your permissions allow it, you can usually upgrade your installation using the admin panel update controls.
Although we highly recommend that you update WordPress completely (along with any affected themes or plugins), you can also easily manually delete the offending files.
To do so, log into your WordPress server and navigate to your document root directory.
You can remove the offending files by typing:
sudo find . -path "*/genericons/example.html" -exec rm -f {} \;
You can then check your directory structure again:
find . -path "*/genericons/example.html"
All of the example.html instances within a genericons directory should be removed.
#Genericons includes a file called example.html which has been found to be vulnerable to attack from the Document Object Model level.
Any WordPress plugin or theme that includes this file is open to an attack.
To help combat this, we have done the following for VaultPress users:
1. We've deleted the file everywhere we can to proactively secure your site.
2. We've added it to our security scanner so that if there are any cases where we couldn't detect the file or couldn't delete it, you will still be notified if the file exists on your site.
3. For users with sites where we couldn’t remove the file, we have personally emailed each of you with steps to remove the file and details about where the file is located.
Also, another important security update was released today for #WordPress in Version 4.2.2. Version 4.2.2 fixes several vulnerabilities that could allow users to compromise your site including the Genericons vulnerability.
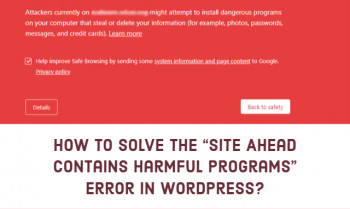
WordPress error This site ahead contains harmful programs
This article will guide you on how to tackle this site ahead contains harmful programs error in #WordPress.
To remove the #deceptive #site notice, you'll have to first remove the malware on your site.
Then, submit a review request at Google Search Console to delete the notice. In 1-3 days, Google will update the status and remove the deceptive site warning.
You can check Google's Transparency Report to see if a website is blacklisted due to a Copyright or DMCA claim.
You can also use Google's #Safe #Browsing Site Status tool.
To fix website that is NOT safe for browsing:
1. Scan your own computer with antivirus and malware detection software and remove all threats.
2. Change passwords to your hosting account (cPanel , plesk, webmin etc.)
3. Change FTP passwords.
4. Verify that your website is infected and remove malicious code.
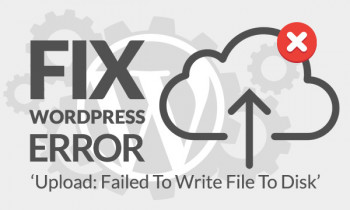
WordPress Upload Failed to Write File to Disk error
This article will guide you on how to resolve 'Upload: Failed to Write File to Disk' Error in WordPress.
The Upload: Failed to Write File to #Disk WordPress error can occur due to a number of reasons.
The most typical cause of the error is incorrect folder permissions.
But besides incorrect permissions, this error can also ocurr due to your website exceeding the quota limit of the hosting service.
To fix this #WordPress #error:
1. Try changing the permissions on the wp-content directory to 766.
2. If you still have problems, try 767, 775 or 777.
3. Once your uploads are working, change the permissions on wp-content back to 755 again and check that everything still works OK.
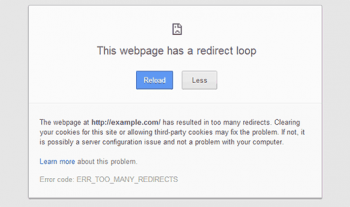
WordPress Error Too Many Redirects Issue
This article will guide you on how to resolve “error too many #redirects issue” in #WordPress.
There are no limits in using 301 redirects on a site. You can implement multiple number of 301 redirects without getting any penalty.
But Too many 301 redirects put unnecessary load on the server and reduce speed.
Try to reduce direct redirects by using rules.
To fix WordPress #301 Moved Permanently:
i. Change the #HTTPS response code to 200 if you don't want the URL to redirect.
ii. If the URL is supposed to redirect, then remove the loop and fix the final destination URL.

WordPress 403 Forbidden Error
This article will guide you on different methods to fix the 403 #forbidden error in WordPress.
The 403 Forbidden #error means that your server is working, but you no longer have permission to view all or some of your site for some reason.
The two most likely causes of this error are issues with your WordPress site's file permissions or .htaccess file.
Also, some plugin issues might also cause the #403 Forbidden error.
To Fix 403 Forbidden WordPress Error:
1. Create a Backup. Most of the time, you are not responsible for the errors that occur on your WordPress website hosting server.
2. Check . htaccess File.
3. Deactivate All Plugins. Login to your WordPress admin dashboard and navigate to #Plugins - Installed Plugins.
WordPress RSS Feed Errors
This article will guide you on different methods to fix WordPress RSS feed #errors on your #site. You will also see the causes those errors and how to avoid them in the future.
A feed is a function of special #software that allows feedreaders to access a site, automatically looking for new content and then posting the information about new content and updates to another site.
This provides a way for users to keep up with the latest and hottest information posted on different blogging sites.
To enable an #RSS feed in #WordPress:
1. Log in to your WordPress admin area and go to Widgets in the Appearance section.
2. Click on Add next to the RSS widget.
3. In the Current Widgets section on the right, click on Edit for the RSS widget.
4. Type the RSS feed URL, its title (optional) and check what item details to display (optional).


