GameGuard redundant execution error 115
This article will guide you on different methods to get rid of Windows #Application #Error 115
To fix this #Windows 10 GameGuard error, allow NProtect access through your #firewall, and if it persists, delete #GameGuard directory. If the update isn't successful or GameGuard file is corrupted, try again later or check firewall settings.
To fix GameGuard error 114?
Initialization error 114 could occur in GameGuard in many different cases:
1. System restart(rebooting).
2. Spyware/Virus.
3. Windows Security update.
4. Collisions with other #programs.
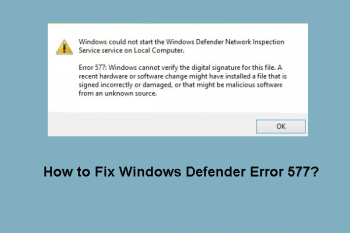
Windows error 577
This article will guide you on different methods to fix Windows error 577. This error appears due to the issues with #Security Center that is an in-built Windows tool, which is set to scan the system on a regular basis and inform its user about a pending update, missing software, turned off antivirus, and similar issues.
To repair Windows startup:
1. Hold the Shift key down at the #Windows sign-in screen and press the Power button at the same time.
2. Continue holding the Shift key, then click Restart.
3. Once the PC restarts, it'll present a screen with a few options.
4. From here, click Advanced options.
5. In the Advanced options menu, choose Startup #Repair.

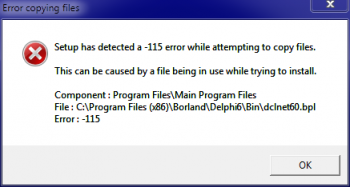
Microsoft office Error code 1309
This article will guide you on different methods to resolve #Microsoft office Error code 1309. To avoid this error please right click the downloaded file and select “Extract All,” then choose a destination for the files to be extracted to.
If you encountered a problem while installing Office on a PC, try restarting your computer and then attempting to install Office again. If that didn't help, use this easy fix tool to uninstall #Office completely. After your uninstall is complete, try reinstalling Office.
To fix Another installation is already in progress on Windows 10:
1. Restart the #Windows Installer service.
2. End Windows Installer process.
3. Disable Windows Installer service and restart your #PC.
4. Perform Disk Cleanup.
5. Perform a Clean #Boot.
6. Check your #Registry.
7. Uninstall and reinstall Office.
Windows Live Mail Error 0x800ccc0e
This article will guide you on steps to fix #Outlook #Error #0x800ccc0e. Usually, this error occurs due to bad #email settings or because of minor problems with the email server or internet connection. Also, the customer may experience this error while receiving the mail on the email #client.
Try to run Windows Live Mail as Administrator in compatibility mode. Try to re-configure the Windows Live Mail account. Remove the existing WLM account and create a new one. Try reinstalling Windows Essentials 2012 on your Windows 10.
To get rid of Windows Live Mail error:
1. Open your Windows Live mail program.
2. Select the Home tab at the top right of your Windows Live Mail.
3. Click the Outbox to the left. Find any emails that are not sending out.
4. Once you send the email again, you can delete the email in the Outbox.
The error will go away after the sent email is deleted.
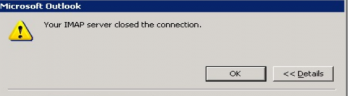
IMAP server closed the connection 0x800cccdd
This article will guide you on steps to resolve #IMAP #server closed the connection #0x800cccdd #Outlook #error. We also saw that the reason for this error is an incorrect IMAP settings.
A server connection #timeout means that a server is taking too long to reply to a data request made from another device. Timeouts are not a reply message: they show up when there isn't a reply and a server request is not fulfilled in a predetermined length of time.
Sometimes Outlook users get the 0x800CCCDD error ('Your IMAP server closed the connection') whenever they send or receive #emails via an IMAP account. This particular error code is signaling that the Send/Receive feature has failed.
To stop Outlook from timing out:
1. Click Outlook 2010's "File" tab.
2. Double-click an email account's name in the list to edit its settings.
3. Click the "Advanced" tab on the settings window, then locate the Server Timeouts section.
4. Click "OK" and then "Cancel" to save the new timeout setting for the selected account.

Recover deleted items in Microsoft outlook
This article will guide you on methods to recover deleted #emails in #Outlook. This is possible by retrieving contents from the Recoverable Items folder.
By default, the deleted #items won't be included while searching in Outlook. Actually Outlook provides you with a feature of automatically searching all folders include emails in the Deleted Items folder in each #data file.
To Recover Permanently Deleted #Hotmail Messages:
1. Go to Outlook.com and log in to your Live, Hotmail, or other Microsoft email account. 2. Select the Deleted Items folder in the left pane.
3. Select Recover items deleted from this folder at the top of the message list. The Recoverable Items folder will open.


