
Duplicity restore full backup
This article will guide you on steps to perform a Duplicity-restore full backup. #Duplicity is an efficient #backup application.
#rsync is a protocol built for Unix-like systems that provides unbelievable versatility for backing up and synchronizing data. It can be used locally to back up files to different directories or can be configured to sync across the Internet to other #hosts.
Incremental Backup captures only the changes made since the last incremental backup. Saves both time and #storage space, and ensures that your backup is up to date. Differential Backup captures only the changes made since the last full backup, not since the last differential backup.
When a normal or full backup runs on a selected drive, all the files on that drive are backed up. This, of course, includes system files, application files, user data — everything. The downside of normal backups is that they take a very long time to run, and in some cases this is more time than a company can allow.
To Use Duplicity with GPG to Securely Automate #Backups on #Ubuntu:
1. Install the Prerequisite Packages.
2. Download and Install Duplicity from Source.
3. Create SSH Keys.
4. Create GPG Keys.
5. Run an Initial Test.
6. Create Your First Backup.
7. Restore a Backup.

How to install OBS on Linux Windows and MacOS
This article will guide you on steps to #install #OBS on #Windows. Also, we saw some common errors that we came across while installing OBS.
Open Broadcaster Software (OBS) is a free and open-source cross-platform streaming and recording program built with Qt and maintained by the OBS Project. There are versions of OBS Studio available for Microsoft Windows, macOS, and Linux distributions. OBS is funded on Open Collective.
As a standard Windows application, OBS should run fine on Windows 10 without any issues in the core program. However, OBS makes heavy use of advanced hardware features, particularly on your GPU such as texture sharing and hardware encoding. Windows 10 will come with new #drivers for your hardware, including your #GPU.
To set up OBS for #streaming:
1. Run the auto-configuration wizard. When you load OBS Studio for the first time you should see the Auto-Configuration Wizard.
2. Set up your audio devices. By default, OBS Studio is set to capture your system default desktop audio device and microphone.
3. Add your sources for video.
4. Test your stream and record settings.
FileZilla connection closed by server
This article will guide you on how to resolve #FileZilla connection closed by #server. Also we discussed about the causes for the FileZilla connection getting closed by the server.
If your computer cannot connect to that server, then either your FTP software is not working correctly, or something on your #computer (probably a #firewall or other security software) is blocking all #FTP connections. You may want to try using other FTP software such as the free FileZilla.
In general, connection refused #errors are generated during a connect system call when an application attempts to connect using #TCP to a server port which is not open.
To fix FTP Connection refused error:
1. Make sure ftp server installed. Make sure ftp server installed and service is running.
2. Is ftp server running (is port 21 open)? Login to ftp server using ssh and try to telnet port 21 (to see port is open or not).
3. FTP user permissions.
4. Security or Firewall.
ISPConfig DKIM to verify mail server
This article will guide you on how to enable #DKIM on ISPConfig control panel. DKIM is an authentication standard for a domain name that sends an email, for use against spam and phishing.
It's possible to have more than one DKIM key published in your #DNS records. So, the DKIM selector is important for ensuring that your emails can be properly authenticated. The <selector> field specifies which DKIM key you're using, and the <header domain> field is filled with your domain name.
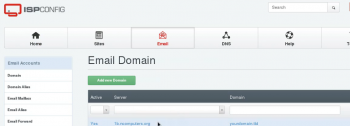
To generate DKIM Record in #ISPConfig:
1. Login to ISPConfig.
2. Click on Email.
3. Inside Email Accounts >> Select Domain and click on Mail Domain name.
4. Click on #DomainKeys Identified Mail (DKIM).
5. Tick Enable DKIM and Click on Generate DKIM Private-key Button.
6. Copy #DNS Record and add it to your DNS with its DKIM Selector.
7. Click on Save Button.

HTTP IIS redirect not working
This article will guide you on different methods to fix HTTP IIS redirect not working #error. There are several reasons why you might want to redirect clients to a new location. For example, if your company is migrating to a new Web site, you could redirect all requests from the old Web #site to the new Web site. Likewise, if you have deployed a new #application on a Web server, you could redirect all requests for the old application's #URL namespace.
To install HTTP Redirection on IIS 7 and later:
1. On the taskbar, click Server Manager.
2. In Server Manager, click the Manage menu, and then click Add Roles and Features.
3. In the Add Roles and Features wizard, click Next. Select the installation type and click Next. Select the destination server and click Next.
4. On the Server Roles page, expand Web Server (#IIS), expand Web Server, expand Common HTTP Features, and then select HTTP Redirection. Click Next.
5. On the Select features page, click Next.
6. On the Confirm installation selections page, click Install.
7. On the Results page, click Close.
Also, you can Configure the HTTP status #code, which can be one of these three options:
i. 301 Permanent.
ii. 302 Found.
iii. 307 Temporary.
iv. 308 Permanent #Redirect.

Reset Windows Administrator Password from Hyper-V
This article will guide you on steps to reset the forgotten #Windows Administrator password from Hyper-V using an #ISO file.
Microsoft's Hyper-V virtualization can greatly reduce cost of operations. By purchasing a few very powerful #servers you can virtualize all or most of your entire infrastructure while reducing the cost of #hardware and maintenance.
To Reset Lost Admin Password for Hyper-V Virtual #Machine:
1. Select the administrator account, then click the Reset Password button to reset the password to blank.
2. Click the Restart button to reboot the virtual machine, you are able to log in to the administrator account with a blank password.


